Adobe 38043740 User Guide - Page 77
Installing ColdFusion Extensions for Eclipse
 |
UPC - 883919135168
View all Adobe 38043740 manuals
Add to My Manuals
Save this manual to your list of manuals |
Page 77 highlights
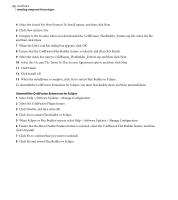
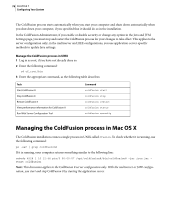
ADOBE COLDFUSION 8 73 Installing and Using ColdFusion Installing using the ColdFusion 8 .NET Service installer 1 Open the installer. 2 Select the directory in which to install the .NET Service files. 3 Do one of the following: a To install the .NET Service on the computer that is running ColdFusion, select the Install .NET Service With ColdFusion option and specify the ColdFusion root directory. b To install the .NET Service remotely, select the Install .NET Service As Standalone option. 4 Review the Summary and click Install. 5 Restart ColdFusion. Uninstall the ColdFusion 8 .NET Service 1 Select Start > Settings > Control Panel > Add or Remove Programs. 2 Select Adobe ColdFusion .NET Service. 3 Click Uninstall. Alternatively, you can uninstall the Adobe Coldfusion 8 .NET Service by running the Uninstall Adobe ColdFusion 8 .NET Integration Services.exe program. The program is located in the cf_root\jnbridge\uninstall directory on ColdFusion server configurations. On multiserver and J2EE configurations and on computers where you installed the Integration software without ColdFusion, it is in the C:\ColdFusionDotNetService\uninstall directory by default. Installing ColdFusion Extensions for Eclipse The ColdFusion Extensions for Eclipse include wizards that help generate code for common tasks and an extension that lets you connect to remote servers from Flex Builder and Eclipse. If you previously installed ColdFusion Extensions for Eclipse, you should uninstall them before installing a later version. Install the ColdFusion Extensions for Eclipse 1 In Eclipse, in the Update Sites to Visit dialog box, uncheck the Ignore Features Not Applicable To This Environment option. 2 Download the ColdFusion Extensions for Eclipse from the Adobe website. 3 Select Help > Software Updates > Find and Install.
-
 1
1 -
2
-
3
-
4
-
5
-
6
-
7
-
8
-
9
-
10
-
11
-
12
-
13
-
14
-
15
-
16
-
17
-
18
-
19
-
20
-
21
-
22
-
23
-
24
-
25
-
26
-
27
-
28
-
29
-
30
-
31
-
32
-
33
-
34
-
35
-
36
-
37
-
38
-
39
-
40
-
41
-
42
-
43
-
44
-
45
-
46
-
47
-
48
-
49
-
50
-
51
-
52
-
53
-
54
-
55
-
56
-
57
-
58
-
59
-
60
-
61
-
62
-
63
-
64
-
65
-
66
-
67
-
68
-
69
-
70
-
71
-
 72
72 -
 73
73 -
 74
74 -
 75
75 -
 76
76 -
 77
77 -
 78
78 -
 79
79 -
 80
80 -
 81
81 -
 82
82 -
83
-
84
-
85
-
86
-
87
-
88
-
89
-
90
-
91
-
92
-
93
-
94
-
95
-
96
-
97
-
98
-
99
-
100
-
101
-
102
-
103
-
104
-
105
-
106
-
107
-
108
-
109
-
110
-
111
-
112
 |
 |
