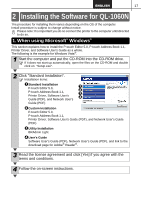
Brother International ™ QL-1050 Users Manual - English and Spanish - Page 25
For Network interface cable users, For shared network printer users, Choose Network Shared Printer
 |
View all Brother International ™ QL-1050 manuals
Add to My Manuals
Save this manual to your list of manuals |
Page 25 highlights
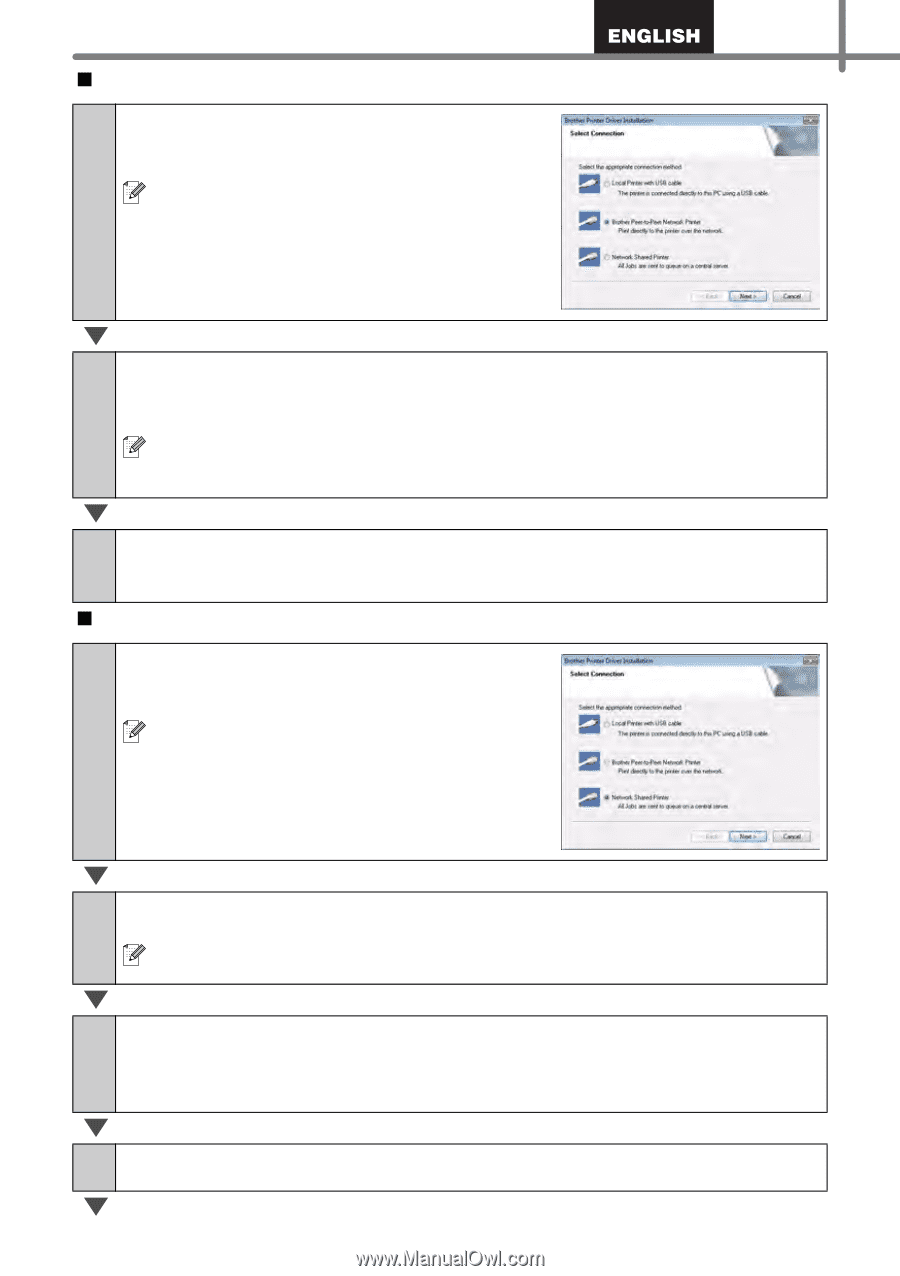
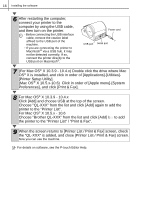
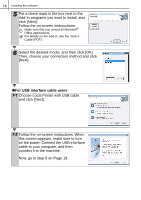
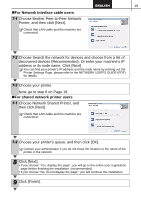
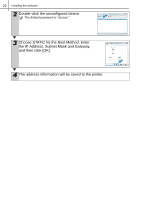
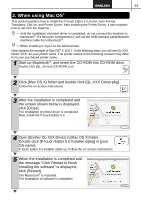
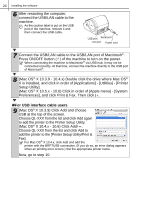
19 „For Network interface cable users 7-1 Choose Brother Peer-to-Peer Network Printer, and then click [Next]. Check that LAN cable and the machine are connected. 7-2 Choose Search the network for devices and choose from a list of discovered devices (Recommended). Or enter your machine's IP address or its node name. Click [Next]. You can find your printer's IP address and the node name by printing out the Printer Settings Page, please refer to the NETWORK USER'S GUIDE (PDF) for details. 7-3 Choose your printer. Now, go to step 8 on Page 19. „For shared network printer users 7-1 Choose Network Shared Printer, and then click [Next]. Check that LAN cable and the machine are connected. 7-2 Choose your printer's queue, and then click [OK]. Contact your administrator if you do not know the location or the name of the printer in the network 8 Click [Next]. • If you choose "Yes, display the page", you will go to the online user registration page before finishing the installation. (recommended) • If you choose "No, do not display the page", you will continue the installation. 9 Click [Finish].
-
 1
1 -
2
-
3
-
4
-
5
-
6
-
7
-
8
-
9
-
10
-
11
-
12
-
13
-
14
-
15
-
16
-
17
-
18
-
19
-
 20
20 -
 21
21 -
 22
22 -
 23
23 -
 24
24 -
 25
25 -
 26
26 -
 27
27 -
 28
28 -
 29
29 -
 30
30 -
31
-
32
-
33
-
34
-
35
-
36
-
37
-
38
-
39
-
40
-
41
-
42
-
43
-
44
-
45
-
46
-
47
-
48
-
49
-
50
-
51
-
52
-
53
-
54
-
55
-
56
-
57
-
58
-
59
-
60
-
61
-
62
-
63
-
64
-
65
-
66
-
67
-
68
-
69
-
70
-
71
-
72
-
73
-
74
-
75
-
76
-
77
-
78
-
79
-
80
-
81
-
82
-
83
-
84
-
85
-
86
-
87
-
88
-
89
 |
 |