Brother International ™ QL-1050 Users Manual - English and Spanish - Page 7

Introduction, Contents

Page 7 highlights

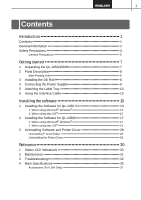
1 Introduction Contents Introduction 1 Contents 1 General Information 2 Safety Precautions 3 General Precautions 5 Getting started 7 1 Unpacking the QL-1050/1060N 7 2 Parts Description 8 Main Printing Unit 8 3 Installing the DK Roll 8 4 Connecting the Power Supply 9 5 Attaching the Label Tray 10 6 Using the Interface Cable 10 Installing the software 13 1 Installing the Software for QL-1050 13 1. When using Microsoft® Windows 13 2. When using Mac OS 15 2 Installing the Software for QL-1060N 17 1. When using Microsoft® Windows 17 2. When using Mac OS 23 3 Uninstalling Software and Printer Driver 28 Uninstalling P-touch Editor 28 Uninstalling the Printer Driver 28 Reference 30 1 Status LED Indications 30 2 Maintenance 31 3 Troubleshooting 32 4 Main Specifications 35 Accessories (For USA Only 37

  • 1
  • 2
  • 3
  • 4
  • 5
  • 6
  • 7
  • 8
  • 9
  • 10
  • 11
  • 12
  • 13
  • 14
  • 15
  • 16
  • 17
  • 18
  • 19
  • 20
  • 21
  • 22
  • 23
  • 24
  • 25
  • 26
  • 27
  • 28
  • 29
  • 30
  • 31
  • 32
  • 33
  • 34
  • 35
  • 36
  • 37
  • 38
  • 39
  • 40
  • 41
  • 42
  • 43
  • 44
  • 45
  • 46
  • 47
  • 48
  • 49
  • 50
  • 51
  • 52
  • 53
  • 54
  • 55
  • 56
  • 57
  • 58
  • 59
  • 60
  • 61
  • 62
  • 63
  • 64
  • 65
  • 66
  • 67
  • 68
  • 69
  • 70
  • 71
  • 72
  • 73
  • 74
  • 75
  • 76
  • 77
  • 78
  • 79
  • 80
  • 81
  • 82
  • 83
  • 84
  • 85
  • 86
  • 87
  • 88
  • 89

1
Introduction
Introduction •••••••••••••••••••••••••••••••••••••••••••••••••••••••• 1
Contents •••••••••••••••••••••••••••••••••••••••••••••••••••••••••••••••••••••••••••••• 1
General Information •••••••••••••••••••••••••••••••••••••••••••••••••••••••••••••••• 2
Safety Precautions •••••••••••••••••••••••••••••••••••••••••••••••••••••••••••••••••3
General Precautions •••••••••••••••••••••••••••••••••••••••••••••••••••••••••••••••••••••• 5
Getting started
••••••••••••••••••••••••••••••••••••••••••••••••••••• 7
1
Unpacking the QL-1050/1060N••••••••••••••••••••••••••••••••••••••••••••• 7
2
Parts Description••••••••••••••••••••••••••••••••••••••••••••••••••••••••••••••• 8
Main Printing Unit•••••••••••••••••••••••••••••••••••••••••••••••••••••••••••••••••••••••••• 8
3
Installing the DK Roll•••••••••••••••••••••••••••••••••••••••••••••••••••••••••• 8
4
Connecting the Power Supply••••••••••••••••••••••••••••••••••••••••••••••• 9
5
Attaching the Label Tray ••••••••••••••••••••••••••••••••••••••••••••••••••••• 10
6
Using the Interface Cable •••••••••••••••••••••••••••••••••••••••••••••••••••• 10
Installing the software
•••••••••••••••••••••••••••••••••••••••••••• 13
1
Installing the Software for QL-1050 •••••••••••••••••••••••••••••••••••••••• 13
1. When using Microsoft
®
Windows
®
•••••••••••••••••••••••••••••••••••••••••••••••••• 13
2. When using Mac OS
®
••••••••••••••••••••••••••••••••••••••••••••••••••••••••••••••••• 15
2
Installing the Software for QL-1060N •••••••••••••••••••••••••••••••••••••• 17
1. When using Microsoft
®
Windows
®
•••••••••••••••••••••••••••••••••••••••••••••••••• 17
2. When using Mac OS
®
••••••••••••••••••••••••••••••••••••••••••••••••••••••••••••••••• 23
3
Uninstalling Software and Printer Driver •••••••••••••••••••••••••••••••••• 28
Uninstalling P-touch Editor •••••••••••••••••••••••••••••••••••••••••••••••••••••••••••••• 28
Uninstalling the Printer Driver ••••••••••••••••••••••••••••••••••••••••••••••••••••••••••• 28
Reference••••••••••••••••••••••••••••••••••••••••••••••••••••••••••• 30
1
Status LED Indications •••••••••••••••••••••••••••••••••••••••••••••••••••••••30
2
Maintenance•••••••••••••••••••••••••••••••••••••••••••••••••••••••••••••••••••• 31
3
Troubleshooting•••••••••••••••••••••••••••••••••••••••••••••••••••••••••••••••• 32
4
Main Specifications•••••••••••••••••••••••••••••••••••••••••••••••••••••••••••• 35
Accessories (For USA Only) •••••••••••••••••••••••••••••••••••••••••••••••••••••••••••• 37
Contents