Brother International BAS-300 Series Programmer Instruction Manual - English - Page 19
operation.
 |
View all Brother International BAS-300 Series manuals
Add to My Manuals
Save this manual to your list of manuals |
Page 19 highlights
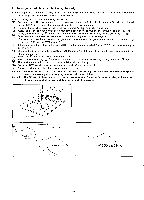
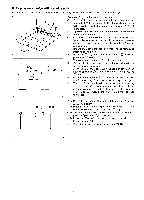
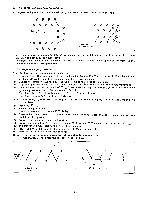
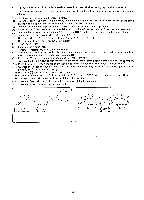
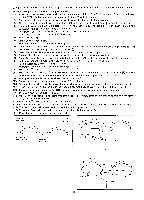
iz To program a low speed sewing operation in subdivided sections • If the programming operation is performed according to the regular procedure, the first 1 stitch and the last 2 stitches will be automatically performed at low speed. If the sewing speed is to be reduced during the sewing operation (e.g., at acute angles), use the [] key (Load key) to perform a low speed sewing operation. Example: Program a low speed sewing operation from points \ Q "666" • El 0 - 0 on the collar of the garment in the figure at left. 0 "666" • •DE) (1) Press theEj key. The work clamp will move to the point of origin (X-0; Y-0), the numeral "0" will be indicated on the STEP display, and the command indicator "F" will "666" • illuminate. (2) Insert the disk containing the proper pattern into the disk 0 "666" • El•rij•E drive. (3) Press the R/W switch. The data indicator will illuminate, "666" • E. [1 •rj and the program data will be read into the memory. (4) Press the numeral key 0. 3 times to indicate "999" on the STEP display, and then press the [1 key. The work clamp will begin to advance one stitch at a time, starting from the initial stitch position. Maximum stitch number is 999. (5) When the tip of the needle becomes aligned with the position marked 0, press either theEl key or the H key. The work clamp will stop. (If, however, the work clamp is accidentally advanced beyond the position marked 0, use the numeral keys to indicate on the STEP display the number of stitches to past this position and then press the H key. The work clamp will move in the reverse direction as many as indicated on the STEP display.) (6) Press the numeral key [1 3 times to indicate "666" on the STEP display. Then, press the El key. (7) Press the numeral key El to indicate "001" on the STEP display. Then, press the Ef key. The tip of the needle will move to the point marked O. (8) Repeat the procedure `(6) and (7) to complete the programming operation from position 0 - 0. (9) Press the R/W switch to write the pattern to disk. (Refer to page 24.) Press the E] key to enter the sewing mode. Note The low speed sewing operation cannot be performed unless the pattern design is complete.
-
 1
1 -
2
-
3
-
4
-
5
-
6
-
7
-
8
-
9
-
10
-
11
-
12
-
13
-
 14
14 -
 15
15 -
 16
16 -
 17
17 -
 18
18 -
 19
19 -
 20
20 -
 21
21 -
 22
22 -
 23
23 -
 24
24 -
25
-
26
-
27
-
28
-
29
-
30
-
31
-
32
-
33
-
34
-
35
-
36
 |
 |
