Brother International BAS-300 Series Programmer Instruction Manual - English - Page 8
i.030
 |
View all Brother International BAS-300 Series manuals
Add to My Manuals
Save this manual to your list of manuals |
Page 8 highlights
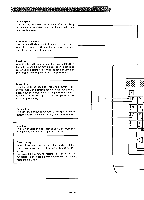
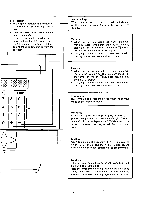
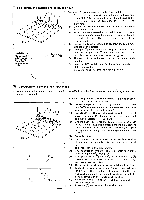
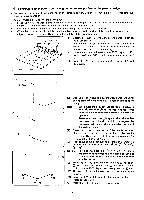
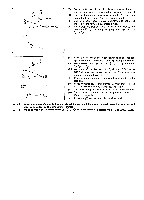
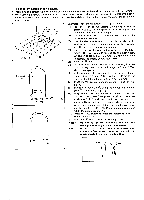
[1] To program a stitch pattern containing numerous straight lines in the pattern design • To program the straight-line portions of the pattern design, use the LI key (Line key) to facilitate the programming operation. Example: Program the pattern in the figure below. (1) Press the©key. The work clamp will move to the point of origin (X-0; Y-0), the numeral "0" will be indicated on the STEP display, and the command indicator "F" will illuminate. (2) Operate the direction keys to move the work clamp to the initial stitch position. (3) When the tip of the needle and the initial stitch position Q on the outline of the needle movement become aligned, press the key. Thus, the initial stitch will be programmed. (4) Operate the numeral keys to indicate the proper pitch on the STEP display. (For example, to set the proper stitch length when the actual stitch length is 3 mm, use the numeral keys to indicate "O3O" on the STEP display.) If the pitch is not indicated on the STEP display, or if it exceeds 8.O mm "O8O", it will automatically be set to 2 mm. (5) Press the al key. The command indicator "LI" will illuminate. (X-0, Y 0) 0 (i."030" . O• •® 8 OO 0 • El (6) Use the direction keys to move the work clamp to the final stitch position ©on the straight line portion of the pattern design. Note 1 When more than 120 stitches are required between point QQ and point 0, the operation speed of the work clamp will suddenly decrease to warm the operator. Therefore, press the key and then the a key between point 0 and point 0 to reprogram the remaining stitches on the straight-line portion of the pattern design. (7) Press the El key when the tip of the needle becomes aligned with point @ on the outline of the needle movement. Thus, the straight-line portion from point ® to point 0 will be programmed. (8) Repeat the above procedure to program the remaining straight-line portions from point @ ©, © - O, Note 2 For diagonal lines, e.g. - ©, - O, there are instances in which the line may not turn out to be straight unless the line is subdivided into smaller portions. (9) Press the key at the position indicated by the letter 0. Then, press the numeral key El 3 times to indicate "111" on the STEP display, and then press the El key. (10) The work clamp will move back to the initial stitch position. (11) Press the R/W switch to write the pattern to disk. (Refer to page 24.) Press the [1] key to enter the sewing mode. -6-
-
 1
1 -
2
-
 3
3 -
 4
4 -
 5
5 -
 6
6 -
 7
7 -
 8
8 -
 9
9 -
 10
10 -
 11
11 -
 12
12 -
 13
13 -
14
-
15
-
16
-
17
-
18
-
19
-
20
-
21
-
22
-
23
-
24
-
25
-
26
-
27
-
28
-
29
-
30
-
31
-
32
-
33
-
34
-
35
-
36
 |
 |
