Canon CONSOLE Image Control & Storage Software v1.1 Console Software Operation - Page 8
Connecting the Camcorder
 |
View all Canon CONSOLE Image Control & Storage Software v1.1 manuals
Add to My Manuals
Save this manual to your list of manuals |
Page 8 highlights
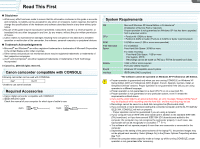
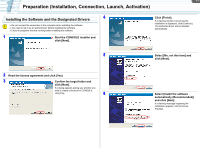
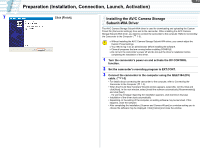
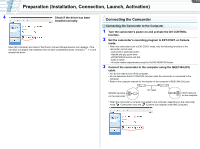
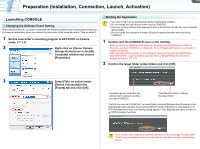
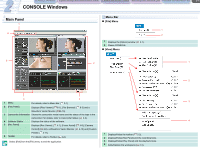
1-3 Preparation (Installation, Connection, Launch, Activation) 4 Check if the driver has been installed correctly. Open [My Computer] and check if the [Canon Camera Storage Device] icon appears. If the icon does not appear, the installation has not been completed properly. Uninstall ( 7-1) and reinstall the driver. Connecting the Camcorder Connecting the Camcorder to the Computer 1 Turn the camcorder's power on and activate the DV CONTROL function. 2 Set the camcorder's recording program to EXT.CONT. or Camera mode. • When the camcorder is set to EXT.CONT. mode, only the following functions of the camcorder can be used. - Camcorder's start/stop button - Handle and grip zoom lever - ZOOM SPEED switch and dial - EJECT switch - All audio related adjustments except for AUDIO MONITOR button 3 Connect the camcorder to the computer using the IEEE1394 (DV) cable. • You do not need to turn off the computer. • Do not deactivate the DV CONTROL function while the camcorder is connected to the computer. • Refer to the computer manual for the location of the computer's IEEE1394 (DV) port. HDV/DV terminal on the camcorder DV cable IEEE1394 port on the computer • When the camcorder is correctly connected to the computer, depending on the camcorder mode, (Camcorder icon) and (Camera icon) appear under [My Computer].
-
 1
1 -
2
-
 3
3 -
 4
4 -
 5
5 -
 6
6 -
 7
7 -
 8
8 -
 9
9 -
 10
10 -
 11
11 -
 12
12 -
 13
13 -
14
-
15
-
16
-
17
-
18
-
19
-
20
-
21
-
22
-
23
-
24
-
25
-
26
-
27
-
28
-
29
-
30
-
31
-
32
-
33
-
34
-
35
-
36
-
37
-
38
-
39
-
40
-
41
-
42
-
43
-
44
-
45
-
46
-
47
-
48
-
49
-
50
-
51
-
52
-
53
 |
 |
