Canon CONSOLE Image Control & Storage Software v1.1 Console Software Operation - Page 9
Launching CONSOLE
 |
View all Canon CONSOLE Image Control & Storage Software v1.1 manuals
Add to My Manuals
Save this manual to your list of manuals |
Page 9 highlights
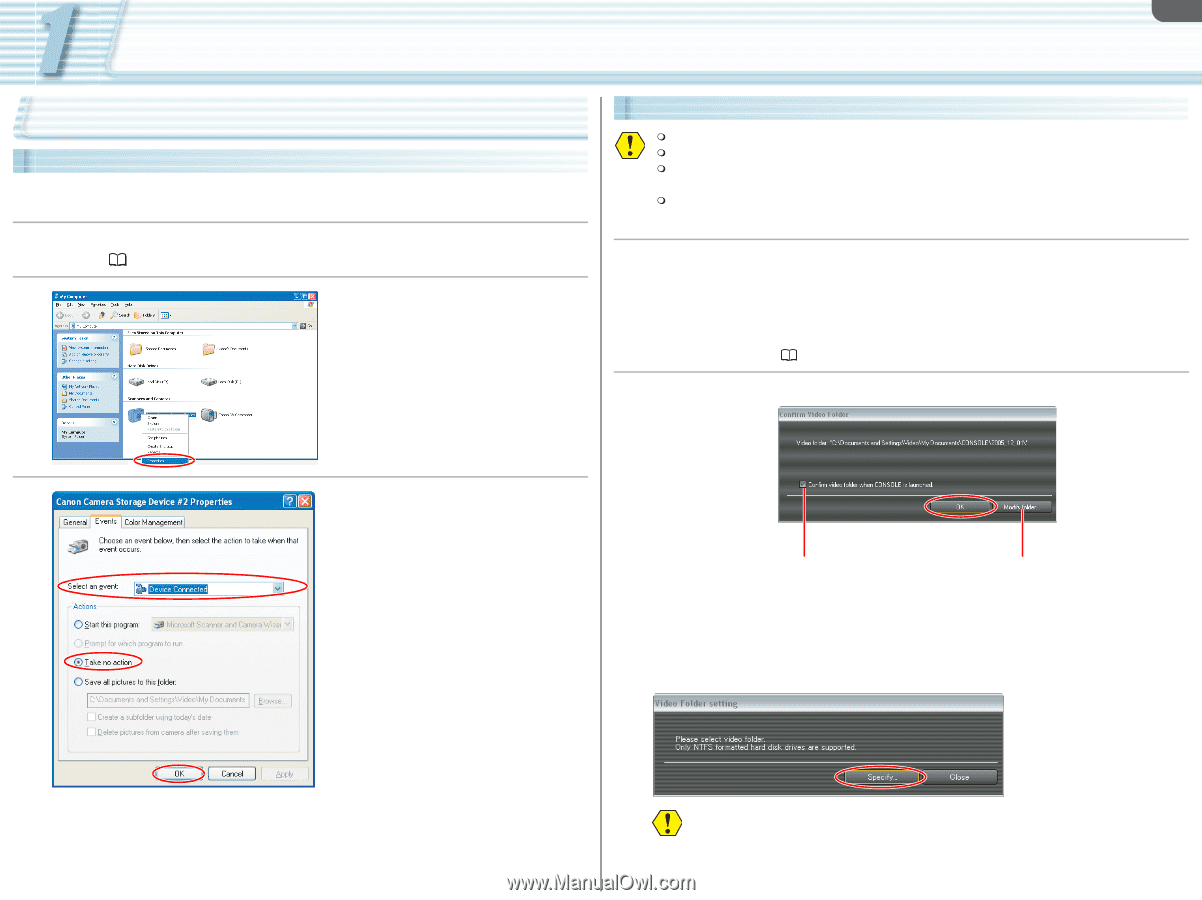
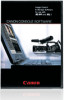
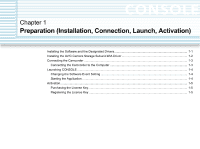
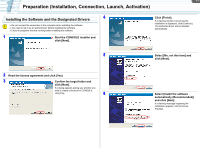
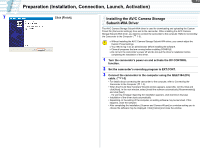
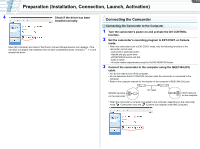
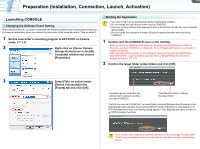
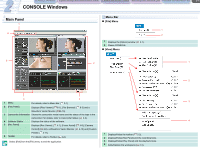
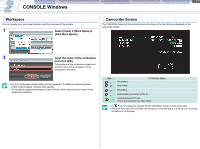
1-4 Preparation (Installation, Connection, Launch, Activation) Launching CONSOLE Changing the Software Event Setting When using CONSOLE, you need to deactivate the Windows program that automatically prompts you to choose an application when you connect the camcorder to the computer (set to "Take no action"). 1 Set the camcorder's recording program to EXT.CONT. or Camera mode. ( 1-3) 2 Right-click on [Canon Camera Storage Device] icon in the [My Computer] window and choose [Properties]. Starting the Application You need to log in as an administrator before installing the software. Do not change the user account while running CONSOLE. If you are running software that displays the time at the title bar, the title bar may not display texts properly. Do not change the settings in Windows [Display Properties] window while launching CONSOLE. 1 Double-click the [CONSOLE] icon on the desktop. • When you have not registered the license yet, the remaining trial period and number of times you can start CONSOLE are displayed. Click on [Registration] when you proceed to register the license. • When the trial period is expired, or the number of times you can start the CONSOLE is exceeded its limit, a warning window appears. Click on [Registration] and proceed to register the license. ( 1-5) 2 Confirm the target folder (video folder) and click [OK]. 3 Select [Take no action] under [Device Connected] in the [Events] tab and click [OK]. By removing this checkmark, this window will not appear next time you start CONSOLE. Click [Modify Folder] to change the target folder. The first time you start CONSOLE, the target folder is set as [Windows drive:\Documents and Settings\login user name\My Documents\CONSOLE\date]. If Windows is not installed on an NTFS formatted hard disk, the following dialog appears. Click [Specify] and select a folder on an NTFS formatted hard disk. If you set the video folder to an external hard disk, an error message "Delayed Write Failed" may be displayed while recording onto the hard disk, and the recording may be lost.
-
 1
1 -
2
-
3
-
 4
4 -
 5
5 -
 6
6 -
 7
7 -
 8
8 -
 9
9 -
 10
10 -
 11
11 -
 12
12 -
 13
13 -
 14
14 -
15
-
16
-
17
-
18
-
19
-
20
-
21
-
22
-
23
-
24
-
25
-
26
-
27
-
28
-
29
-
30
-
31
-
32
-
33
-
34
-
35
-
36
-
37
-
38
-
39
-
40
-
41
-
42
-
43
-
44
-
45
-
46
-
47
-
48
-
49
-
50
-
51
-
52
-
53
 |
 |