Canon EOS R5 C Advanced User Guide VIDEO edition - Page 210
Button and Dial Operations
 |
View all Canon EOS R5 C manuals
Add to My Manuals
Save this manual to your list of manuals |
Page 210 highlights
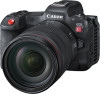
Using the WFT-R10 Wireless File Transmitter 210 3 Connect the DC coupler to the AC adapter. • Securely connect the plug of the CA-946 AC Adapter (sold separately) to the connector of the DR-E6C DC Coupler. • When using the DR-E6 DC Coupler, securely connect the plug to the connector of the AC-E6N AC Adapter (sold separately). 4 Connect the power cord. • Connect the power cord to the AC power adapter and insert the power plug into a power outlet. ባ ቢ Button and Dial Operations Button and dial operations are the same as those of the camera. For details, refer to the Advanced User Guide (PHOTO edition or VIDEO edition). To use the buttons and dials, turn the vertical-grip on/off switch (4) to ON. • The buttons and dials are used the same way as corresponding buttons and dials on the camera. 1 2 9 3 4 10 PHOTO Mode 1 Shutter button 2 < > Multi-function button 5 6 78 VIDEO Mode REC (start/stop recording) button FUNC button/Assignable button Camera 11
-
 1
1 -
2
-
3
-
4
-
5
-
6
-
7
-
8
-
9
-
10
-
11
-
12
-
13
-
14
-
15
-
16
-
17
-
18
-
19
-
20
-
21
-
22
-
23
-
24
-
25
-
26
-
27
-
28
-
29
-
30
-
31
-
32
-
33
-
34
-
35
-
36
-
37
-
38
-
39
-
40
-
41
-
42
-
43
-
44
-
45
-
46
-
47
-
48
-
49
-
50
-
51
-
52
-
53
-
54
-
55
-
56
-
57
-
58
-
59
-
60
-
61
-
62
-
63
-
64
-
65
-
66
-
67
-
68
-
69
-
70
-
71
-
72
-
73
-
74
-
75
-
76
-
77
-
78
-
79
-
80
-
81
-
82
-
83
-
84
-
85
-
86
-
87
-
88
-
89
-
90
-
91
-
92
-
93
-
94
-
95
-
96
-
97
-
98
-
99
-
100
-
101
-
102
-
103
-
104
-
105
-
106
-
107
-
108
-
109
-
110
-
111
-
112
-
113
-
114
-
115
-
116
-
117
-
118
-
119
-
120
-
121
-
122
-
123
-
124
-
125
-
126
-
127
-
128
-
129
-
130
-
131
-
132
-
133
-
134
-
135
-
136
-
137
-
138
-
139
-
140
-
141
-
142
-
143
-
144
-
145
-
146
-
147
-
148
-
149
-
150
-
151
-
152
-
153
-
154
-
155
-
156
-
157
-
158
-
159
-
160
-
161
-
162
-
163
-
164
-
165
-
166
-
167
-
168
-
169
-
170
-
171
-
172
-
173
-
174
-
175
-
176
-
177
-
178
-
179
-
180
-
181
-
182
-
183
-
184
-
185
-
186
-
187
-
188
-
189
-
190
-
191
-
192
-
193
-
194
-
195
-
196
-
197
-
198
-
199
-
200
-
201
-
202
-
203
-
204
-
 205
205 -
 206
206 -
 207
207 -
 208
208 -
 209
209 -
 210
210 -
 211
211 -
 212
212 -
 213
213 -
 214
214 -
 215
215 -
216
-
217
-
218
-
219
-
220
-
221
-
222
-
223
-
224
-
225
-
226
-
227
-
228
-
229
-
230
-
231
-
232
-
233
-
234
-
235
-
236
-
237
-
238
-
239
-
240
-
241
-
242
-
243
-
244
-
245
-
246
-
247
-
248
 |
 |
