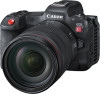
Canon EOS R5 C Advanced User Guide VIDEO edition - Page 30
Using the Viewfinder, Turn on the camera and adjust the viewfinder by turning the dioptric
 |
View all Canon EOS R5 C manuals
Add to My Manuals
Save this manual to your list of manuals |
Page 30 highlights
Preparing the Camera Sensor mode Recording format 30 Resolution System frequency/Frame rate High: 59.94 Hz Medium: 50.00 Hz Low: 24.00 Hz Using a battery pack1 Power supply to a commercially available accessory Yes No Other power sources RAW HQ RAW ST RAW LT 5952x3140 Super 35mm (Cropped) HDMI RAW 31-60 26-60 25-60 1-30 1-25 1-24 59.94 50.00 - 29.97, 23.98 25.00 24.00 - Ü3 Ü Ü Ü Ü - Ü3 Ü Ü Ü Ü XF-AVC MP4 (HEVC) MP4 (H.264) 4096x2160 3840x2160 2048x1080 1920x1080 1280x720 31-120 26-604, 26-120 25-604, 26-120 1-30 1-25 1-24 Ü3 Ü Ü Ü Ü Ü RAW HQ RAW ST 1-120 Ü Ü Ü RAW LT 2976x1570 Super 16mm (Cropped) HDMI RAW 59.94, 29.97, 23.98 50.00, 25.00 Ü Ü Ü 24.00 XF-AVC MP4 (HEVC) MP4 (H.264) 2048x1080 1920x1080 1280x720 1-120 Ü Ü Ü 1 Differs depending on wether the camera is supplying power to an accessory or not, when using a battery pack and a commercially available accessory (compatible with the multi-function shoe) is attached to the camera. 2 Not avalable when using a USB power adapter and an EF lens is attached to the camera. 3 Not available when an EF lens is attached to the camera. It may also be unavailable when attaching some RF lenses. 4 When the resolution is 4096x2160 or 3840x2160. Using the Viewfinder The camera's viewfinder features an OLED screen that turns on automatically when you look through the viewfinder and turns off shortly after you move your eye away from it. Turn on the camera and adjust the viewfinder by turning the dioptric adjustment knob left or right. NOTES • You cannot use the viewfinder and the LCD monitor at the same time. • You can adjust the brightness, contrast, color saturation, sharpness and luminance of the viewfinder with the respective settings in the > [¢ Monitoring Setup] menu (A 190).
-
 1
1 -
2
-
3
-
4
-
5
-
6
-
7
-
8
-
9
-
10
-
11
-
12
-
13
-
14
-
15
-
16
-
17
-
18
-
19
-
20
-
21
-
22
-
23
-
24
-
 25
25 -
 26
26 -
 27
27 -
 28
28 -
 29
29 -
 30
30 -
 31
31 -
 32
32 -
 33
33 -
 34
34 -
 35
35 -
36
-
37
-
38
-
39
-
40
-
41
-
42
-
43
-
44
-
45
-
46
-
47
-
48
-
49
-
50
-
51
-
52
-
53
-
54
-
55
-
56
-
57
-
58
-
59
-
60
-
61
-
62
-
63
-
64
-
65
-
66
-
67
-
68
-
69
-
70
-
71
-
72
-
73
-
74
-
75
-
76
-
77
-
78
-
79
-
80
-
81
-
82
-
83
-
84
-
85
-
86
-
87
-
88
-
89
-
90
-
91
-
92
-
93
-
94
-
95
-
96
-
97
-
98
-
99
-
100
-
101
-
102
-
103
-
104
-
105
-
106
-
107
-
108
-
109
-
110
-
111
-
112
-
113
-
114
-
115
-
116
-
117
-
118
-
119
-
120
-
121
-
122
-
123
-
124
-
125
-
126
-
127
-
128
-
129
-
130
-
131
-
132
-
133
-
134
-
135
-
136
-
137
-
138
-
139
-
140
-
141
-
142
-
143
-
144
-
145
-
146
-
147
-
148
-
149
-
150
-
151
-
152
-
153
-
154
-
155
-
156
-
157
-
158
-
159
-
160
-
161
-
162
-
163
-
164
-
165
-
166
-
167
-
168
-
169
-
170
-
171
-
172
-
173
-
174
-
175
-
176
-
177
-
178
-
179
-
180
-
181
-
182
-
183
-
184
-
185
-
186
-
187
-
188
-
189
-
190
-
191
-
192
-
193
-
194
-
195
-
196
-
197
-
198
-
199
-
200
-
201
-
202
-
203
-
204
-
205
-
206
-
207
-
208
-
209
-
210
-
211
-
212
-
213
-
214
-
215
-
216
-
217
-
218
-
219
-
220
-
221
-
222
-
223
-
224
-
225
-
226
-
227
-
228
-
229
-
230
-
231
-
232
-
233
-
234
-
235
-
236
-
237
-
238
-
239
-
240
-
241
-
242
-
243
-
244
-
245
-
246
-
247
-
248
 |
 |
