Canon Microfilm Scanner 350II MS-350II Instruction Manual. 3.01 MB - Page 37
Setting The Scanner
 |
View all Canon Microfilm Scanner 350II manuals
Add to My Manuals
Save this manual to your list of manuals |
Page 37 highlights
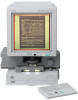
CE-IE-335-01 35 ■ SETTING THE SCANNER ■ SETTING THE SCANNER In the Scanner mode, the image projected on the scanner's screen can be saved by the connected personal computer, or printed out through a printer connected to the PC. Actual settings and operations for scanning differ depending on the application you use. In the DMP mode, the image projected on the scanner's screen can be printed out through a printer connected to the scanner. Here below explained are various functions that can be set on the scanner main unit. Loading the film Load the auto carrier with the film you want to view. For details about the auto carrier installation, see the instructions you received with the auto carrier. Adjusting the image Follow the procedure below to adjust the image on the screen. Read and perform this procedure correctly to attain a crisp image on the screen and a clear scanned image. ■ Enlarging and reducing image size 1. Press the Image Adjust Select key on the operation keyboard to illuminate the [ZOOM] lamp. 2. Turn the Image Adjust Control dial to adjust the image size. Turn the dial right to enlarge the image, or left to reduce it. You can register zoom settings to the Memory keys on the operation keyboard. You can then use these keys to recall the registered zoom settings at any time (➞ P.48, "Registering the zoom values"). ■ Focusing the image 1. Press the Image Adjust Select key on the operation keyboard to illuminate the [FOCUS] lamp. 2. Turn the Image Adjust Control dial left or right to obtain proper focus. ■ Arbitrary rotation 1. Press the Image Adjust Select key on the operation keyboard to illuminate the [ROTATE] lamp. 2. Turn the Image Adjust Control dial to rotate the image. Turn the dial right to rotate the image to the right, left to rotate it to the left. ■ 90 degree rotation 1. Press the rotation key, either left or right, on the operation key- board so that the image can be rotated 90 degrees in the direction shown by the arrow on the key. 35 07.5.14, 14:19
-
 1
1 -
2
-
3
-
4
-
5
-
6
-
7
-
8
-
9
-
10
-
11
-
12
-
13
-
14
-
15
-
16
-
17
-
18
-
19
-
20
-
21
-
22
-
23
-
24
-
25
-
26
-
27
-
28
-
29
-
30
-
31
-
 32
32 -
 33
33 -
 34
34 -
 35
35 -
 36
36 -
 37
37 -
 38
38 -
 39
39 -
 40
40 -
 41
41 -
 42
42 -
43
-
44
-
45
-
46
-
47
-
48
-
49
-
50
-
51
-
52
-
53
-
54
-
55
-
56
-
57
-
58
-
59
-
60
-
61
-
62
 |
 |
