Canon Microfilm Scanner 350II MS-350II Instruction Manual. 3.01 MB - Page 39
Trimming/border removal settings, Trimming
 |
View all Canon Microfilm Scanner 350II manuals
Add to My Manuals
Save this manual to your list of manuals |
Page 39 highlights
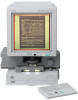
■ SETTING THE SCANNER ■ Trimming/border removal settings When an image on negative film is scanned and projected onto the scanner screen, the area outside the image appears as a black border around the image. The Automatic Border Removal function can be used to remove this black border around the scanned image. Trimming allows you to restrict scanning to a specified area of the image. Border removal allows you either to remove all the black border around the image or to leave a narrow black margin around the image. • If Positive ( ) is selected as polarity, the Automatic Border Removal function cannot be carried out. • In the ISIS/TWAIN Driver or CapturePerfect, "Trimming" is called "Framing", and "Automatic Border Removal" is called "Auto-detection". Trimming Press the border key on the operation panel until the ( ) indicator lights and then scan the image. Follow the procedure below to define the area to the image to be scanned. Adjustment or modifications to the triming area should be made from the application software before scanning begins or while scanning is paused. ■ Defining an area for trimming 1. Press and hold down the Trimming/Border key for approximately 2 seconds until the lamp for trimming ( ) starts blinking. The current area setting is shown in the display. 2. To adjust the area setting, press the Print Number Setting keys. The starting point or origin for defining the screen area is the lower right corner of the screen. Plus key Minus key Press to move in the vertical direction. The number in the Print display shows the current screen vertical coordinate. Press to move in the horizontal direction. The number in the Print display shows the current horizontal coordinate. CE-IE-335-01 37 37 07.5.14, 14:19
-
 1
1 -
2
-
3
-
4
-
5
-
6
-
7
-
8
-
9
-
10
-
11
-
12
-
13
-
14
-
15
-
16
-
17
-
18
-
19
-
20
-
21
-
22
-
23
-
24
-
25
-
26
-
27
-
28
-
29
-
30
-
31
-
32
-
33
-
 34
34 -
 35
35 -
 36
36 -
 37
37 -
 38
38 -
 39
39 -
 40
40 -
 41
41 -
 42
42 -
 43
43 -
 44
44 -
45
-
46
-
47
-
48
-
49
-
50
-
51
-
52
-
53
-
54
-
55
-
56
-
57
-
58
-
59
-
60
-
61
-
62
 |
 |
