Canon Microfilm Scanner 350II MS-350II Instruction Manual. 3.01 MB - Page 38
Selecting the polarity, Brightness adjustment, Automatic adjustment, Manual adjustment
 |
View all Canon Microfilm Scanner 350II manuals
Add to My Manuals
Save this manual to your list of manuals |
Page 38 highlights
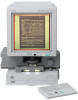
■ SETTING THE SCANNER ■ 36 CE-IE-335-01 36 Selecting the polarity This setting selects the film polarity (possitive or negative). Press the Negative/Positive key on the operation panel to select the film polarity. Negative Positive A Auto Prints positive from negative film. Prints positive from positive film. Automatically detects the type of film in use and prints a positive image. If you select Auto, the Negative or Positive lamp blinks to tell you which type of film has been detected. The HZ-05 zoom lens has no function to automatically switch between Negative and Positive. When using the HZ-05 zoom lens, always use the Negative/Positive switching key to select ( ) Negative or ( ) Positive. Do not use Auto for an image with a grey or light border (where black and white may be difficult to distinguish), or if you intend to remove the border from the image, trim the image, or define the area on the image with the other keys. If you intend to use these special functions, set Negative or Positive manually. Brightness adjustment Adjust the brightness of the image during scanning. The brightness can be adjusted automatically (AE) or manually. Switching the operation modes can be also set in the user mode. Automatic adjustment Press the AE key on the operation panel. The AE key lights and the image brightness is adjusted automatically during scanning. When automatic adjustment is selected, you can make fine adjustment to the brightness through 17 level by pressing the brightness adjustment key ( or ). Moving the indicator to the right brightens the image by fine increments, and moving it to the left darkens the image by fine increments. Manual adjustment When the AE key is lit, you can use the brightness adjustment key ( or ) to adjust the brightness of the scanned image. Moving the indicator to the right brightens the scanned image and moving it to the left darkens the scanned image. In manual adjustment, the brightness can be adjusted through 33 levels, as shown in the figure at left. 07.5.14, 14:19
-
 1
1 -
2
-
3
-
4
-
5
-
6
-
7
-
8
-
9
-
10
-
11
-
12
-
13
-
14
-
15
-
16
-
17
-
18
-
19
-
20
-
21
-
22
-
23
-
24
-
25
-
26
-
27
-
28
-
29
-
30
-
31
-
32
-
 33
33 -
 34
34 -
 35
35 -
 36
36 -
 37
37 -
 38
38 -
 39
39 -
 40
40 -
 41
41 -
 42
42 -
 43
43 -
44
-
45
-
46
-
47
-
48
-
49
-
50
-
51
-
52
-
53
-
54
-
55
-
56
-
57
-
58
-
59
-
60
-
61
-
62
 |
 |
