Canon PIXMA i900D i900D Quick Start Guide - Page 46
Printing Maintenance, With the printer on, load a sheet of Letter paper in the printer., Open the BJ
 |
View all Canon PIXMA i900D manuals
Add to My Manuals
Save this manual to your list of manuals |
Page 46 highlights
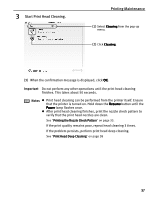
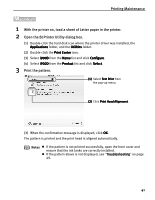
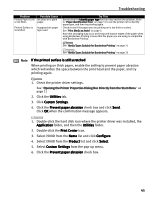
Printing Maintenance 1 With the printer on, load a sheet of Letter paper in the printer. 2 Open the BJ Printer Utility dialog box. (1) Double-click the hard disk icon where the printer driver was installed, the Applications folder, and the Utilities folder. (2) Double-click the Print Center icon. (3) Select i900D from the Name list and click Configure. (4) Select i900D from the Product list and click Select. 3 Print the pattern. (1) Select Test Print from the pop-up menu. (2) Click Print Head Alignment. (3) When the confirmation message is displayed, click OK. The pattern is printed and the print head is aligned automatically. Notes z If the pattern is not printed successfully, open the front cover and ensure that the ink tanks are correctly installed. z If the pattern above is not displayed, see "Troubleshooting" on page 49. 41
-
 1
1 -
2
-
3
-
4
-
5
-
6
-
7
-
8
-
9
-
10
-
11
-
12
-
13
-
14
-
15
-
16
-
17
-
18
-
19
-
20
-
21
-
22
-
23
-
24
-
25
-
26
-
27
-
28
-
29
-
30
-
31
-
32
-
33
-
34
-
35
-
36
-
37
-
38
-
39
-
40
-
 41
41 -
 42
42 -
 43
43 -
 44
44 -
 45
45 -
 46
46 -
 47
47 -
 48
48 -
 49
49 -
 50
50 -
 51
51 -
52
-
53
-
54
-
55
-
56
-
57
-
58
-
59
-
60
-
61
-
62
-
63
-
64
-
65
-
66
-
67
-
68
 |
 |
