Canon PowerShot A510 PowerShot A520/A510 Camera User Guide - Page 21
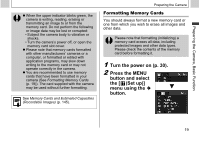
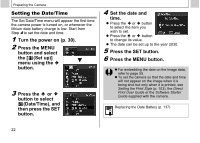
Turn the power on p. 30., Press the MENU, button and select, Set up], menu using the, button. - memory card capacity
 |
View all Canon PowerShot A510 manuals
Add to My Manuals
Save this manual to your list of manuals |
Page 21 highlights
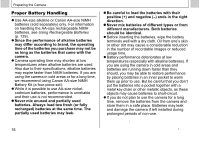
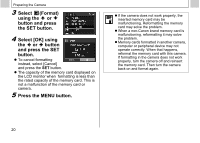
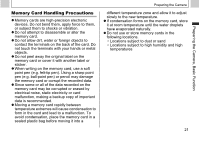
Preparing the Camera, Basic Function z When the upper indicator blinks green, the camera is writing, reading, erasing or transmitting an image to or from the memory card. Do not perform the following or image data may be lost or corrupted: • Subject the camera body to vibration or shocks. • Turn the camera's power off, or open the memory card slot cover. z Please note that memory cards formatted with other manufacturers' cameras or a computer, or formatted or edited with application programs, may slow down writing to the memory card or may not operate correctly in the camera. z You are recommended to use memory cards that have been formatted in your camera (See Formatting Memory Cards (p. 19)). The card supplied with the camera may be used without further formatting. See Memory Cards and Estimated Capacities (Recordable Images) (p. 145). Preparing the Camera Formatting Memory Cards You should always format a new memory card or one from which you wish to erase all images and other data. Please note that formatting (initializing) a memory card erases all data, including protected images and other data types. Please check the contents of the memory card before formatting it. 1 Turn the power on (p. 30). 2 Press the MENU button and select the [ (Set up)] menu using the button. 19
-
 1
1 -
2
-
3
-
4
-
5
-
6
-
7
-
8
-
9
-
10
-
11
-
12
-
13
-
14
-
15
-
 16
16 -
 17
17 -
 18
18 -
 19
19 -
 20
20 -
 21
21 -
 22
22 -
 23
23 -
 24
24 -
 25
25 -
 26
26 -
27
-
28
-
29
-
30
-
31
-
32
-
33
-
34
-
35
-
36
-
37
-
38
-
39
-
40
-
41
-
42
-
43
-
44
-
45
-
46
-
47
-
48
-
49
-
50
-
51
-
52
-
53
-
54
-
55
-
56
-
57
-
58
-
59
-
60
-
61
-
62
-
63
-
64
-
65
-
66
-
67
-
68
-
69
-
70
-
71
-
72
-
73
-
74
-
75
-
76
-
77
-
78
-
79
-
80
-
81
-
82
-
83
-
84
-
85
-
86
-
87
-
88
-
89
-
90
-
91
-
92
-
93
-
94
-
95
-
96
-
97
-
98
-
99
-
100
-
101
-
102
-
103
-
104
-
105
-
106
-
107
-
108
-
109
-
110
-
111
-
112
-
113
-
114
-
115
-
116
-
117
-
118
-
119
-
120
-
121
-
122
-
123
-
124
-
125
-
126
-
127
-
128
-
129
-
130
-
131
-
132
-
133
-
134
-
135
-
136
-
137
-
138
-
139
-
140
-
141
-
142
-
143
-
144
-
145
-
146
-
147
-
148
-
149
-
150
-
151
-
152
-
153
-
154
-
155
-
156
-
157
-
158
-
159
-
160
-
161
-
162
-
163
 |
 |
