Canon SELPHY ES2 SELPHY ES2 / ES20 Printer User Guide - Page 37
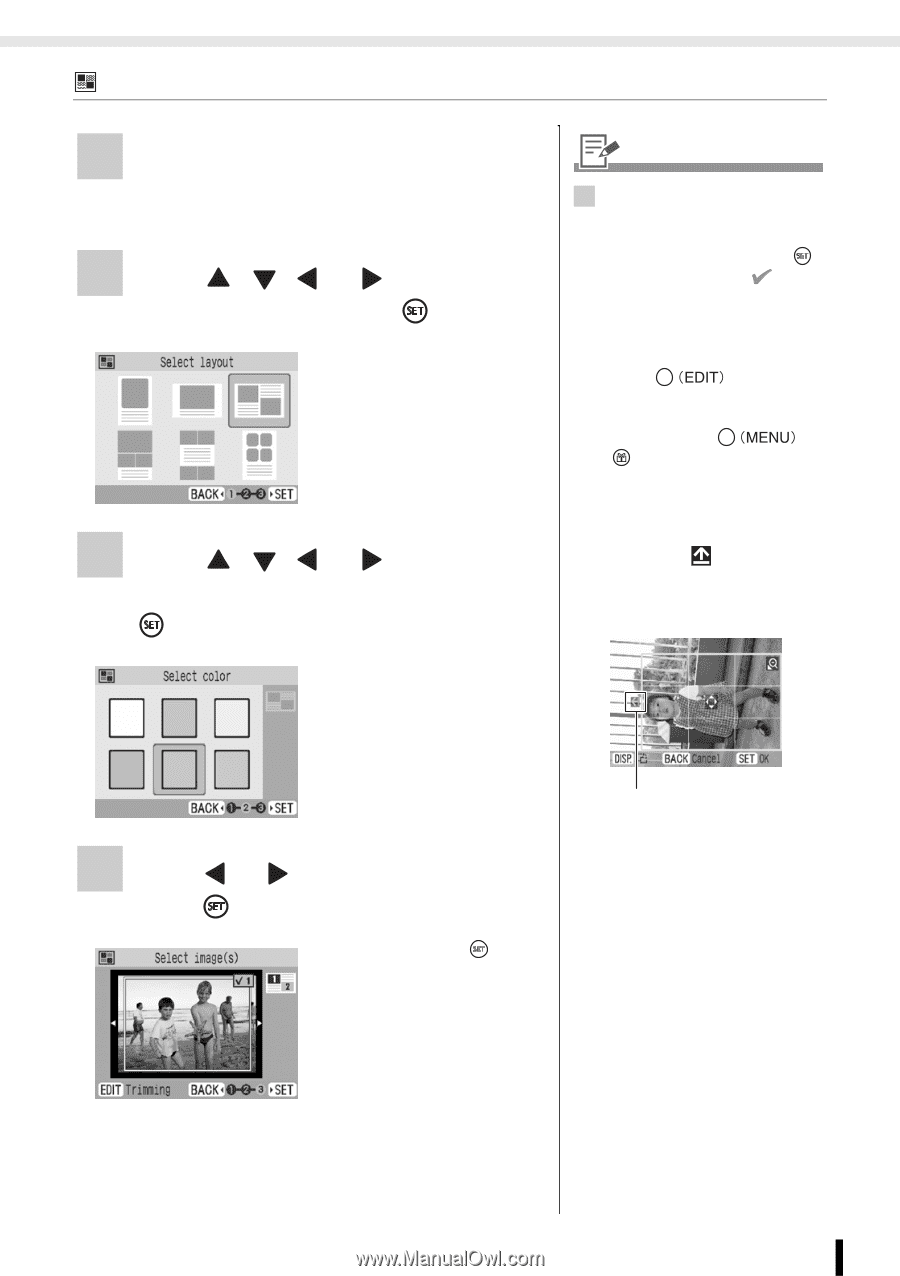
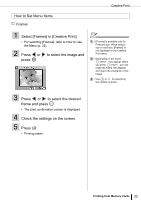
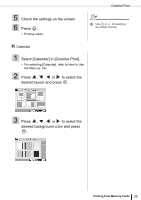
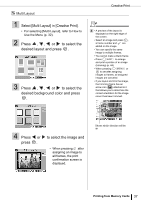
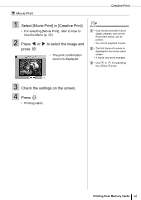
Select [Multi Layout] in [Creative Print]., Press, to select the, desired layout and press
 |
View all Canon SELPHY ES2 manuals
Add to My Manuals
Save this manual to your list of manuals |
Page 37 highlights
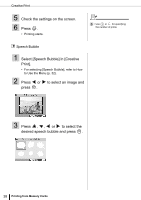
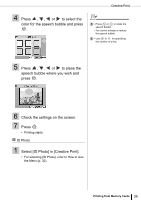
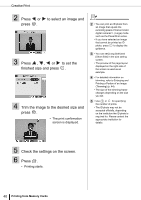
Multi Layout 1 Select [Multi Layout] in [Creative Print]. • For selecting [Multi Layout], refer to How to Use the Menu (p. 32). 2 Press , , or to select the desired layout and press . 3 Press , , or to select the desired background color and press . Creative Print 4 • A preview of the layout is displayed on the right edge of the screen. • Select an image and press , a frame number and are added on the image. • You can specify the same image to multiple frames. • You cannot make a blank frame. • Press to enlarge and print a portion of an image (trimming) (p. 44). • When pressing or to set after assigning images to frames, all assigned images are canceled. • If you layout and trim the image, the trimming frame has an arrow icon ( ) attached to it that allows you to determine the correct orientation for the image once it has been trimmed. 4 Press or press . to select the image and • When pressing after assigning an image to all frames, the print confirmation screen is displayed. Shows which direction will be up Printing from Memory Cards 37
-
 1
1 -
2
-
3
-
4
-
5
-
6
-
7
-
8
-
9
-
10
-
11
-
12
-
13
-
14
-
15
-
16
-
17
-
18
-
19
-
20
-
21
-
22
-
23
-
24
-
25
-
26
-
27
-
28
-
29
-
30
-
31
-
 32
32 -
 33
33 -
 34
34 -
 35
35 -
 36
36 -
 37
37 -
 38
38 -
 39
39 -
 40
40 -
 41
41 -
 42
42 -
43
-
44
-
45
-
46
-
47
-
48
-
49
-
50
-
51
-
52
-
53
-
54
-
55
-
56
-
57
-
58
-
59
-
60
-
61
-
62
-
63
-
64
-
65
-
66
-
67
-
68
-
69
-
70
-
71
-
72
-
73
-
74
-
75
-
76
-
77
-
78
-
79
-
80
-
81
-
82
-
83
-
84
-
85
-
86
-
87
-
88
-
89
-
90
-
91
-
92
-
93
-
94
-
95
-
96
-
97
-
98
-
99
-
100
-
101
-
102
-
103
 |
 |