Canon SELPHY ES2 SELPHY ES2 / ES20 Printer User Guide - Page 40
Press, to select an image and, press, to set the, finished size and press, Trim the image to
 |
View all Canon SELPHY ES2 manuals
Add to My Manuals
Save this manual to your list of manuals |
Page 40 highlights
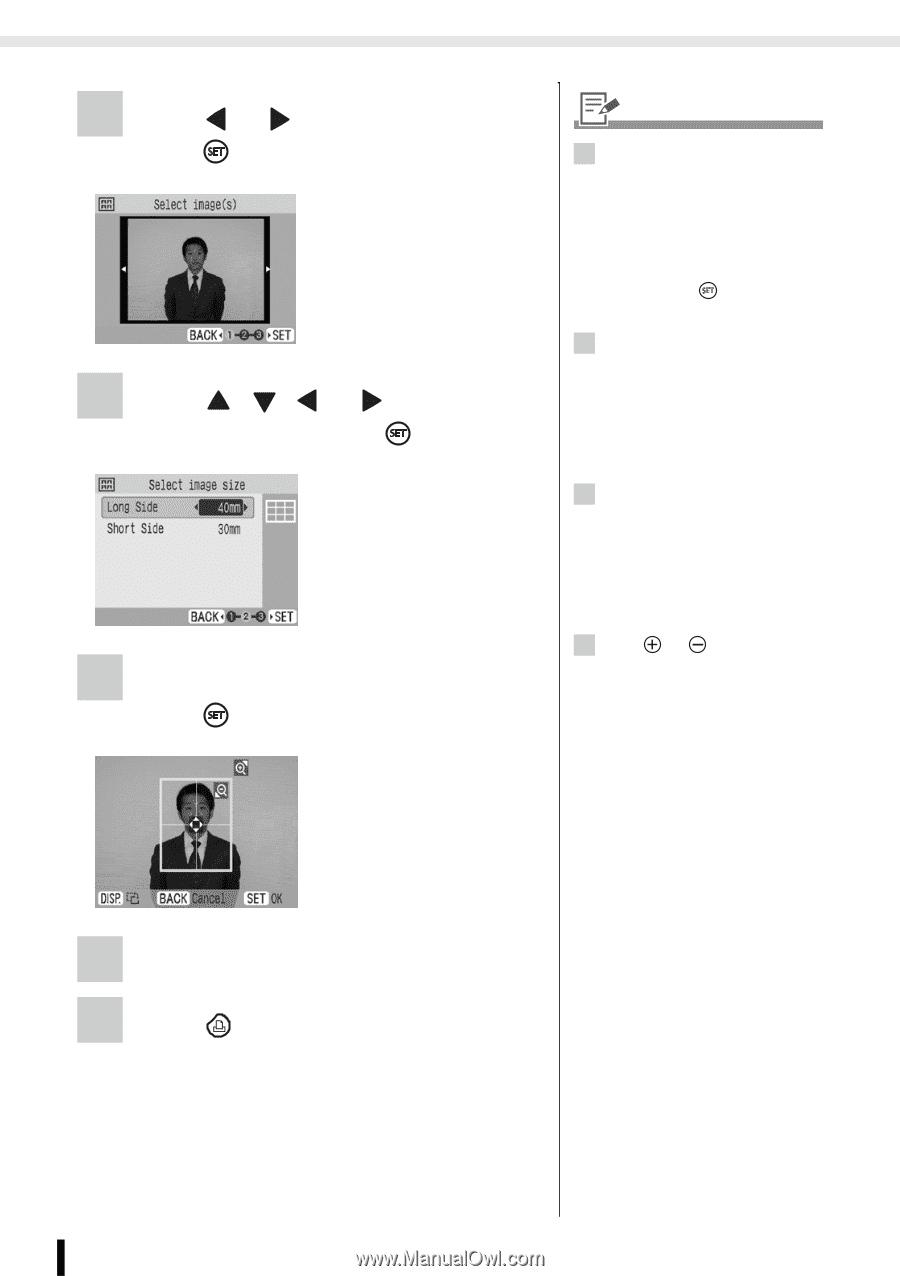
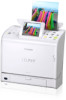
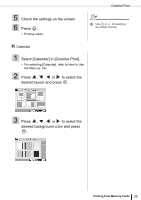
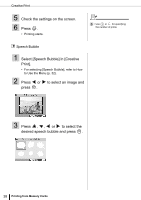
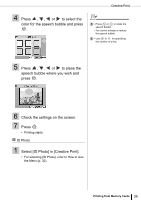
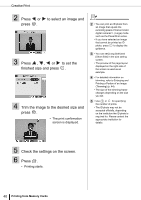
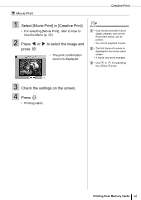
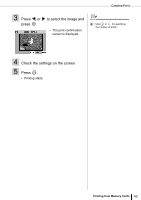
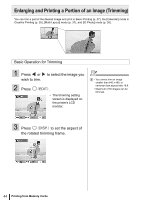
Creative Print 2 Press or press . to select an image and 3 Press , , or to set the finished size and press . 4 Trim the image to the desired size and press . • The print confirmation screen is displayed. 2 • You can print an ID photo from an image that equals the recording pixels of Canon brand digital cameras' L (Large) mode such as the PowerShot series. • If you have selected an image that cannot be printed as ID photo, press to display the guidance. 3 • You can set [Long Side] and [Short Side] in the size setting screen. • The preview of the page layout displayed on the right side of the screen is used as an example. 4 • For detailed information on trimming, refer to Enlarging and Printing a Portion of an Image (Trimming) (p. 44). • The size of the trimming frame changes depending on the size you set. 5 • Use or for specifying the number of prints. • The ID photo may not be accepted officially, depending on the institution the ID photo is required for. Please contact the appropriate institution for details. 5 Check the settings on the screen. 6 Press . • Printing starts. 40 Printing from Memory Cards
-
 1
1 -
2
-
3
-
4
-
5
-
6
-
7
-
8
-
9
-
10
-
11
-
12
-
13
-
14
-
15
-
16
-
17
-
18
-
19
-
20
-
21
-
22
-
23
-
24
-
25
-
26
-
27
-
28
-
29
-
30
-
31
-
32
-
33
-
34
-
 35
35 -
 36
36 -
 37
37 -
 38
38 -
 39
39 -
 40
40 -
 41
41 -
 42
42 -
 43
43 -
 44
44 -
 45
45 -
46
-
47
-
48
-
49
-
50
-
51
-
52
-
53
-
54
-
55
-
56
-
57
-
58
-
59
-
60
-
61
-
62
-
63
-
64
-
65
-
66
-
67
-
68
-
69
-
70
-
71
-
72
-
73
-
74
-
75
-
76
-
77
-
78
-
79
-
80
-
81
-
82
-
83
-
84
-
85
-
86
-
87
-
88
-
89
-
90
-
91
-
92
-
93
-
94
-
95
-
96
-
97
-
98
-
99
-
100
-
101
-
102
-
103
 |
 |