Cisco ESW-540-48 Administration Guide - Page 131
Configuring IPS, Intrusion Prevention System, Active Users,
 |
UPC - 882658251351
View all Cisco ESW-540-48 manuals
Add to My Manuals
Save this manual to your list of manuals |
Page 131 highlights
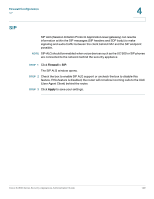
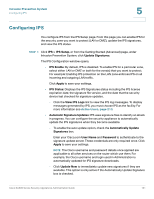
Intrusion Prevention System Configuring IPS 5 Configuring IPS You configure IPS from the IPS Setup page. From this page you can enable IPS for the security zone you want to protect (LAN or DMZ), update the IPS signatures, and view the IPS status. STEP 1 Click IPS > IPS Setup, or from the Getting Started (Advanced) page, under Intrusion Prevention System, click Update Signatures. The IPS Configuration window opens. • IPS Enable: By default, IPS is disabled. To enable IPS for a particular zone, select either LAN or DMZ or both for the zone(s) that you want to protect. For example: Enabling IPS protection on the LAN zone enforces IPS on all incoming and outgoing LAN traffic. Click Apply to save your settings. • IPS Status: Displays the IPS Signatures status including the IPS license expiration date, the signature file version, and the date that the security device last checked for signature updates. - Click the View IPS Logs link to view the IPS log messages. To display messages generated by IPS, you must choose IPS as the facility. For more information see Active Users, page 213. • Automatic Signature Updates: IPS uses signature files to identify an attack in progress. You can configure the security appliance to automatically update the IPS signatures when they become available. - To enable the auto update option, check the Automatically Update Signatures box. Enter your Cisco.com User Name and Password to authenticate to the signature update server. These credentials are only required once. Click Apply to save your settings. NOTE The Cisco username and password details once applied are applicable to all other services on the router which use them. For example, the Cisco username and login used in Administration is automatically updated for IPS signature downloads. - Click Update Now to immediately update new signatures if they are available. This option is only active if the Automatically Update Signature box is checked. Cisco SA500 Series Security Appliances Administration Guide 131
-
 1
1 -
2
-
3
-
4
-
5
-
6
-
7
-
8
-
9
-
10
-
11
-
12
-
13
-
14
-
15
-
16
-
17
-
18
-
19
-
20
-
21
-
22
-
23
-
24
-
25
-
26
-
27
-
28
-
29
-
30
-
31
-
32
-
33
-
34
-
35
-
36
-
37
-
38
-
39
-
40
-
41
-
42
-
43
-
44
-
45
-
46
-
47
-
48
-
49
-
50
-
51
-
52
-
53
-
54
-
55
-
56
-
57
-
58
-
59
-
60
-
61
-
62
-
63
-
64
-
65
-
66
-
67
-
68
-
69
-
70
-
71
-
72
-
73
-
74
-
75
-
76
-
77
-
78
-
79
-
80
-
81
-
82
-
83
-
84
-
85
-
86
-
87
-
88
-
89
-
90
-
91
-
92
-
93
-
94
-
95
-
96
-
97
-
98
-
99
-
100
-
101
-
102
-
103
-
104
-
105
-
106
-
107
-
108
-
109
-
110
-
111
-
112
-
113
-
114
-
115
-
116
-
117
-
118
-
119
-
120
-
121
-
122
-
123
-
124
-
125
-
 126
126 -
 127
127 -
 128
128 -
 129
129 -
 130
130 -
 131
131 -
 132
132 -
 133
133 -
 134
134 -
 135
135 -
 136
136 -
137
-
138
-
139
-
140
-
141
-
142
-
143
-
144
-
145
-
146
-
147
-
148
-
149
-
150
-
151
-
152
-
153
-
154
-
155
-
156
-
157
-
158
-
159
-
160
-
161
-
162
-
163
-
164
-
165
-
166
-
167
-
168
-
169
-
170
-
171
-
172
-
173
-
174
-
175
-
176
-
177
-
178
-
179
-
180
-
181
-
182
-
183
-
184
-
185
-
186
-
187
-
188
-
189
-
190
-
191
-
192
-
193
-
194
-
195
-
196
-
197
-
198
-
199
-
200
-
201
-
202
-
203
-
204
-
205
-
206
-
207
-
208
-
209
-
210
-
211
-
212
-
213
-
214
-
215
-
216
-
217
-
218
-
219
-
220
-
221
-
222
-
223
-
224
-
225
-
226
-
227
-
228
-
229
-
230
-
231
-
232
-
233
-
234
-
235
-
236
-
237
-
238
-
239
-
240
 |
 |