Cisco ESW-540-48 Administration Guide - Page 175
Adding or Editing User Login Policies, User Login Policy By IP Address
 |
UPC - 882658251351
View all Cisco ESW-540-48 manuals
Add to My Manuals
Save this manual to your list of manuals |
Page 175 highlights
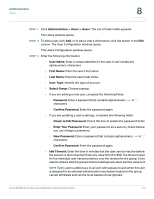
Administration Users STEP 4 Click Apply to save your settings. 8 Adding or Editing User Login Policies STEP 1 To add or edit user login policies, click Administration > Users > Users. The Users window opens. You cannot configure these settings for the system default users, only for the users that you add. STEP 2 Proceed as needed, based on the type of policy: • User Login Policy: Click the first button in the Edit User Policies column. When the User Login Policies window opens, enter the following information: - Disable Login: Check this box to disable the account, or uncheck this box to enable the account. This setting cannot be changed for the default admin account. - Deny Login from WAN Interface: Check this box to prevent the user from logging in from the WAN, or uncheck this box to allow the user to log in from the WAN. This setting cannot be changed for the default admin account. • User Login Policy By Browser: Click the second button in the Edit User Policies column. When the User Policy By Client Browser window opens, enter the following information: - In the User Policy By Client Browser area, choose whether to Deny Login from Defined Browsers or to Allow Login only from Defined Browsers. - To add a browser, click Add, choose the browser, and then click Apply. - To delete a browser, check the box, and then click Delete. • User Login Policy By IP Address: Click the third button in the Edit User Policies column. When the User Policy By Source IP Address window opens, enter the following information: - In the User Policy By Source IP Address area, choose whether to Deny Login from Defined Addresses or to Allow Login only from Defined Addresses. Cisco SA500 Series Security Appliances Administration Guide 175
-
 1
1 -
2
-
3
-
4
-
5
-
6
-
7
-
8
-
9
-
10
-
11
-
12
-
13
-
14
-
15
-
16
-
17
-
18
-
19
-
20
-
21
-
22
-
23
-
24
-
25
-
26
-
27
-
28
-
29
-
30
-
31
-
32
-
33
-
34
-
35
-
36
-
37
-
38
-
39
-
40
-
41
-
42
-
43
-
44
-
45
-
46
-
47
-
48
-
49
-
50
-
51
-
52
-
53
-
54
-
55
-
56
-
57
-
58
-
59
-
60
-
61
-
62
-
63
-
64
-
65
-
66
-
67
-
68
-
69
-
70
-
71
-
72
-
73
-
74
-
75
-
76
-
77
-
78
-
79
-
80
-
81
-
82
-
83
-
84
-
85
-
86
-
87
-
88
-
89
-
90
-
91
-
92
-
93
-
94
-
95
-
96
-
97
-
98
-
99
-
100
-
101
-
102
-
103
-
104
-
105
-
106
-
107
-
108
-
109
-
110
-
111
-
112
-
113
-
114
-
115
-
116
-
117
-
118
-
119
-
120
-
121
-
122
-
123
-
124
-
125
-
126
-
127
-
128
-
129
-
130
-
131
-
132
-
133
-
134
-
135
-
136
-
137
-
138
-
139
-
140
-
141
-
142
-
143
-
144
-
145
-
146
-
147
-
148
-
149
-
150
-
151
-
152
-
153
-
154
-
155
-
156
-
157
-
158
-
159
-
160
-
161
-
162
-
163
-
164
-
165
-
166
-
167
-
168
-
169
-
 170
170 -
 171
171 -
 172
172 -
 173
173 -
 174
174 -
 175
175 -
 176
176 -
 177
177 -
 178
178 -
 179
179 -
 180
180 -
181
-
182
-
183
-
184
-
185
-
186
-
187
-
188
-
189
-
190
-
191
-
192
-
193
-
194
-
195
-
196
-
197
-
198
-
199
-
200
-
201
-
202
-
203
-
204
-
205
-
206
-
207
-
208
-
209
-
210
-
211
-
212
-
213
-
214
-
215
-
216
-
217
-
218
-
219
-
220
-
221
-
222
-
223
-
224
-
225
-
226
-
227
-
228
-
229
-
230
-
231
-
232
-
233
-
234
-
235
-
236
-
237
-
238
-
239
-
240
 |
 |
