Creative 0404 Owners Manual - Page 23
Devices, VST Multitrack, Setup, E-MU 0404|USB, Switch, Control Panel, ASIO Buffer Latency - latency asio
 |
UPC - 054651129276
View all Creative 0404 manuals
Add to My Manuals
Save this manual to your list of manuals |
Page 23 highlights
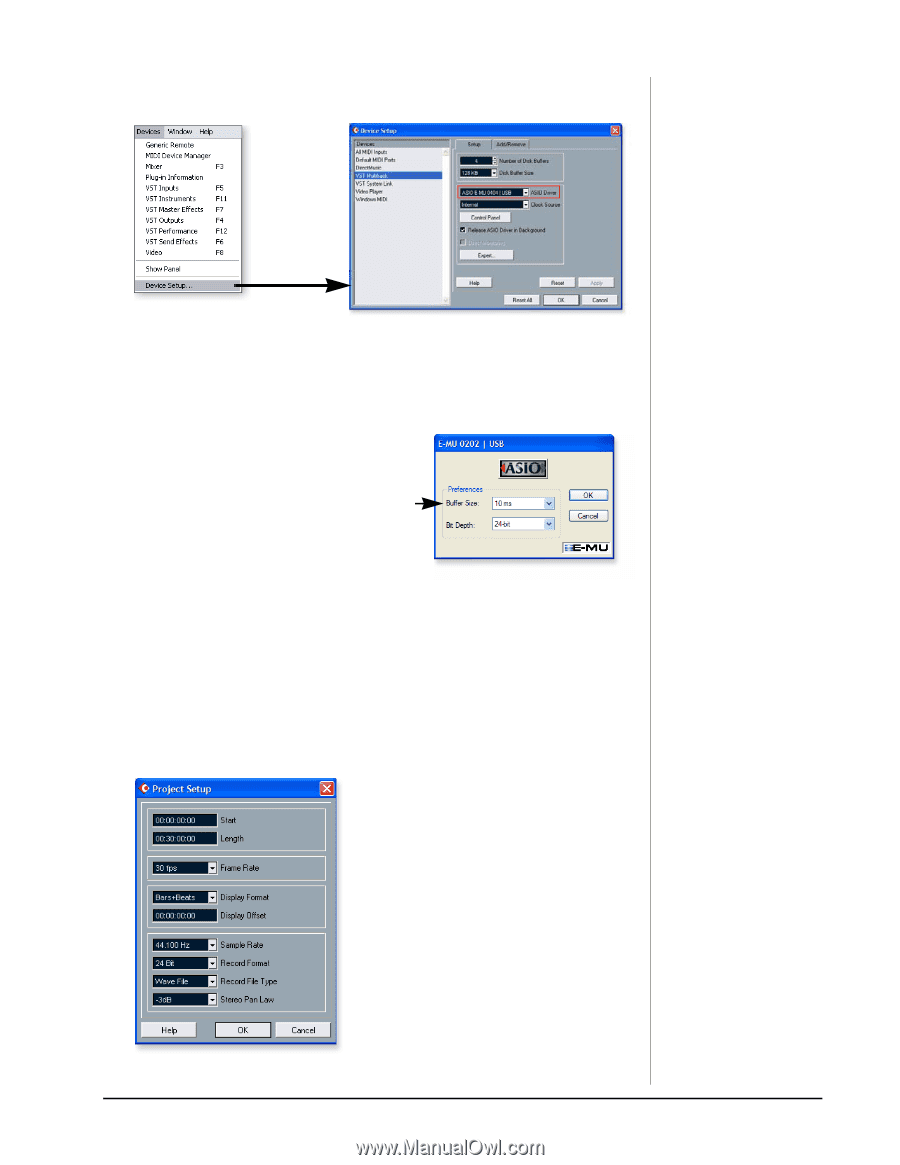
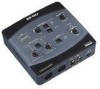
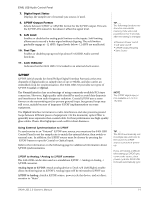
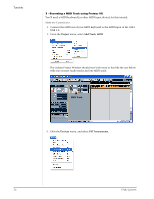
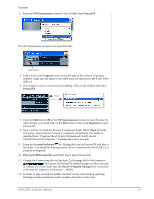
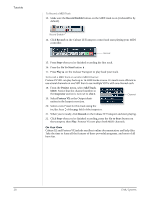
Tutorials 6. Select Device Setup... from the Devices menu. 7. Select VST Multitrack from the Devices list. 8. In the Setup section of the dialog box, select ASIO E-MU 0404|USB. A pop up dialog box asks, if you want to keep or switch the ASIO driver. Select Switch. Buffer Latency Setting 9. Click the Control Panel button. The popup dialog box shown at right appears. 10. Set the ASIO Buffer Latency as low as your computer will allow and click OK. (10ms is a good starting point.) A low latency setting is important to assure fast response when using virtual instruments and to minimize delay when monitoring through Cubase. If you hear crackles or other audio problems, try increasing the Buffer Size. 11. Close the Device Setup screen by clicking OK. 12. Note: If the Cubase LE application crashes for any reason, it is recommended that you re-boot the computer. 13. Select Project Setup from the Project menu. This is where you set the Sample Rate and Record Format (bit depth), among other things. Set the Record Format to 24-bits and the Sample Rate to 44.1kHz. 0404 USB 2.0 Owner's Manual 23
-
 1
1 -
2
-
3
-
4
-
5
-
6
-
7
-
8
-
9
-
10
-
11
-
12
-
13
-
14
-
15
-
16
-
17
-
 18
18 -
 19
19 -
 20
20 -
 21
21 -
 22
22 -
 23
23 -
 24
24 -
 25
25 -
 26
26 -
 27
27 -
 28
28 -
29
-
30
-
31
-
32
-
33
-
34
-
35
-
36
-
37
-
38
-
39
-
40
-
41
-
42
-
43
-
44
-
45
-
46
-
47
-
48
-
49
-
50
-
51
-
52
-
53
-
54
-
55
-
56
 |
 |