D-Link DCS-6511 Product Manual - Page 12
Standard Mounting Instructions
 |
View all D-Link DCS-6511 manuals
Add to My Manuals
Save this manual to your list of manuals |
Page 12 highlights
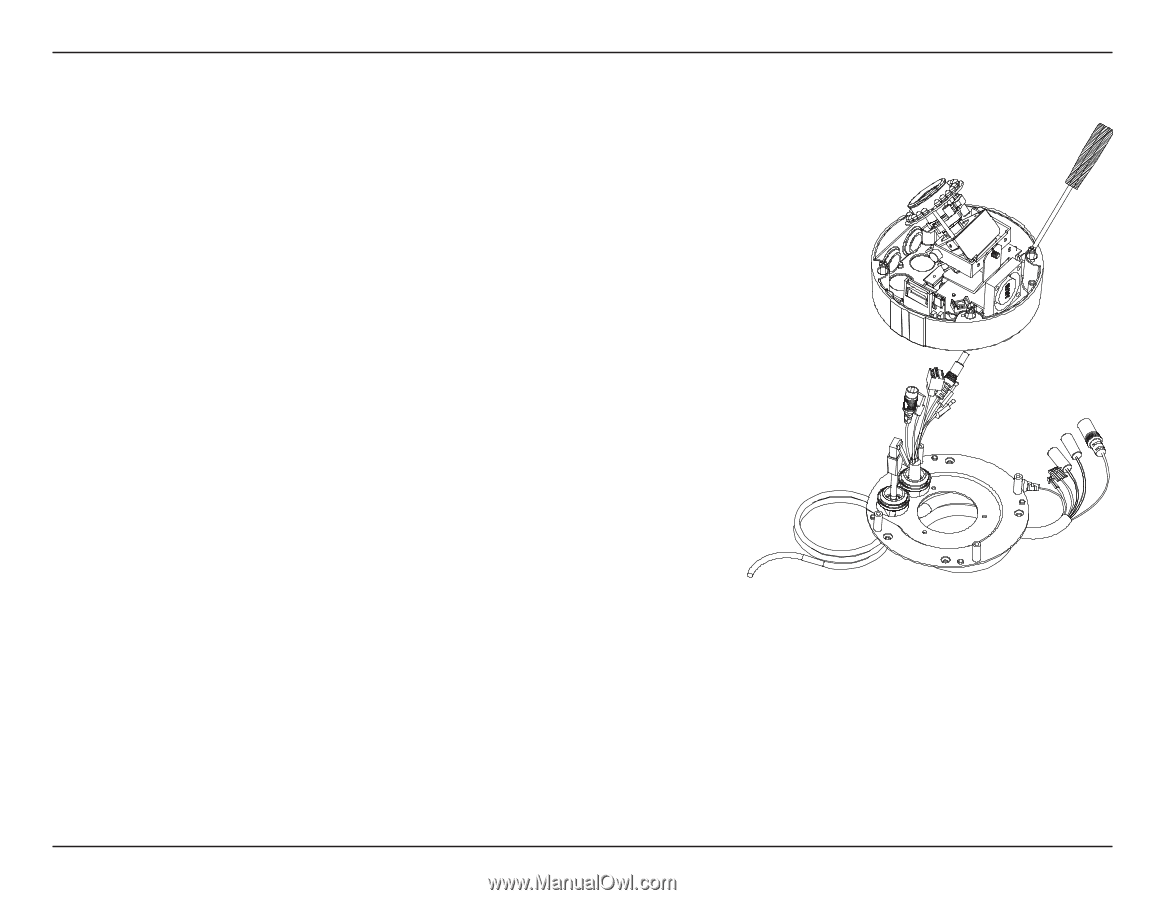
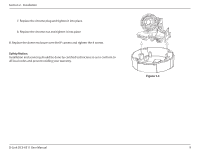
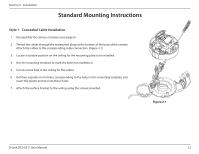
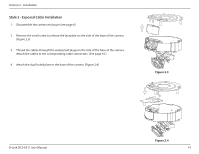
Section 2 - Installation Standard Mounting Instructions Style 1 - Concealed Cable Installation 1. Disassemble the camera enclosure (see page 6). 2. Thread the cables through the waterproof plugs at the bottom of the base of the camera. Attach the cables to the corresponding cable connectors. (Figure 2.1) 3. Locate a suitable position on the ceiling for the mounting plate to be installed. 4. Use the mounting template to mark the holes for installation. 5. Cut an access hole in the ceiling for the cables. 6. Drill four separate 6 mm holes corresponding to the holes in the mounting template and insert the plastic anchors into these holes. 7. Attach the surface bracket to the ceiling using the screws provided. Figure 2.1 D-Link DCS-6511 User Manual 12
-
 1
1 -
2
-
3
-
4
-
5
-
6
-
 7
7 -
 8
8 -
 9
9 -
 10
10 -
 11
11 -
 12
12 -
 13
13 -
 14
14 -
 15
15 -
 16
16 -
 17
17 -
18
-
19
-
20
-
21
-
22
-
23
-
24
-
25
-
26
-
27
-
28
-
29
-
30
-
31
-
32
-
33
-
34
-
35
-
36
-
37
-
38
-
39
-
40
-
41
-
42
-
43
-
44
-
45
-
46
-
47
-
48
-
49
-
50
-
51
-
52
-
53
-
54
-
55
-
56
-
57
-
58
-
59
-
60
-
61
-
62
-
63
-
64
-
65
-
66
-
67
-
68
-
69
-
70
-
71
-
72
-
73
-
74
 |
 |