D-Link DCS-6511 Product Manual - Page 9
Safety Notice, D-Link DCS-6511 User Manual
 |
View all D-Link DCS-6511 manuals
Add to My Manuals
Save this manual to your list of manuals |
Page 9 highlights
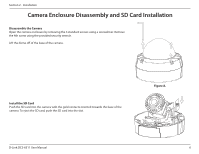
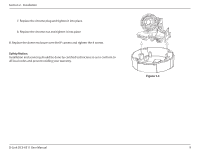
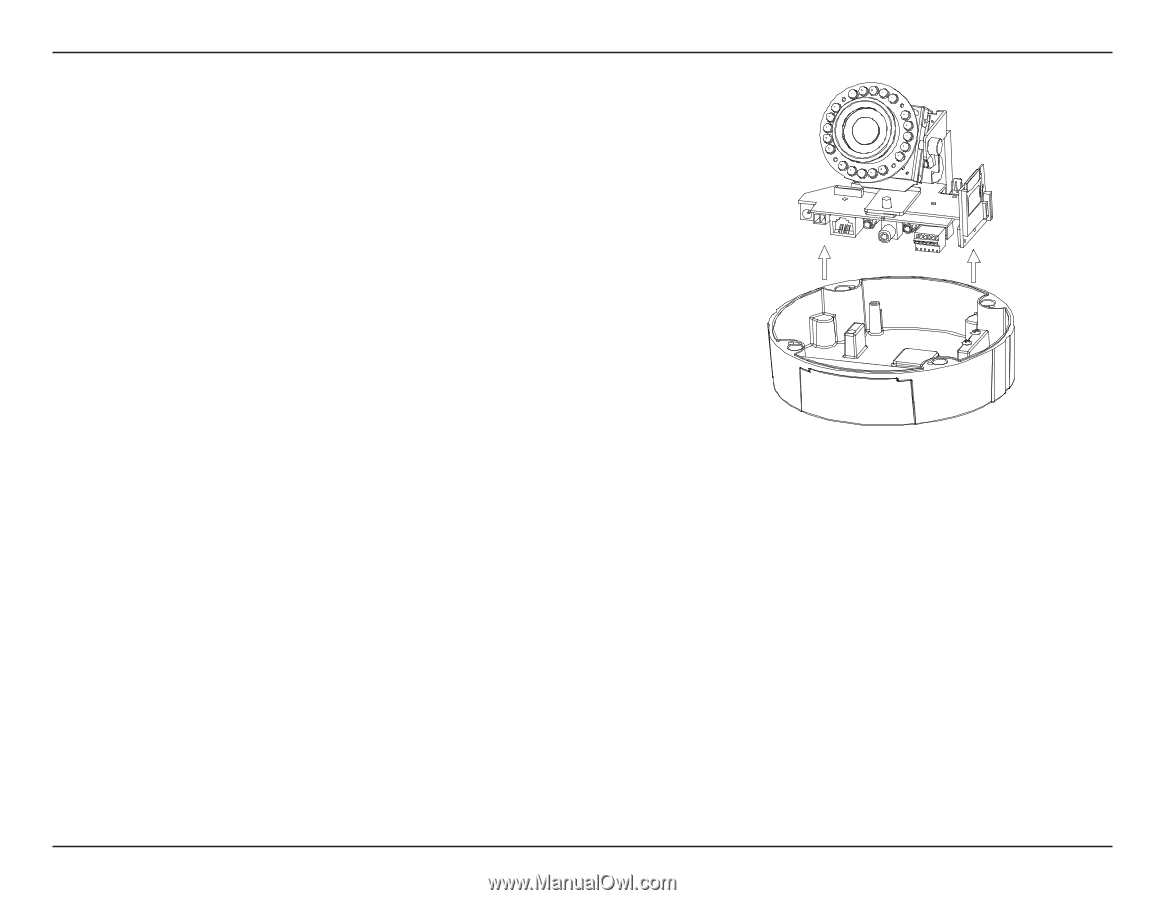
Section 2 - Installation 7. Replace the chrome plug and tighten it into place. 8. Replace the chrome nut and tighten it into place B. Replace the dome enclosure over the IP camera and tighten the 4 screws. Safety Notice: Installation and servicing should be done by certified technicians so as to conform to all local codes and prevent voiding your warranty. Figure 1.3 D-Link DCS-6511 User Manual 9
-
 1
1 -
2
-
3
-
 4
4 -
 5
5 -
 6
6 -
 7
7 -
 8
8 -
 9
9 -
 10
10 -
 11
11 -
 12
12 -
 13
13 -
 14
14 -
15
-
16
-
17
-
18
-
19
-
20
-
21
-
22
-
23
-
24
-
25
-
26
-
27
-
28
-
29
-
30
-
31
-
32
-
33
-
34
-
35
-
36
-
37
-
38
-
39
-
40
-
41
-
42
-
43
-
44
-
45
-
46
-
47
-
48
-
49
-
50
-
51
-
52
-
53
-
54
-
55
-
56
-
57
-
58
-
59
-
60
-
61
-
62
-
63
-
64
-
65
-
66
-
67
-
68
-
69
-
70
-
71
-
72
-
73
-
74
 |
 |
9
D-Link DCS-6511 User Manual
Section 2 - Installation
Figure 1.3
7. Replace the chrome plug and tighten it into place.
8. Replace the chrome nut and tighten it into place
B. Replace the dome enclosure over the IP camera and tighten the 4 screws.
Safety Notice:
Installation and servicing should be done by certified technicians so as to conform to
all local codes and prevent voiding your warranty.