D-Link DCS-6511 Product Manual - Page 15
D-Link DCS-6511 Manual
 |
View all D-Link DCS-6511 manuals
Add to My Manuals
Save this manual to your list of manuals |
Page 15 highlights
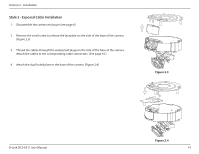
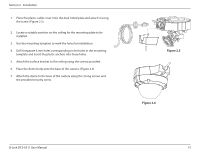
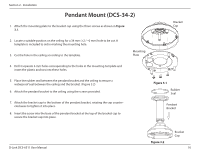
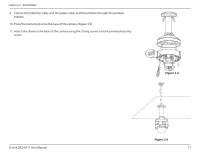
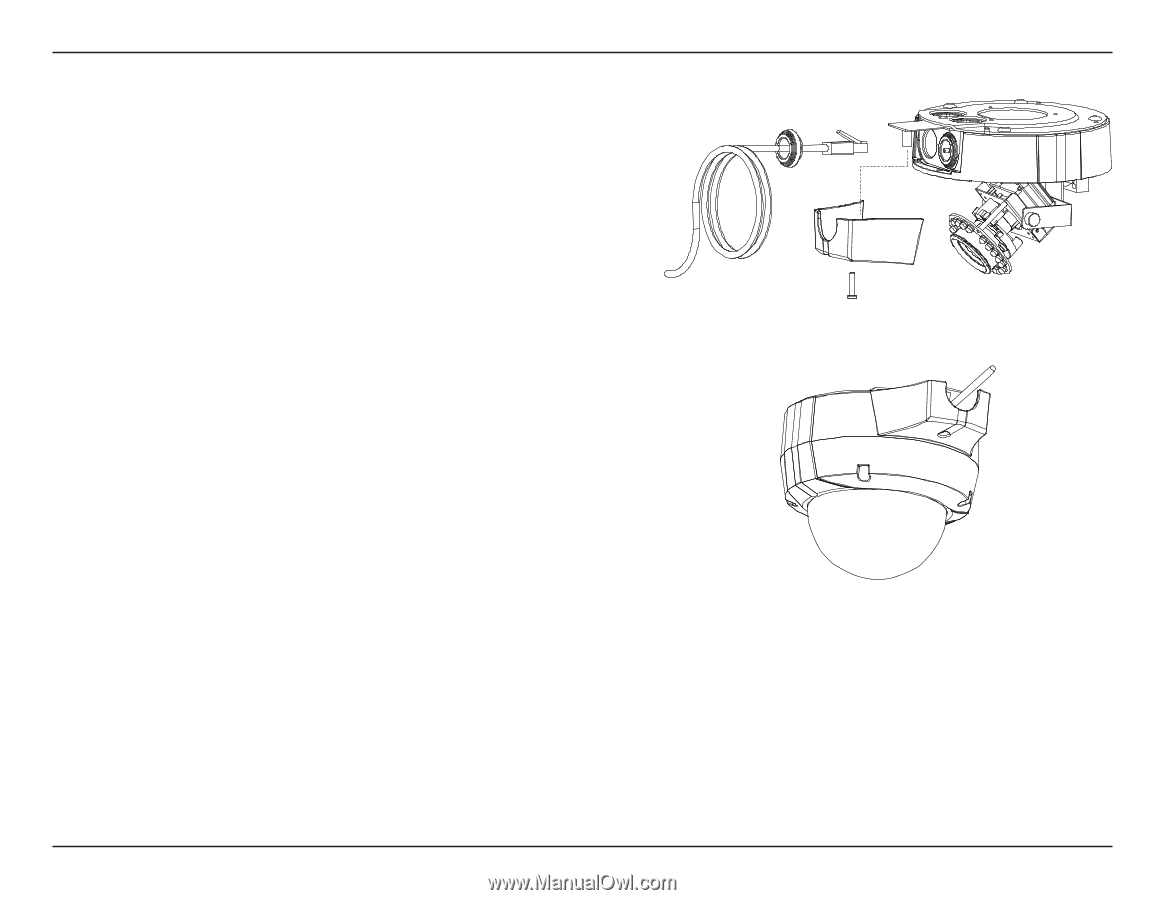
Section 2 - Installation 1. Place the plastic cable cover onto the dual-holed plate and attach it using the screw. (Figure 2.5) 2. Locate a suitable position on the ceiling for the mounting plate to be installed. 3. Use the mounting template to mark the holes for installation. 4. Drill 4 separate 6 mm holes corresponding to the holes in the mounting template and insert the plastic anchors into these holes. 5. Attach the surface bracket to the ceiling using the screws provided. 6. Place the dome body onto the base of the camera. (Figure 2.6) 7. Attach the dome to the base of the camera using the 3 long screws and the provided security screw. Figure 2.5 Figure 2.6 D-Link DCS-6511 User Manual 15
-
 1
1 -
2
-
3
-
4
-
5
-
6
-
7
-
8
-
9
-
 10
10 -
 11
11 -
 12
12 -
 13
13 -
 14
14 -
 15
15 -
 16
16 -
 17
17 -
 18
18 -
 19
19 -
 20
20 -
21
-
22
-
23
-
24
-
25
-
26
-
27
-
28
-
29
-
30
-
31
-
32
-
33
-
34
-
35
-
36
-
37
-
38
-
39
-
40
-
41
-
42
-
43
-
44
-
45
-
46
-
47
-
48
-
49
-
50
-
51
-
52
-
53
-
54
-
55
-
56
-
57
-
58
-
59
-
60
-
61
-
62
-
63
-
64
-
65
-
66
-
67
-
68
-
69
-
70
-
71
-
72
-
73
-
74
 |
 |
15
D-Link DCS-6511 User Manual
Section 2 - Installation
Figure 2.5
Figure 2.6
1.
Place the plastic cable cover onto the dual-holed plate and attach it using
the screw. (Figure 2.5)
2.
Locate a suitable position on the ceiling for the mounting plate to be
installed.
3.
Use the mounting template to mark the holes for installation.
4.
Drill 4 separate 6 mm holes corresponding to the holes in the mounting
template and insert the plastic anchors into these holes.
5.
Attach the surface bracket to the ceiling using the screws provided.
6.
Place the dome body onto the base of the camera. (Figure 2.6)
7.
Attach the dome to the base of the camera using the 3 long screws and
the provided security screw.