D-Link DCS-7110 Product Manual - Page 32
Sharpness, Overlay Title and Time Stamp on Video, Privacy Mask, Enable privacy mask, to apply changes.
 |
UPC - 790069350207
View all D-Link DCS-7110 manuals
Add to My Manuals
Save this manual to your list of manuals |
Page 32 highlights
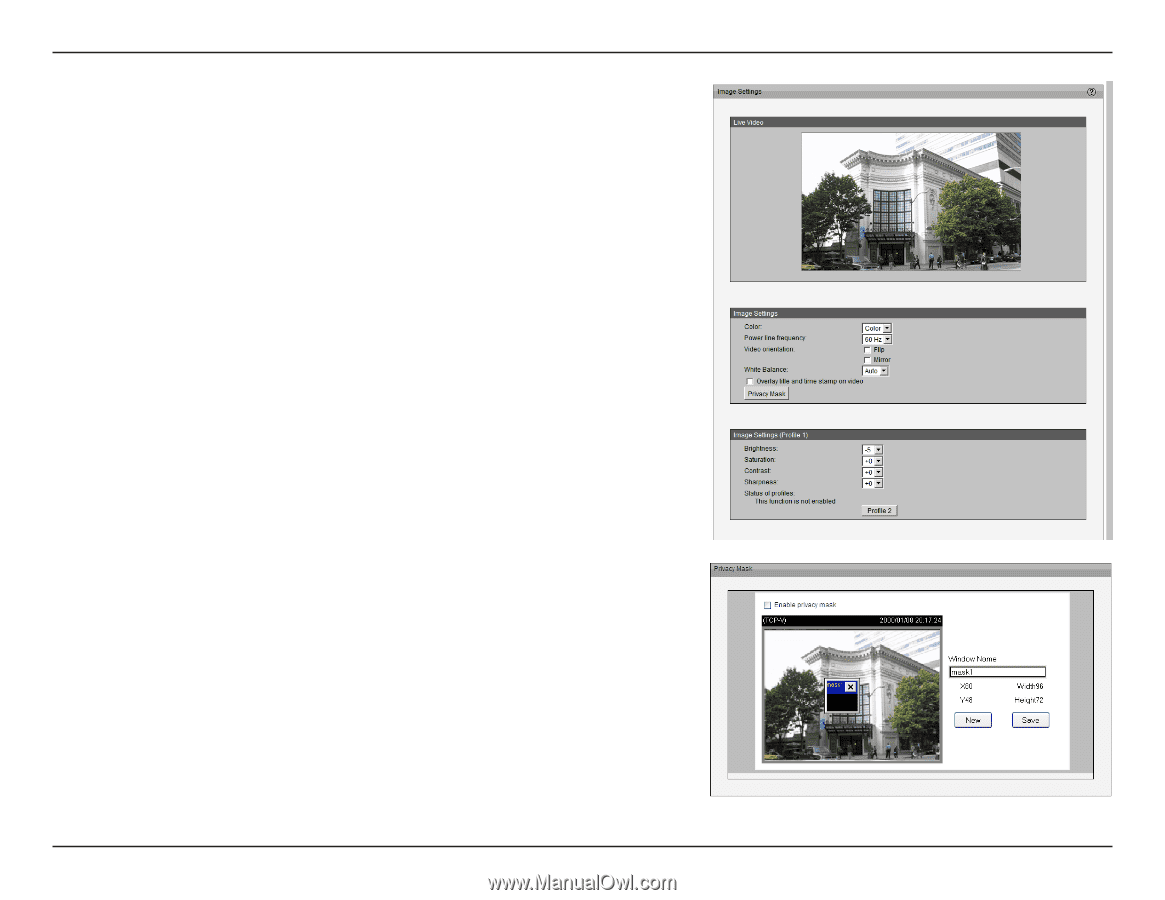
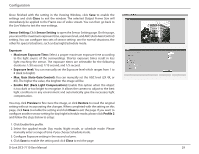
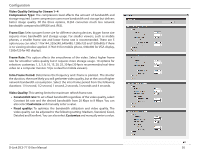
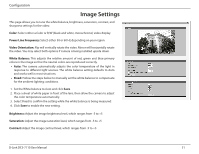
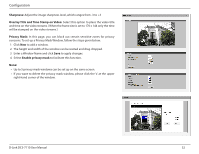
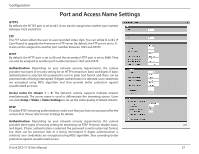
Configuration Sharpness: Adjust the image sharpness level, which ranges from -3 to +3 Overlay Title and Time Stamp on Video: Select this option to place the video title and time on the video streams. (When the frame size is set to 176 x 144 only the time will be stamped on the video streams.) Privacy Mask: In this page, you can block out certain sensitive zones for privacy concerns. To set up a Privacy Mask Window, follow the steps given below: 1. Click New to add a window. 2. The height and width of the window can be resized and drag-dropped. 3. Enter a Window Name and click Save to apply changes. 4. Select Enable privacy mask to facilitate this function. None: • Up to 5 privacy mask windows can be set up on the same screen. • If you want to delete the privacy mask window, please click the 'x' at the upper right-hand corner of the window. D-Link DCS-7110 User Manual 32
-
 1
1 -
2
-
3
-
4
-
5
-
6
-
7
-
8
-
9
-
10
-
11
-
12
-
13
-
14
-
15
-
16
-
17
-
18
-
19
-
20
-
21
-
22
-
23
-
24
-
25
-
26
-
 27
27 -
 28
28 -
 29
29 -
 30
30 -
 31
31 -
 32
32 -
 33
33 -
 34
34 -
 35
35 -
 36
36 -
 37
37 -
38
-
39
-
40
-
41
-
42
-
43
-
44
-
45
-
46
-
47
-
48
-
49
-
50
-
51
-
52
-
53
-
54
-
55
-
56
-
57
-
58
-
59
-
60
-
61
-
62
-
63
-
64
-
65
-
66
-
67
-
68
-
69
-
70
-
71
-
72
-
73
-
74
-
75
-
76
-
77
-
78
-
79
-
80
 |
 |