D-Link DCS-7110 Product Manual - Page 40
HTTPS, Create Self-signed Certificate Automatically
 |
UPC - 790069350207
View all D-Link DCS-7110 manuals
Add to My Manuals
Save this manual to your list of manuals |
Page 40 highlights
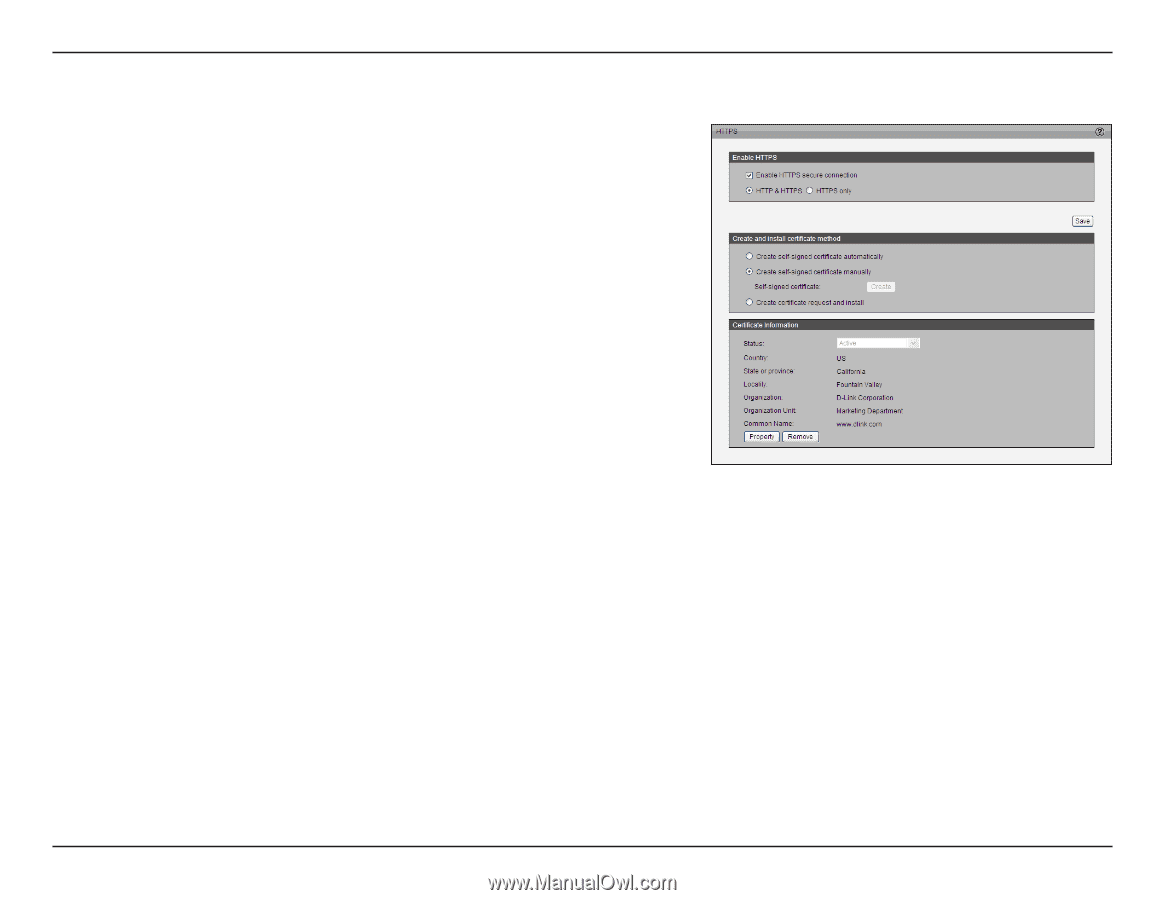
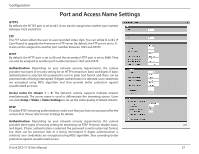
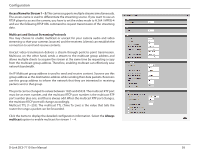
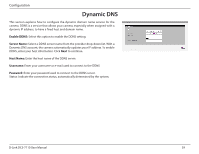
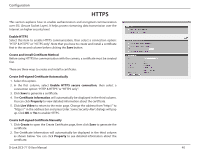
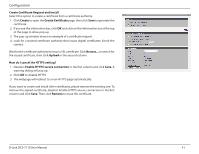
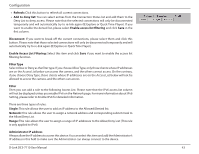
Configuration HTTPS This section explains how to enable authentication and encrypted communication over SSL (Secure Socket Layer). It helps protect streaming data transmission over the Internet on higher security level. Enable HTTPS Select this item to enable HTTPS communication, then select a connection option: "HTTP & HTTPS" or "HTTPS only". Note that you have to create and install a certificate first in the second column before clicking the Save button. Create and Install Certificate Method Before using HTTPS for communication with the camera, a certificate must be created first. There are three ways to create and install a certificate: Create Self-signed Certificate Automatically 1. Select this option. 2. In the first column, select Enable HTTPS secure connection, then select a connection option: "HTTP & HTTPS" or "HTTPS only". 3. Click Save to generate a certificate. 4. The Certificate Information will automatically be displayed in the third column. You can click Property to view detailed information about the certificate. 5. Click Live Video to return to the main page. Change the address from "http://" to "https://" in the address bar and press Enter. Some Security Alert dialogs will pop up. Click OK or Yes to enable HTTPS. Create Self-signed Certificate Manually 1. Click Create to open the Create Certificate page, then click Save to generate the certificate. 2. The Certificate Information will automatically be displayed in the third column as shown below. You can click Property to see detailed information about the certificate. D-Link DCS-7110 User Manual 40
-
 1
1 -
2
-
3
-
4
-
5
-
6
-
7
-
8
-
9
-
10
-
11
-
12
-
13
-
14
-
15
-
16
-
17
-
18
-
19
-
20
-
21
-
22
-
23
-
24
-
25
-
26
-
27
-
28
-
29
-
30
-
31
-
32
-
33
-
34
-
 35
35 -
 36
36 -
 37
37 -
 38
38 -
 39
39 -
 40
40 -
 41
41 -
 42
42 -
 43
43 -
 44
44 -
 45
45 -
46
-
47
-
48
-
49
-
50
-
51
-
52
-
53
-
54
-
55
-
56
-
57
-
58
-
59
-
60
-
61
-
62
-
63
-
64
-
65
-
66
-
67
-
68
-
69
-
70
-
71
-
72
-
73
-
74
-
75
-
76
-
77
-
78
-
79
-
80
 |
 |