DIRECTV R10 System Manual - Page 36
Phone Setup - codes
 |
View all DIRECTV R10 manuals
Add to My Manuals
Save this manual to your list of manuals |
Page 36 highlights
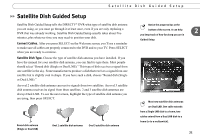
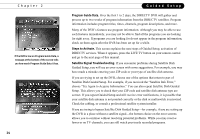
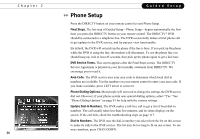
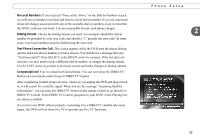
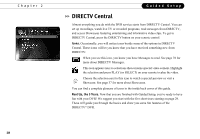
Chapter 2 26 Guided Setup Phone Setup Press the DIRECTV button on your remote control to start Phone Setup. Final Steps. The last step of Guided Setup-Phone Setup-begins automatically the first time you press the DIRECTV button on your remote control. The DIRECTV® DVR should be connected to a telephone line. The DVR occasionally makes a brief phone call to get updates to the DVR service, and for pay per view functionality. By default, the DVR will not pick up the phone if the line is busy. If you pick up the phone while the DVR is using the line, the modem will disconnect. To use the phone line you should hang up, wait at least 45 seconds, then pick up the phone again to get a dial tone. DVR Service Terms. This screen appears after the Final Steps screen. The DIRECTV Service Agreement is printed on your first monthly statement from DIRECTV. We encourage you to read it. Area Code. The DVR service uses your area code to determine which local dial-in numbers are available. Use the numbers on your remote control to enter your area code. If you make a mistake, press LEFT arrow to correct it. Phone Dialing Options. Most people will not need to change the settings the DVR uses to dial out. However, if your phone system uses special dialing options, select "Yes." See "Phone Dialing Options" on page 91 for help with the various settings. Update Dial-In Numbers. The DVR makes a toll-free call to get a list of local dial-in numbers. The call usually takes less than five minutes, and its status displays on the screen. If the call fails, check the troubleshooting steps on page 117. Dial-In Numbers. The DVR uses the dial-in number you select from the list on this screen to make its calls to the DVR service. The list may be too long to fit on one screen. To see more numbers, press CHAN DOWN.
-
 1
1 -
2
-
3
-
4
-
5
-
6
-
7
-
8
-
9
-
10
-
11
-
12
-
13
-
14
-
15
-
16
-
17
-
18
-
19
-
20
-
21
-
22
-
23
-
24
-
25
-
26
-
27
-
28
-
29
-
30
-
 31
31 -
 32
32 -
 33
33 -
 34
34 -
 35
35 -
 36
36 -
 37
37 -
 38
38 -
 39
39 -
 40
40 -
 41
41 -
42
-
43
-
44
-
45
-
46
-
47
-
48
-
49
-
50
-
51
-
52
-
53
-
54
-
55
-
56
-
57
-
58
-
59
-
60
-
61
-
62
-
63
-
64
-
65
-
66
-
67
-
68
-
69
-
70
-
71
-
72
-
73
-
74
-
75
-
76
-
77
-
78
-
79
-
80
-
81
-
82
-
83
-
84
-
85
-
86
-
87
-
88
-
89
-
90
-
91
-
92
-
93
-
94
-
95
-
96
-
97
-
98
-
99
-
100
-
101
-
102
-
103
-
104
-
105
-
106
-
107
-
108
-
109
-
110
-
111
-
112
-
113
-
114
-
115
-
116
-
117
-
118
-
119
-
120
-
121
-
122
-
123
-
124
-
125
-
126
-
127
-
128
-
129
-
130
-
131
-
132
-
133
-
134
-
135
-
136
-
137
-
138
-
139
-
140
-
141
-
142
-
143
-
144
-
145
-
146
-
147
-
148
-
149
-
150
-
151
-
152
-
153
-
154
-
155
-
156
-
157
-
158
-
159
-
160
-
161
-
162
-
163
-
164
-
165
 |
 |