Dell 2130cn User Guide - Page 138
Connecting the Printer to the Network
 |
UPC - 335521301238
View all Dell 2130cn manuals
Add to My Manuals
Save this manual to your list of manuals |
Page 138 highlights
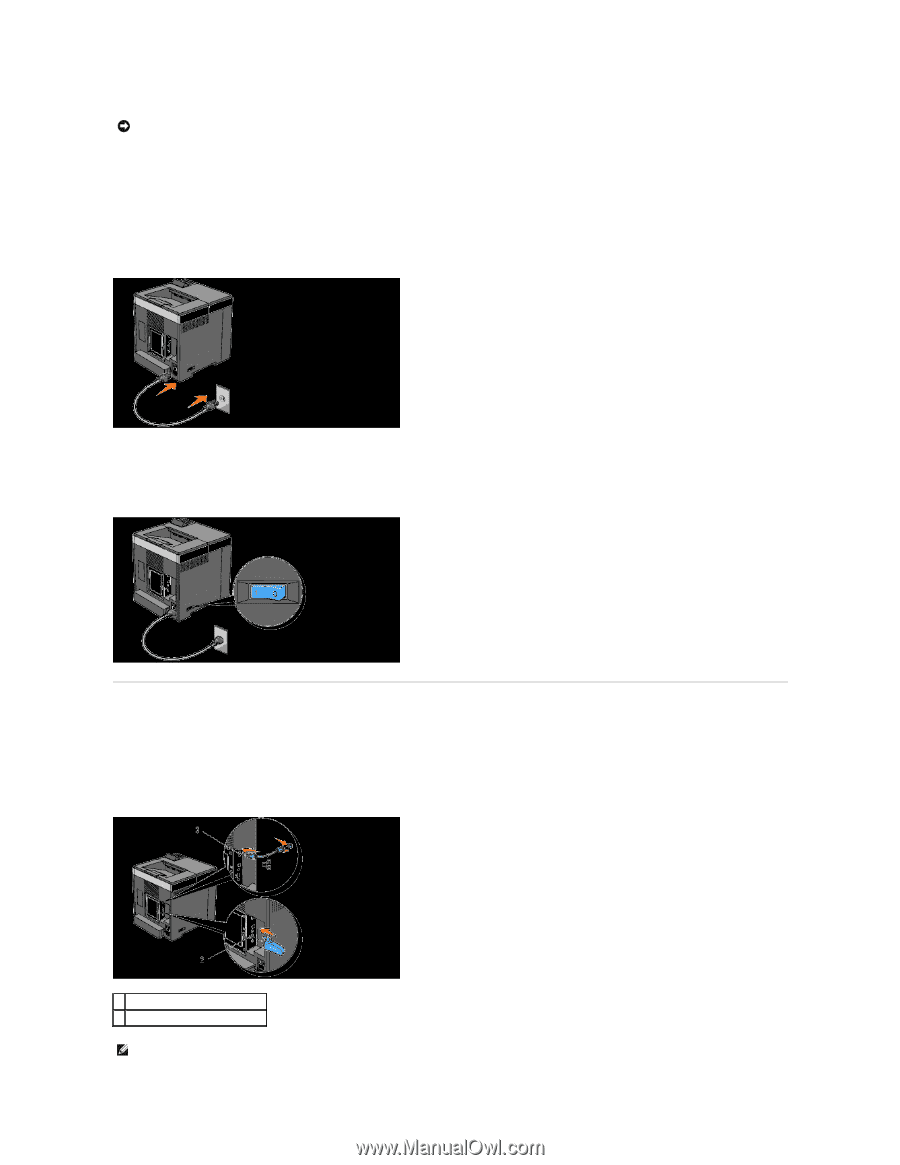
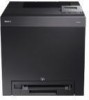
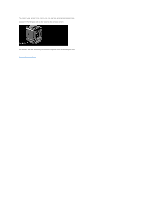
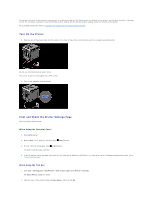
NOTICE: Do not plug a USB cable into the USB port on your keyboard (If present). A USB port requires a USB cable. Ensure that you match the USB symbol on the cable to the USB symbol on the printer. Plug the other end of the cable into a USB port on the back of the computer. Turn On the Printer 1. Connect the power cable to the printer and plug it into a power source. Do not use extension cords or power strips. The printer should not be plugged into a UPS system. 2. Turn on the computer and the printer. Connecting the Printer to the Network To attach the printer to a network: 1. Ensure the printer, computer, and any other attached devices are turned off and unplugged. 2. Connect the printer to the network using an Ethernet cable or the optional wireless printer adapter. 2 Wireless Printer Adapter Socket 3 Ethernet Port NOTE: When the wireless printer adapter is connected, you cannot use the Ethernet port for a wired connection.
-
 1
1 -
2
-
3
-
4
-
5
-
6
-
7
-
8
-
9
-
10
-
11
-
12
-
13
-
14
-
15
-
16
-
17
-
18
-
19
-
20
-
21
-
22
-
23
-
24
-
25
-
26
-
27
-
28
-
29
-
30
-
31
-
32
-
33
-
34
-
35
-
36
-
37
-
38
-
39
-
40
-
41
-
42
-
43
-
44
-
45
-
46
-
47
-
48
-
49
-
50
-
51
-
52
-
53
-
54
-
55
-
56
-
57
-
58
-
59
-
60
-
61
-
62
-
63
-
64
-
65
-
66
-
67
-
68
-
69
-
70
-
71
-
72
-
73
-
74
-
75
-
76
-
77
-
78
-
79
-
80
-
81
-
82
-
83
-
84
-
85
-
86
-
87
-
88
-
89
-
90
-
91
-
92
-
93
-
94
-
95
-
96
-
97
-
98
-
99
-
100
-
101
-
102
-
103
-
104
-
105
-
106
-
107
-
108
-
109
-
110
-
111
-
112
-
113
-
114
-
115
-
116
-
117
-
118
-
119
-
120
-
121
-
122
-
123
-
124
-
125
-
126
-
127
-
128
-
129
-
130
-
131
-
132
-
 133
133 -
 134
134 -
 135
135 -
 136
136 -
 137
137 -
 138
138 -
 139
139 -
 140
140 -
 141
141 -
 142
142 -
 143
143 -
144
-
145
-
146
-
147
-
148
-
149
-
150
-
151
-
152
-
153
-
154
-
155
-
156
-
157
-
158
-
159
-
160
-
161
-
162
-
163
-
164
-
165
-
166
-
167
-
168
-
169
-
170
-
171
-
172
-
173
-
174
-
175
-
176
-
177
-
178
-
179
-
180
-
181
-
182
-
183
-
184
-
185
-
186
-
187
-
188
-
189
-
190
-
191
-
192
-
193
-
194
-
195
-
196
-
197
-
198
-
199
-
200
-
201
-
202
-
203
-
204
 |
 |