Dell 2130cn User Guide - Page 53
Setting Up for Shared Printing
 |
UPC - 335521301238
View all Dell 2130cn manuals
Add to My Manuals
Save this manual to your list of manuals |
Page 53 highlights
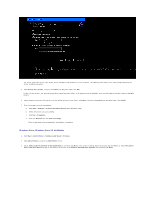
Back to Contents Page Setting Up for Shared Printing Point and Print P e e r-t o-P e e r You can share your new printer on the network using the Drivers and Utilities CD that shipped with your printer, or using Microsoft® point and print or peer-topeer method. However, if you use one of the Microsoft methods, you will not have all the features, such as the status monitor and other printer utilities, that are installed with the Drivers and Utilities CD. To share a locally-attached printer on the network, you need to share the printer, and then install the shared printer on network clients: NOTE: The following are options you need to buy separately for shared printing. n Ethernet cable Windows® XP, Windows XP 64-bit Edition, Windows Server® 2003, Windows Server 2003 Enterprise x64 Edition, Windows 2000 1. Click start® Printers and Faxes (Printers for Windows 2000). 2. Right-click this printer icon and select Properties. 3. From the Sharing tab, check the Share this printer (Share as for Windows 2000) check box, and then type a name in the Share name (Share as for Windows 2000) text box. 4. Click Additional Drivers and select the operating systems of all network clients printing to this printer. 5. Click OK. If you are missing files, you will be prompted to insert the server operating system CD. Windows Vista®, Windows Vista 64-bit Edition 1. Click Start® Control Panel® Hardware and Sound® Printers. 2. Right-click this printer icon and select Sharing. 3. Click Change sharing options button. 4. The dialog box displaying "Windows needs your permission to continue" appears. 5. Click Continue button. 6. Check the Share this printer check box, and then type a name in the Share name text box. 7. Click Additional Drivers and select the operating systems of all network clients printing to this printer. 8. Click OK. Windows Server 2008, Windows Server 2008 Enterprise x64 Edition 1. Click Start® Control Panel® Printers. 2. Right-click this printer icon and select Sharing. 3. Check the Share this printer check box, and then type a name in the Share name text box. 4. Click Additional Drivers and select the operating systems of all network clients printing to this printer. 5. Click OK. To check that the printer is successfully shared: l Ensure that the printer object in the Printers or Printers and Faxes folder is shared. A icon of sharing is shown underneath the printer icon.
-
 1
1 -
2
-
3
-
4
-
5
-
6
-
7
-
8
-
9
-
10
-
11
-
12
-
13
-
14
-
15
-
16
-
17
-
18
-
19
-
20
-
21
-
22
-
23
-
24
-
25
-
26
-
27
-
28
-
29
-
30
-
31
-
32
-
33
-
34
-
35
-
36
-
37
-
38
-
39
-
40
-
41
-
42
-
43
-
44
-
45
-
46
-
47
-
 48
48 -
 49
49 -
 50
50 -
 51
51 -
 52
52 -
 53
53 -
 54
54 -
 55
55 -
 56
56 -
 57
57 -
 58
58 -
59
-
60
-
61
-
62
-
63
-
64
-
65
-
66
-
67
-
68
-
69
-
70
-
71
-
72
-
73
-
74
-
75
-
76
-
77
-
78
-
79
-
80
-
81
-
82
-
83
-
84
-
85
-
86
-
87
-
88
-
89
-
90
-
91
-
92
-
93
-
94
-
95
-
96
-
97
-
98
-
99
-
100
-
101
-
102
-
103
-
104
-
105
-
106
-
107
-
108
-
109
-
110
-
111
-
112
-
113
-
114
-
115
-
116
-
117
-
118
-
119
-
120
-
121
-
122
-
123
-
124
-
125
-
126
-
127
-
128
-
129
-
130
-
131
-
132
-
133
-
134
-
135
-
136
-
137
-
138
-
139
-
140
-
141
-
142
-
143
-
144
-
145
-
146
-
147
-
148
-
149
-
150
-
151
-
152
-
153
-
154
-
155
-
156
-
157
-
158
-
159
-
160
-
161
-
162
-
163
-
164
-
165
-
166
-
167
-
168
-
169
-
170
-
171
-
172
-
173
-
174
-
175
-
176
-
177
-
178
-
179
-
180
-
181
-
182
-
183
-
184
-
185
-
186
-
187
-
188
-
189
-
190
-
191
-
192
-
193
-
194
-
195
-
196
-
197
-
198
-
199
-
200
-
201
-
202
-
203
-
204
 |
 |
