Dell 2130cn User Guide - Page 146
For Firefox 2.0 or Later
 |
UPC - 335521301238
View all Dell 2130cn manuals
Add to My Manuals
Save this manual to your list of manuals |
Page 146 highlights
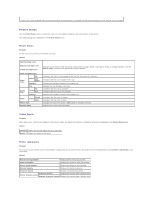
l Spanish (Traditional Sort) [es] l German (Germany) [de] l French (France) [fr] l English [en] or English (United States) [en-us] l Danish [da] l Dutch [nl] l Norwegian [no] l Swedish [sv] Setting the Printer's IP Address to Non-Proxy 1. Select Internet Options from the Tools menu. 2. Click LAN Settings under Local Area Network (LAN) Settings in the Connections tab. 3. Do either of the following: l Clear the Use a proxy sever for your LAN check box under Proxy server. l Click Advanced, and then specify the printer's IP address in the Do not use proxy server for addresses beginning with field under Exceptions. After setting the language and proxy, type (the printer's IP address) in the URL entry field of the browser to activate the Dell Printer Configuration Web Tool. For Firefox 2.0 or Later Setting Up the Display Language 1. Select Options from the Tools menu. 2. Click Advanced. 3. Click Choose in the General tab. 4. Specify the display language in order of preference in the Languages in order of preference list. For example: l English [en] or English/United States [en-us] l Italian [it] l Spanish [es] l German [de] l French [fr] l Dutch [nl] l Norwegian [no] l Swedish [sv] l Danish [da] Setting the Printer's IP Address to Non-Proxy 1. Select Options from the Tools menu. 2. Click Advanced tab. 3. Click Network on the Options dialog box. 4. Click Connection® Settings. 5. Do one of the following:
-
 1
1 -
2
-
3
-
4
-
5
-
6
-
7
-
8
-
9
-
10
-
11
-
12
-
13
-
14
-
15
-
16
-
17
-
18
-
19
-
20
-
21
-
22
-
23
-
24
-
25
-
26
-
27
-
28
-
29
-
30
-
31
-
32
-
33
-
34
-
35
-
36
-
37
-
38
-
39
-
40
-
41
-
42
-
43
-
44
-
45
-
46
-
47
-
48
-
49
-
50
-
51
-
52
-
53
-
54
-
55
-
56
-
57
-
58
-
59
-
60
-
61
-
62
-
63
-
64
-
65
-
66
-
67
-
68
-
69
-
70
-
71
-
72
-
73
-
74
-
75
-
76
-
77
-
78
-
79
-
80
-
81
-
82
-
83
-
84
-
85
-
86
-
87
-
88
-
89
-
90
-
91
-
92
-
93
-
94
-
95
-
96
-
97
-
98
-
99
-
100
-
101
-
102
-
103
-
104
-
105
-
106
-
107
-
108
-
109
-
110
-
111
-
112
-
113
-
114
-
115
-
116
-
117
-
118
-
119
-
120
-
121
-
122
-
123
-
124
-
125
-
126
-
127
-
128
-
129
-
130
-
131
-
132
-
133
-
134
-
135
-
136
-
137
-
138
-
139
-
140
-
 141
141 -
 142
142 -
 143
143 -
 144
144 -
 145
145 -
 146
146 -
 147
147 -
 148
148 -
 149
149 -
 150
150 -
 151
151 -
152
-
153
-
154
-
155
-
156
-
157
-
158
-
159
-
160
-
161
-
162
-
163
-
164
-
165
-
166
-
167
-
168
-
169
-
170
-
171
-
172
-
173
-
174
-
175
-
176
-
177
-
178
-
179
-
180
-
181
-
182
-
183
-
184
-
185
-
186
-
187
-
188
-
189
-
190
-
191
-
192
-
193
-
194
-
195
-
196
-
197
-
198
-
199
-
200
-
201
-
202
-
203
-
204
 |
 |