Dell Alienware Area-51m Service Manual - Page 108
Troubleshooting, Flashing the BIOS, Flashing BIOS (USB key)
 |
View all Dell Alienware Area-51m manuals
Add to My Manuals
Save this manual to your list of manuals |
Page 108 highlights
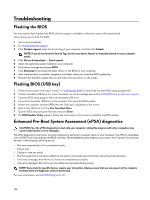
Troubleshooting Flashing the BIOS You may need to flash (update) the BIOS when an update is available or when you replace the system board. Follow these steps to flash the BIOS: 1 Turn on your computer. 2 Go to www.dell.com/support. 3 Click Product support, enter the Service Tag of your computer, and then click Submit. NOTE: If you do not have the Service Tag, use the auto-detect feature or manually browse for your computer model. 4 Click Drivers & downloads → Find it myself. 5 Select the operating system installed on your computer. 6 Scroll down the page and expand BIOS. 7 Click Download to download the latest version of the BIOS for your computer. 8 After the download is complete, navigate to the folder where you saved the BIOS update file. 9 Double-click the BIOS update file icon and follow the instructions on the screen. Flashing BIOS (USB key) 1 Follow the procedure from step 1 to step 7 in "Flashing the BIOS" to download the latest BIOS setup program file. 2 Create a bootable USB drive. For more information see the knowledge base article SLN143196 at www.dell.com/support. 3 Copy the BIOS setup program file to the bootable USB drive. 4 Connect the bootable USB drive to the computer that needs the BIOS update. 5 Restart the computer and press F12 when the Dell logo is displayed on the screen. 6 Boot to the USB drive from the One Time Boot Menu. 7 Type the BIOS setup program filename and press Enter. 8 The BIOS Update Utility appears. Follow the instructions on the screen to complete the BIOS update. Enhanced Pre-Boot System Assessment (ePSA) diagnostics CAUTION: Use the ePSA diagnostics to test only your computer. Using this program with other computers may cause invalid results or error messages. The ePSA diagnostics (also known as system diagnostics) performs a complete check of your hardware. The ePSA is embedded with the BIOS and is launched by the BIOS internally. The embedded system diagnostics provides a set of options for particular devices or device groups allowing you to: • Run tests automatically or in an interactive mode • Repeat tests • Display or save test results • Run thorough tests to introduce additional test options to provide extra information about the failed device(s) • View status messages that inform you if tests are completed successfully • View error messages that inform you of problems encountered during testing NOTE: Some tests for specific devices require user interaction. Always ensure that you are present at the computer terminal when the diagnostic tests are performed. For more information, see Dell EPSA Diagnostic 3.0. 108
-
 1
1 -
2
-
3
-
4
-
5
-
6
-
7
-
8
-
9
-
10
-
11
-
12
-
13
-
14
-
15
-
16
-
17
-
18
-
19
-
20
-
21
-
22
-
23
-
24
-
25
-
26
-
27
-
28
-
29
-
30
-
31
-
32
-
33
-
34
-
35
-
36
-
37
-
38
-
39
-
40
-
41
-
42
-
43
-
44
-
45
-
46
-
47
-
48
-
49
-
50
-
51
-
52
-
53
-
54
-
55
-
56
-
57
-
58
-
59
-
60
-
61
-
62
-
63
-
64
-
65
-
66
-
67
-
68
-
69
-
70
-
71
-
72
-
73
-
74
-
75
-
76
-
77
-
78
-
79
-
80
-
81
-
82
-
83
-
84
-
85
-
86
-
87
-
88
-
89
-
90
-
91
-
92
-
93
-
94
-
95
-
96
-
97
-
98
-
99
-
100
-
101
-
102
-
 103
103 -
 104
104 -
 105
105 -
 106
106 -
 107
107 -
 108
108 -
 109
109 -
 110
110 -
 111
111
 |
 |