Dell Dimension 4400 Dell Dimension 4400 Systems Owner's Manual - Page 85
computer cover.
 |
View all Dell Dimension 4400 manuals
Add to My Manuals
Save this manual to your list of manuals |
Page 85 highlights
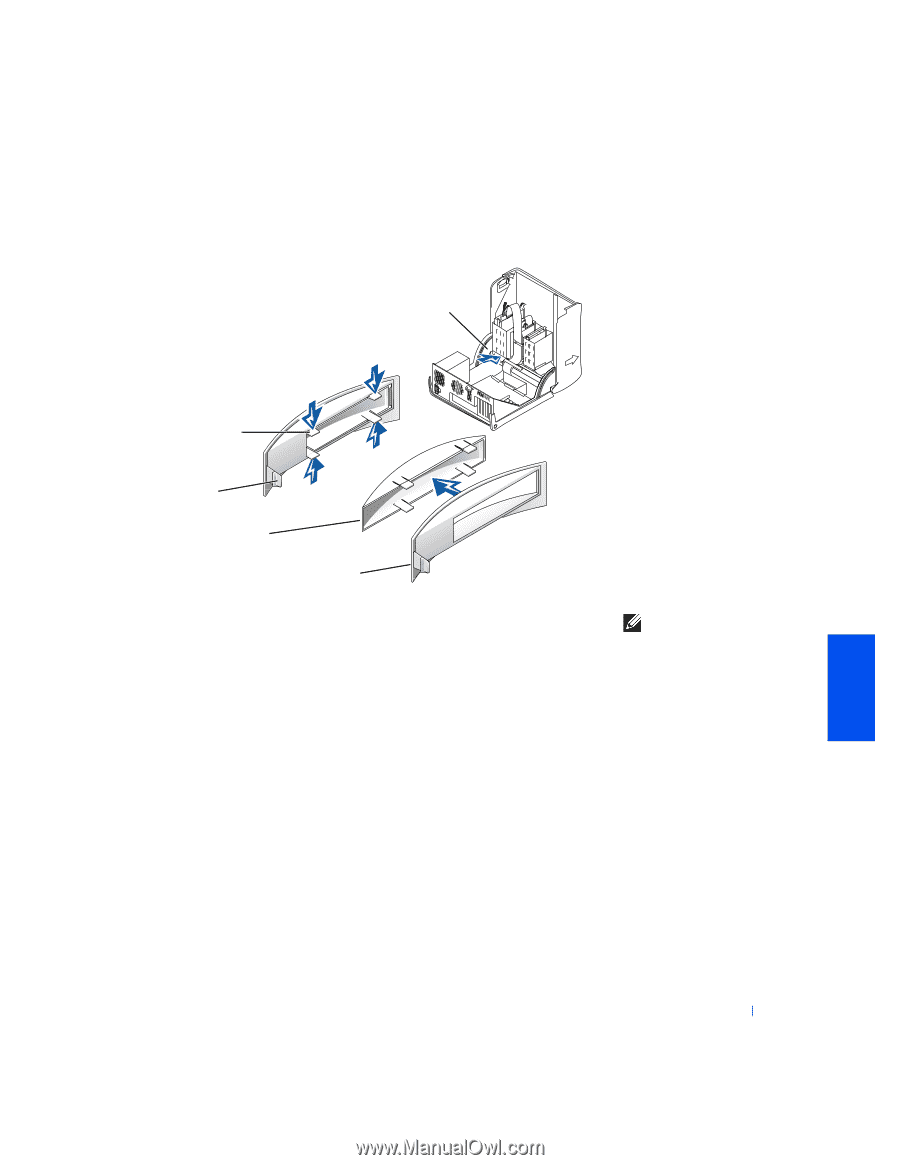
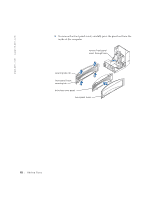
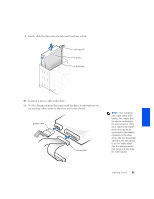
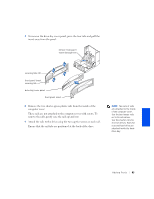
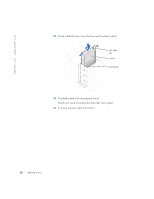
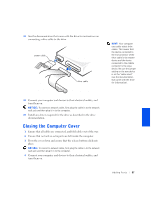
7 To remove the drive-bay cover panel, press the four tabs and pull the insert away from the panel. remove front panel insert through here securing tabs (4) front-panel insert securing tab drive-bay cover panel front panel insert 8 Remove the two shorter, green plastic rails from the inside of the computer cover. These rails are not attached to the computer cover with screws. To remove the rails, gently ease the rails up and out. 9 Attach the rails to the drive using the two captive screws on each rail. Ensure that the rail tabs are positioned at the back of the drive. HINT: Two sets of rails are attached to the inside of the computer cover. Use the two longer rails on 5.25-inch drives. Use the shorter rails for 3.5-inch drives. Rails for a second hard drive are attached inside the harddrive bay. Adding Parts 85
-
 1
1 -
2
-
3
-
4
-
5
-
6
-
7
-
8
-
9
-
10
-
11
-
12
-
13
-
14
-
15
-
16
-
17
-
18
-
19
-
20
-
21
-
22
-
23
-
24
-
25
-
26
-
27
-
28
-
29
-
30
-
31
-
32
-
33
-
34
-
35
-
36
-
37
-
38
-
39
-
40
-
41
-
42
-
43
-
44
-
45
-
46
-
47
-
48
-
49
-
50
-
51
-
52
-
53
-
54
-
55
-
56
-
57
-
58
-
59
-
60
-
61
-
62
-
63
-
64
-
65
-
66
-
67
-
68
-
69
-
70
-
71
-
72
-
73
-
74
-
75
-
76
-
77
-
78
-
79
-
 80
80 -
 81
81 -
 82
82 -
 83
83 -
 84
84 -
 85
85 -
 86
86 -
 87
87 -
 88
88 -
 89
89 -
 90
90 -
91
-
92
-
93
-
94
-
95
-
96
-
97
-
98
-
99
-
100
-
101
-
102
-
103
-
104
-
105
-
106
-
107
-
108
-
109
-
110
-
111
-
112
-
113
-
114
-
115
-
116
-
117
-
118
-
119
-
120
-
121
-
122
-
123
-
124
-
125
-
126
-
127
-
128
-
129
-
130
-
131
-
132
-
133
-
134
-
135
-
136
-
137
-
138
-
139
-
140
-
141
-
142
-
143
-
144
-
145
-
146
-
147
-
148
 |
 |