Dell Dimension 4400 Dell Dimension 4400 Systems Owner's Manual - Page 87
Connect your computer and devices to their electrical outlets,
 |
View all Dell Dimension 4400 manuals
Add to My Manuals
Save this manual to your list of manuals |
Page 87 highlights
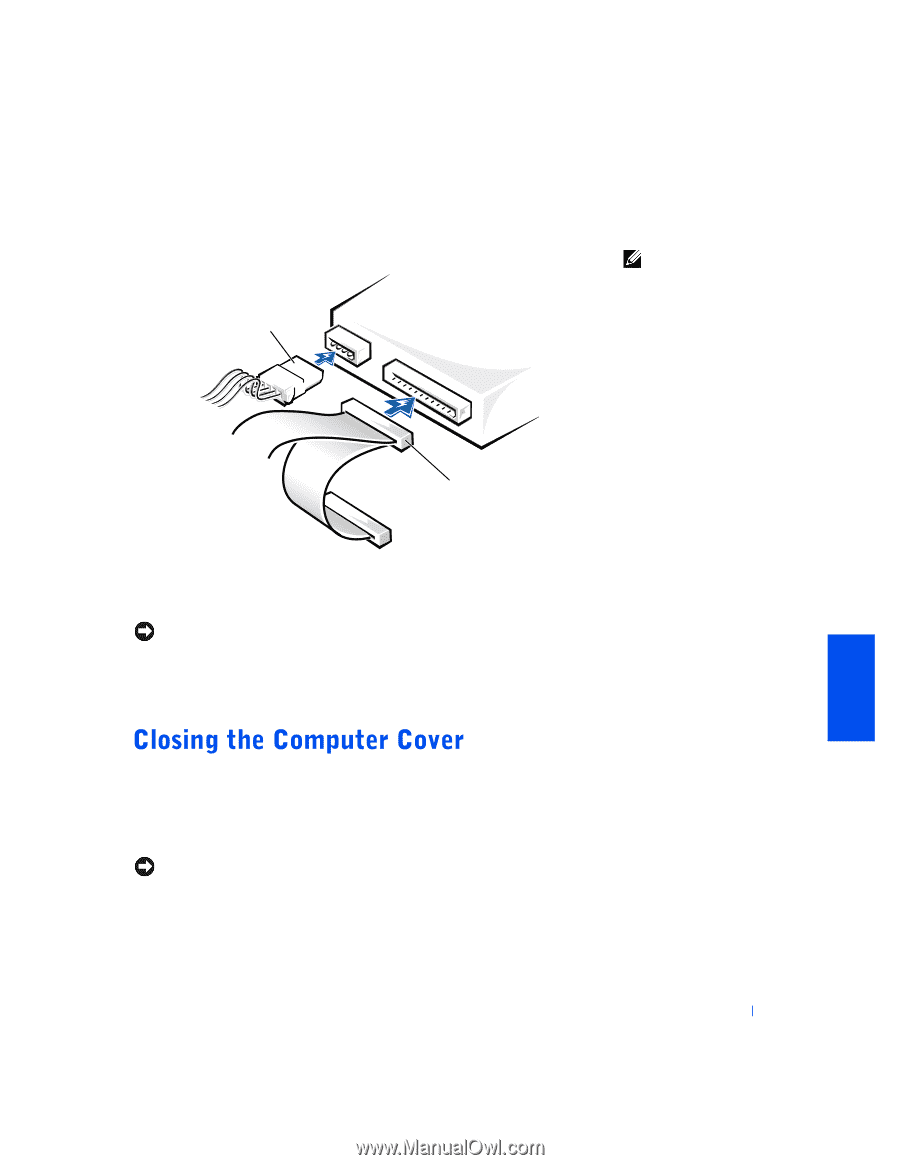
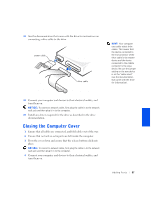
13 See the documentation that came with the drive for instructions on connecting a drive cable to the drive. power cable drive cable HINT: Your computer uses cable-select drive cables. This means that the device connected to the end connector of the drive cable is the master device and the device connected to the middle connector is the slave device. Be sure the jumper setting on the new device is set for "cable select" (see the documentation that came with the drive for information). 14 Connect your computer and devices to their electrical outlets, and turn them on. NOTICE: To connect a network cable, first plug the cable in to the network wall jack and then plug it in to the computer. 15 Install any drivers required for the drive as described in the drive documentation. 1 Ensure that all cables are connected, and fold cables out of the way. 2 Ensure that no tools or extra parts are left inside the computer. 3 Pivot the cover down and ensure that the release buttons click into place. NOTICE: To connect a network cable, first plug the cable in to the network wall jack and then plug it in to the computer. 4 Connect your computer and devices to their electrical outlets, and turn them on. Adding Parts 87
-
 1
1 -
2
-
3
-
4
-
5
-
6
-
7
-
8
-
9
-
10
-
11
-
12
-
13
-
14
-
15
-
16
-
17
-
18
-
19
-
20
-
21
-
22
-
23
-
24
-
25
-
26
-
27
-
28
-
29
-
30
-
31
-
32
-
33
-
34
-
35
-
36
-
37
-
38
-
39
-
40
-
41
-
42
-
43
-
44
-
45
-
46
-
47
-
48
-
49
-
50
-
51
-
52
-
53
-
54
-
55
-
56
-
57
-
58
-
59
-
60
-
61
-
62
-
63
-
64
-
65
-
66
-
67
-
68
-
69
-
70
-
71
-
72
-
73
-
74
-
75
-
76
-
77
-
78
-
79
-
80
-
81
-
 82
82 -
 83
83 -
 84
84 -
 85
85 -
 86
86 -
 87
87 -
 88
88 -
 89
89 -
 90
90 -
 91
91 -
 92
92 -
93
-
94
-
95
-
96
-
97
-
98
-
99
-
100
-
101
-
102
-
103
-
104
-
105
-
106
-
107
-
108
-
109
-
110
-
111
-
112
-
113
-
114
-
115
-
116
-
117
-
118
-
119
-
120
-
121
-
122
-
123
-
124
-
125
-
126
-
127
-
128
-
129
-
130
-
131
-
132
-
133
-
134
-
135
-
136
-
137
-
138
-
139
-
140
-
141
-
142
-
143
-
144
-
145
-
146
-
147
-
148
 |
 |