Dell MXG610s Fibre Channel Switch Module Installation Guide May 2018 - Page 9
Supported licenses, Passwords, Chassis passwords, Port-side view
 |
View all Dell MXG610s manuals
Add to My Manuals
Save this manual to your list of manuals |
Page 9 highlights
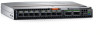
• One green and amber light-emitting diode (LED) on top of each port to indicate port status. • Fabric Insight is supported with the fabric vision license-included in the ENT model and ENT license for other models. • Does not support in-flight encryption or compression. • Forward error correction (FEC) is supported by default on all 32 Gbps ports. By default, all ports support 32 Gbps speed. • Real-time digital thermometers for temperature monitoring • Real-time clock (RTC) with battery Supported licenses The entry-level 8-port version of the switch module ships with eight active ports. You can purchase Ports on Demand (POD) licenses to activate up to an extra 24 ports with 8-port POD licenses. The switch module supports dynamic POD license allocation; two port licenses are assigned to ports 0 and 17 at the factory. The remaining licenses are assigned to active ports on a first-come, first-served basis. After the licenses are issued, you can move them from one port to another, making port licensing flexible. You can upgrade the entry-level 8-port and the midlevel 16-port modules with an ENT license that includes ISL trunking, fabric vision, and extended fabric support. Passwords Chassis passwords If a chassis-created password applies to your IOMs, the instructions included later in this Installation Guide may not function as described. Chassis passwords follow this hierarchy: 1 If you create a password, your password persists and has priority. 2 A chassis-created password that is sent to the IOMs is used when: a You do not create your own password. b The chassis assigns a password that is also pushed to the switch. 3 A default password is used when: a You do not create your own password. b Chassis did not assign a chassis password. Port-side view Externally accessible ports and LEDs are on the port side of the switch module. When you install the switch module in the I/O bay of the blade server chassis, the front panel faces out. Access the I/O module handle at the front of the switch module port side. To insert or remove the switch module from the blade server chassis, press the handle's release latch. Switch module overview 9
-
 1
1 -
2
-
3
-
 4
4 -
 5
5 -
 6
6 -
 7
7 -
 8
8 -
 9
9 -
 10
10 -
 11
11 -
 12
12 -
 13
13 -
 14
14 -
15
-
16
-
17
-
18
-
19
-
20
-
21
-
22
-
23
-
24
-
25
-
26
-
27
-
28
-
29
-
30
-
31
-
32
-
33
-
34
-
35
-
36
-
37
-
38
-
39
-
40
-
41
-
42
-
43
-
44
-
45
 |
 |
