Dell PowerConnect OpenManage Network Manager Web Client Guide 5.1 - Page 305
Do Change Management Example, Configuration Label > Current
 |
View all Dell PowerConnect OpenManage Network Manager manuals
Add to My Manuals
Save this manual to your list of manuals |
Page 305 highlights
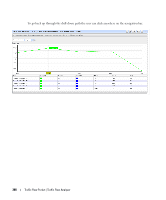
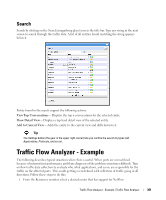
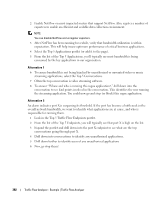
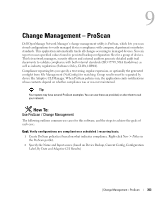
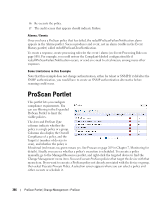
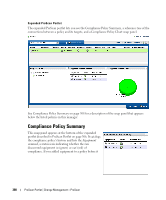
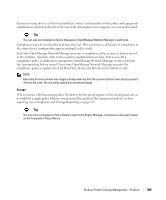
How To: Do Change Management (Example) The following describes an example use of Change Manager. This backs up a configuration file, modifies it, then scans the file for the modified text, and acts according to the result. The following steps describe how to do this: 1 Back up a device configuration. Select a device and click the File Management > Backup right-click menu in Managed Resources portlet. 2 Right click, and Export this backup to a file in the Configuration Files portlet. 3 Edit this config file, adding the word "MyTestContact" somewhere in its text that has no impact. For example, the snmp-server contact, or in comments. Tip Some devices let you create descriptions within their configurations so you can enter a word without impact there. 4 Now import this edited file from the Managed Resources portlet after you have right-clicked on the same device from which you exported it. Renaming it something distinctive is helpful. 5 Right-click this file and Restore to the device. Since the name is a comment or description, it should not interfere with the device's operations. 6 Right-click the device and select File Management > Backup. This makes the MyTestContact file label Current. Tip To confirm MyTestContact is labeled Current, you can use an Advanced filter in the expanded Configuration Files portlet to view only Current labels. 7 Now, create a ProScan policy by right-clicking in the ProScan portlet, selecting New > Policy. 8 In the General tab, name this policy MyTestContactScan, and as an input, select the Configuration Label > Current label as the Input Source. 9 In the Targets tab, select the equipment from which you exported the config file. 10 In the Criteria tab, click Add Criteria enter contains MyTestContact as the Match All of the following criteria. 11 Click Save. 12 Right-click the new policy and select Execute Compliance. 13 The audit screen that appears should indicate Success. 14 Right-click and Open the MyTestContactScan policy, and change the Criteria to "does not contain" MyTestContact. 15 Save | Change Management - ProScan 305
-
 1
1 -
2
-
3
-
4
-
5
-
6
-
7
-
8
-
9
-
10
-
11
-
12
-
13
-
14
-
15
-
16
-
17
-
18
-
19
-
20
-
21
-
22
-
23
-
24
-
25
-
26
-
27
-
28
-
29
-
30
-
31
-
32
-
33
-
34
-
35
-
36
-
37
-
38
-
39
-
40
-
41
-
42
-
43
-
44
-
45
-
46
-
47
-
48
-
49
-
50
-
51
-
52
-
53
-
54
-
55
-
56
-
57
-
58
-
59
-
60
-
61
-
62
-
63
-
64
-
65
-
66
-
67
-
68
-
69
-
70
-
71
-
72
-
73
-
74
-
75
-
76
-
77
-
78
-
79
-
80
-
81
-
82
-
83
-
84
-
85
-
86
-
87
-
88
-
89
-
90
-
91
-
92
-
93
-
94
-
95
-
96
-
97
-
98
-
99
-
100
-
101
-
102
-
103
-
104
-
105
-
106
-
107
-
108
-
109
-
110
-
111
-
112
-
113
-
114
-
115
-
116
-
117
-
118
-
119
-
120
-
121
-
122
-
123
-
124
-
125
-
126
-
127
-
128
-
129
-
130
-
131
-
132
-
133
-
134
-
135
-
136
-
137
-
138
-
139
-
140
-
141
-
142
-
143
-
144
-
145
-
146
-
147
-
148
-
149
-
150
-
151
-
152
-
153
-
154
-
155
-
156
-
157
-
158
-
159
-
160
-
161
-
162
-
163
-
164
-
165
-
166
-
167
-
168
-
169
-
170
-
171
-
172
-
173
-
174
-
175
-
176
-
177
-
178
-
179
-
180
-
181
-
182
-
183
-
184
-
185
-
186
-
187
-
188
-
189
-
190
-
191
-
192
-
193
-
194
-
195
-
196
-
197
-
198
-
199
-
200
-
201
-
202
-
203
-
204
-
205
-
206
-
207
-
208
-
209
-
210
-
211
-
212
-
213
-
214
-
215
-
216
-
217
-
218
-
219
-
220
-
221
-
222
-
223
-
224
-
225
-
226
-
227
-
228
-
229
-
230
-
231
-
232
-
233
-
234
-
235
-
236
-
237
-
238
-
239
-
240
-
241
-
242
-
243
-
244
-
245
-
246
-
247
-
248
-
249
-
250
-
251
-
252
-
253
-
254
-
255
-
256
-
257
-
258
-
259
-
260
-
261
-
262
-
263
-
264
-
265
-
266
-
267
-
268
-
269
-
270
-
271
-
272
-
273
-
274
-
275
-
276
-
277
-
278
-
279
-
280
-
281
-
282
-
283
-
284
-
285
-
286
-
287
-
288
-
289
-
290
-
291
-
292
-
293
-
294
-
295
-
296
-
297
-
298
-
299
-
 300
300 -
 301
301 -
 302
302 -
 303
303 -
 304
304 -
 305
305 -
 306
306 -
 307
307 -
 308
308 -
 309
309 -
 310
310 -
311
-
312
-
313
-
314
-
315
-
316
-
317
-
318
-
319
-
320
-
321
-
322
-
323
-
324
-
325
-
326
-
327
-
328
-
329
-
330
-
331
-
332
-
333
-
334
-
335
-
336
-
337
-
338
-
339
-
340
-
341
-
342
-
343
-
344
-
345
-
346
-
347
-
348
-
349
-
350
-
351
-
352
-
353
-
354
-
355
-
356
-
357
-
358
-
359
-
360
-
361
-
362
-
363
-
364
-
365
-
366
-
367
-
368
-
369
-
370
-
371
-
372
-
373
-
374
-
375
-
376
-
377
-
378
-
379
-
380
-
381
-
382
-
383
-
384
-
385
-
386
-
387
-
388
 |
 |