Dell PowerVault 130T DLT Service Manual - Page 47
Replacement, Magnetic Sensor Replacement, CYO Card Replacement
 |
View all Dell PowerVault 130T DLT manuals
Add to My Manuals
Save this manual to your list of manuals |
Page 47 highlights
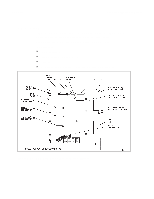
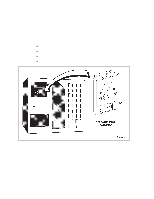
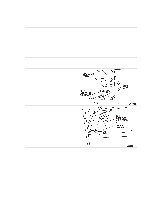
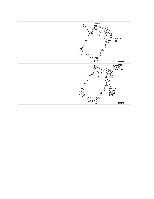
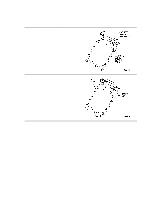
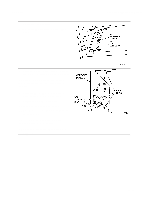
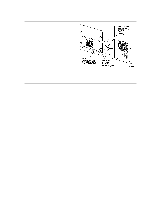
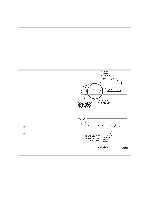
PowerVault 130T Service Manual Replacement Magnetic Sensor Replacement 1. Push the magnetic sensor switch through the cutout as shown. 2. Connect the magnetic sensor connector. CYO Card Replacement 3. Align the four screw holes in the CYO card with the screw holes in the operator panel enclosure. NOTE: Make sure the trace side of the card is facing you and that the component side is down. The operator panel display must align with the cutout in the operator panel enclosure. 4. Install the four CYO card screws using a Torx driver with a T-10 bit. CYO Card 4473D 3-11
-
 1
1 -
2
-
3
-
4
-
5
-
6
-
7
-
8
-
9
-
10
-
11
-
12
-
13
-
14
-
15
-
16
-
17
-
18
-
19
-
20
-
21
-
22
-
23
-
24
-
25
-
26
-
27
-
28
-
29
-
30
-
31
-
32
-
33
-
34
-
35
-
36
-
37
-
38
-
39
-
40
-
41
-
 42
42 -
 43
43 -
 44
44 -
 45
45 -
 46
46 -
 47
47 -
 48
48 -
 49
49 -
 50
50 -
 51
51 -
 52
52 -
53
-
54
-
55
-
56
-
57
-
58
-
59
-
60
-
61
-
62
-
63
-
64
-
65
-
66
-
67
-
68
-
69
-
70
-
71
-
72
-
73
-
74
-
75
-
76
-
77
-
78
-
79
-
80
-
81
-
82
-
83
-
84
-
85
-
86
-
87
-
88
-
89
-
90
-
91
-
92
-
93
-
94
-
95
-
96
 |
 |

PowerVault 130T Service Manual
CYO Card
4473D
3–11
Replacement
Magnetic Sensor Replacement
1.
Push the magnetic sensor switch through
the cutout as shown.
2.
Connect the magnetic sensor connector.
CYO Card Replacement
3.
Align the four screw holes in the CYO
card with the screw holes in the operator
panel enclosure.
NOTE:
Make sure the trace side of the card
is facing you and that the component side
is down.
The operator panel display must
align with the cutout in the operator panel
enclosure.
4.
Install the four CYO card screws using a
Torx driver with a T-10 bit.