Dell PowerVault 130T DLT Service Manual - Page 65
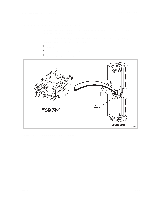
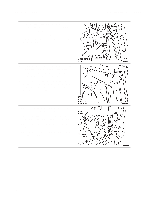
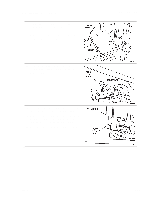
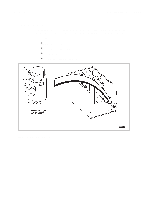
located on the end of the hand assembly, hand/camera assembly to the bearing block
 |
View all Dell PowerVault 130T DLT manuals
Add to My Manuals
Save this manual to your list of manuals |
Page 65 highlights
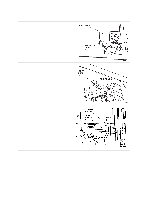
PowerVault 130T Service Manual Replacement 1. Holding the assembly with your left hand, rotate it so the card side (top) faces the front of the library, making sure the hand motor clears the Z column and the Z belt. 2. Rotate the assembly until it clears the Z column and the Z belt and align it with the two screw holes on the bearing block using the locator pins on the bearing block. 3. Install the two screws securing the hand/camera assembly to the bearing block (located on the end of the hand assembly near the reach motor) using a Torx driver with a T-15 bit. NOTE: Do not overtighten 4. Remove the prop holding up the counterweight. 5. Carefully raise the hand/camera assembly to the top of the Z column. Hand/Camera Assembly 4473D 3-29
-
 1
1 -
2
-
3
-
4
-
5
-
6
-
7
-
8
-
9
-
10
-
11
-
12
-
13
-
14
-
15
-
16
-
17
-
18
-
19
-
20
-
21
-
22
-
23
-
24
-
25
-
26
-
27
-
28
-
29
-
30
-
31
-
32
-
33
-
34
-
35
-
36
-
37
-
38
-
39
-
40
-
41
-
42
-
43
-
44
-
45
-
46
-
47
-
48
-
49
-
50
-
51
-
52
-
53
-
54
-
55
-
56
-
57
-
58
-
59
-
 60
60 -
 61
61 -
 62
62 -
 63
63 -
 64
64 -
 65
65 -
 66
66 -
 67
67 -
 68
68 -
 69
69 -
 70
70 -
71
-
72
-
73
-
74
-
75
-
76
-
77
-
78
-
79
-
80
-
81
-
82
-
83
-
84
-
85
-
86
-
87
-
88
-
89
-
90
-
91
-
92
-
93
-
94
-
95
-
96
 |
 |

PowerVault 130T Service Manual
Hand/Camera Assembly
4473D
3–29
Replacement
1.
Holding the assembly with your left hand,
rotate it so the card side (top) faces the front
of the library, making sure the hand motor
clears the Z column and the Z belt.
2.
Rotate the assembly until it clears the Z
column and the Z belt and align it with the
two screw holes on the bearing block using
the locator pins on the bearing block.
3.
Install the two screws securing the
hand/camera assembly to the bearing block
(located on the end of the hand assembly
near the reach motor) using a Torx driver
with a T-15 bit.
NOTE:
Do not overtighten
4.
Remove the prop holding up the
counterweight.
5.
Carefully raise the hand/camera assembly to
the top of the Z column.