Dell PowerVault 130T DLT Service Manual - Page 52
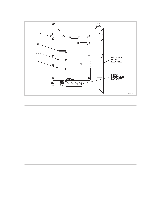
The shows the right side of the tape drive
 |
View all Dell PowerVault 130T DLT manuals
Add to My Manuals
Save this manual to your list of manuals |
Page 52 highlights
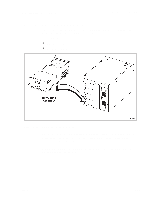
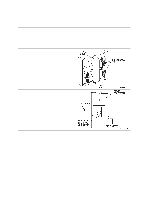
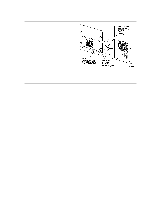
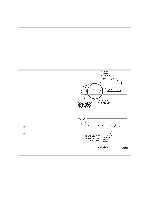
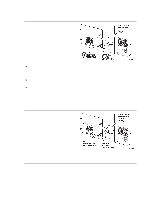
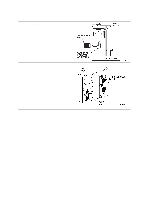
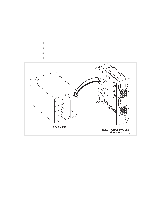
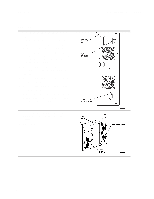
DLT Drive Tray Assembly Replacement 1. Unpack the assembly and inspect it for damage such as bent, broken, or loose parts. 2. Verify that the tape drive model and serial numbers match those on the shipping invoice. Labels on top of the drive show either DLT4000 or DLT7000 and either single-ended or differential. 3. Verify that required cables are present. 4. Report any damaged, missing, or incorrect items to the phone number on the invoice. WARNING: Do not apply power to the drive tray assembly when it is not installed in the library. 5. To check terminator power (TERMPWR), remove the two power supply cover screws using a Torx driver with a T-15 bit, and lift the cover (pulling forward slightly) enough to see the jumpers. For safety, do not remove the cover completely. 6. Set the TERMPWR on or off (enabled or disabled) on the new tape drive to match the drive you are replacing. The figure shows the right side of the tape drive (as you face its front). Install the jumper on the pins as shown to set TERMPWR on. Remove the jumper from the pins to set TERMPWR off. You may store the jumper by placing it on one pin only. 7. Return the power supply cover to its previous position and reinstall the two screws holding it in place. 3-16 PowerVault 130T Service Manual 4473D
-
 1
1 -
2
-
3
-
4
-
5
-
6
-
7
-
8
-
9
-
10
-
11
-
12
-
13
-
14
-
15
-
16
-
17
-
18
-
19
-
20
-
21
-
22
-
23
-
24
-
25
-
26
-
27
-
28
-
29
-
30
-
31
-
32
-
33
-
34
-
35
-
36
-
37
-
38
-
39
-
40
-
41
-
42
-
43
-
44
-
45
-
46
-
 47
47 -
 48
48 -
 49
49 -
 50
50 -
 51
51 -
 52
52 -
 53
53 -
 54
54 -
 55
55 -
 56
56 -
 57
57 -
58
-
59
-
60
-
61
-
62
-
63
-
64
-
65
-
66
-
67
-
68
-
69
-
70
-
71
-
72
-
73
-
74
-
75
-
76
-
77
-
78
-
79
-
80
-
81
-
82
-
83
-
84
-
85
-
86
-
87
-
88
-
89
-
90
-
91
-
92
-
93
-
94
-
95
-
96
 |
 |
