Dell S510n Dell Interactive Projector S510/ Users Guide - Page 44
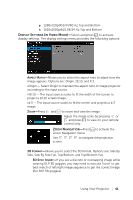
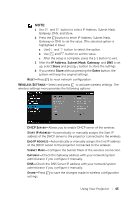
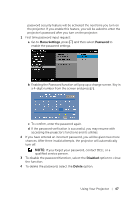
LAN Settings, select DHCP On. If DHCP is Off, manually set the IP Address, Subnet
 |
View all Dell S510n manuals
Add to My Manuals
Save this manual to your list of manuals |
Page 44 highlights
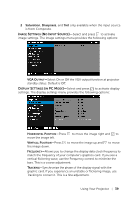
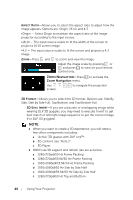
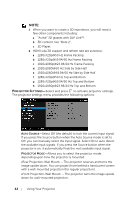
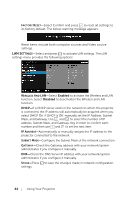
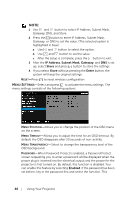
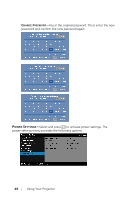
FACTORY RESET-Select Confirm and press to reset all settings to its factory default. The below warning message appears: Reset items include both computer sources and Video source settings. LAN SETTINGS-Select and press to activate LAN settings. The LAN settings menu provides the following options: WIRELESS AND LAN-Select Enabled to activate the Wireless and LAN function. Select Disabled to deactivation the Wireless and LAN function. DHCP-If a DHCP server exists in the network to which the projector is connected, the IP address will automatically be acquired when you select DHCP On. If DHCP is Off, manually set the IP Address, Subnet Mask, and Gateway. Use and to select the number of IP address, Subnet Mask, and Gateway. Key in enter to confirm each number and then use and to set the next item. IP ADDRESS-Automatically or manually assigns the IP address to the projector connected to the network. SUBNET MASK-Configure the Subnet Mask of the network connection. GATEWAY-Check the Gateway address with your network/system administrator if you configure it manually. DNS-Check the DNS Server IP address with your network/system administrator if you configure it manually. STORE-Press to save the changes made in network configuration settings. 44 Using Your Projector
-
 1
1 -
2
-
3
-
4
-
5
-
6
-
7
-
8
-
9
-
10
-
11
-
12
-
13
-
14
-
15
-
16
-
17
-
18
-
19
-
20
-
21
-
22
-
23
-
24
-
25
-
26
-
27
-
28
-
29
-
30
-
31
-
32
-
33
-
34
-
35
-
36
-
37
-
38
-
 39
39 -
 40
40 -
 41
41 -
 42
42 -
 43
43 -
 44
44 -
 45
45 -
 46
46 -
 47
47 -
 48
48 -
 49
49 -
50
-
51
-
52
-
53
-
54
-
55
-
56
-
57
-
58
-
59
-
60
-
61
-
62
-
63
-
64
-
65
-
66
-
67
-
68
-
69
-
70
-
71
-
72
-
73
-
74
-
75
-
76
-
77
-
78
-
79
-
80
-
81
-
82
-
83
-
84
-
85
-
86
-
87
-
88
-
89
-
90
-
91
-
92
-
93
-
94
-
95
-
96
-
97
-
98
-
99
-
100
-
101
-
102
-
103
-
104
-
105
-
106
-
107
-
108
-
109
-
110
-
111
-
112
-
113
-
114
-
115
-
116
-
117
-
118
-
119
-
120
-
121
-
122
-
123
-
124
-
125
-
126
-
127
-
128
-
129
-
130
-
131
-
132
-
133
-
134
-
135
-
136
-
137
-
138
-
139
-
140
-
141
-
142
-
143
-
144
-
145
-
146
-
147
-
148
-
149
-
150
-
151
-
152
-
153
-
154
-
155
 |
 |
