Denon AVR-5805CI Owners Manual - English - Page 47
Analog, Input Mode, Ext. In, Surround Parameter, Cursor
 |
UPC - 081757507424
View all Denon AVR-5805CI manuals
Add to My Manuals
Save this manual to your list of manuals |
Page 47 highlights
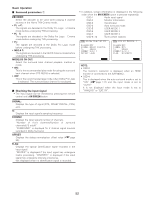
2 Selecting the EXT. IN mode 1 Press the EXT. IN button on the main unit or INPUT MODE button on the remote control unit to switch the external input. When operating the main unit: EXT.IN -1 EXT.IN -2 EXT. IN-1: Once this is selected, the input signals connected to the FRONT L, FRONT R, CENTER, SURR. L A/B (surround left A/B), SURR. R A/B (surround right A/B) SBL (surround back left) and SBR (surround back right) channels of the EXT. IN terminals are output directly to the front (left and right), center, surround A/B (left and right A/B) and surround back (left and right) speaker systems as well as the pre-out terminals. In addition, the signal input to the SW (subwoofer) terminal is output to the PRE OUT SW (subwoofer) terminal. EXT. IN-2: Once this is selected, the input signals connected to the FRONT L, FRONT R, CENTER, SURR. L (surround left) and SURR. R (surround right) channels of the EXT. IN terminals are output directly to the front (left and right), center and surround (left and right) speaker systems as well as the pre-out terminals. In addition, the signal input to the SW (subwoofer) terminal is output to the PRE OUT SW (subwoofer) terminal. 2 Press the SURROUND PARAMETER button. • The surround parameter menu appears. 3 Press the CURSOR D or H button to select the parameter. 2 CH: Select when the input source being played is a 2 channel source. MULTI CH: Select when the input source being played is a multi-channel source. Basic Operation 4 Press the CURSOR F or G button to select the setting. 5 Press the SURROUND PARAMETER button to complete the setting. • Cancelling the external input mode: Press the INPUT MODE or ANALOG button to switch to the desired input mode. • The external input mode can be set for any input source. To watch video while listening to sound, select the input source to which the video signal is connected, then set this mode. • If the subwoofer output level seems too high, set the "SW ATT" surround parameter to "ON". Playback using the external input treminals (EXT.IN-1 and EXT.IN-2) • When the "ANALOG" mode is selected at "EXT.IN Setup" at the System Setup: The surround mode buttons are not operated. • When the "DSP" mode is selected at "EXT.IN Setup" at the System Setup: The surround mode buttons are operated. NOTE: • When the input mode is set to EXT. IN (1 or 2), playback in the DIRECT, STEREO, STANDARD (DOLBY/DTS SURROUND), HOME THX CINEMA, 9CH STEREO and DSP SIMULATION modes are only possible when "DSP" mode is selected for the "Setting the EXT.IN Setup" ( page 105). • In play modes other than the external input mode, the signals connected to these terminals cannot be played. In addition, signals cannot be output from channels not connected to the input terminals. 2 Selecting the analog mode Press the ANALOG button on the main unit or INPUT MODE button on the remote control unit to switch to the analog input. ANALOG (exclusive analog audio signal playback mode): The signals input to the analog input terminals are decoded and played. Press the CURSOR F button to set the "Input channel". Press the ENTER button to return to the previous screen. NOTE: • Input mode when playing DTS sources: Noise will be output if DTS-compatible CDs or LDs are played in the "ANALOG" or "PCM" mode. When playing DTS-compatible sources, be sure to connect the source component to the digital input terminals (OPTICAL/COAXIAL) and set the input mode to "DTS". 47
-
 1
1 -
2
-
3
-
4
-
5
-
6
-
7
-
8
-
9
-
10
-
11
-
12
-
13
-
14
-
15
-
16
-
17
-
18
-
19
-
20
-
21
-
22
-
23
-
24
-
25
-
26
-
27
-
28
-
29
-
30
-
31
-
32
-
33
-
34
-
35
-
36
-
37
-
38
-
39
-
40
-
41
-
 42
42 -
 43
43 -
 44
44 -
 45
45 -
 46
46 -
 47
47 -
 48
48 -
 49
49 -
 50
50 -
 51
51 -
 52
52 -
53
-
54
-
55
-
56
-
57
-
58
-
59
-
60
-
61
-
62
-
63
-
64
-
65
-
66
-
67
-
68
-
69
-
70
-
71
-
72
-
73
-
74
-
75
-
76
-
77
-
78
-
79
-
80
-
81
-
82
-
83
-
84
-
85
-
86
-
87
-
88
-
89
-
90
-
91
-
92
-
93
-
94
-
95
-
96
-
97
-
98
-
99
-
100
-
101
-
102
-
103
-
104
-
105
-
106
-
107
-
108
-
109
-
110
-
111
-
112
-
113
-
114
-
115
-
116
-
117
-
118
-
119
-
120
-
121
-
122
-
123
-
124
-
125
-
126
-
127
-
128
-
129
-
130
-
131
-
132
-
133
-
134
-
135
-
136
-
137
-
138
-
139
-
140
-
141
-
142
-
143
-
144
-
145
-
146
-
147
-
148
-
149
-
150
-
151
-
152
-
153
-
154
-
155
-
156
-
157
-
158
-
159
-
160
-
161
-
162
-
163
-
164
-
165
-
166
-
167
-
168
-
169
-
170
-
171
-
172
-
173
-
174
-
175
-
176
-
177
-
178
-
179
-
180
-
181
-
182
-
183
-
184
-
185
-
186
-
187
-
188
-
189
-
190
-
191
-
192
-
193
-
194
-
195
-
196
-
197
-
198
-
199
-
200
-
201
-
202
-
203
-
204
-
205
-
206
-
207
-
208
-
209
-
210
-
211
-
212
-
213
-
214
 |
 |
