Dirt Devil ND40100 Revision 1 (3/2011) - Page 23
Guía De SoluciÓn De Problemas, Mantenimiento General Suite, General Maintenance
 |
View all Dirt Devil ND40100 manuals
Add to My Manuals
Save this manual to your list of manuals |
Page 23 highlights
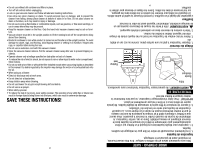
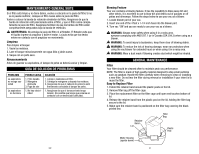
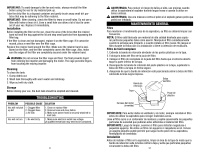
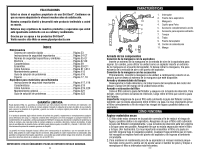
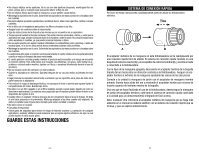
MANTENIMIENTO GENERAL SUITE Si el filtro está limpio y no tiene daños, vuelva a colocarlo en la jaula del filtro Si no se lo puede reutilizar, coloque un filtro nuevo sobre la jaula del filtro. Vuelva a colocar la banda de retención alrededor del filtro. Asegúrese de que la banda de retención esté posicionada sobre el filtro, y que el filtro cubra completamente la jaula del filtro. Asegúrese también de que los bordes del filtro estén completamente asegurados bajo la banda de retención. ADVERTENCIA: No extraiga la jaula del filtro ni el flotador. El flotador evita que el líquido ingrese al propulsor y dañe el motor. La jaula evita que los dedos entren en contacto con el propulsor en movimiento. Limpieza Para limpiar el tanque: 1. Vacíe los residuos. 2. Lave el tanque minuciosamente con agua tibia y jabón suave. 3. Seque con un paño seco. Almacenamiento Antes de guardar su aspiradora, el tanque de polvo se debería vaciar y limpiar. Guía De Solución De Problemas PROBLEMA La aspiradora no recoge suciedad La aspiradora no funciona POSIBLE CAUSA 1. Filtro tapado. 2. Manguera obstruida 3. Fuga de aire 1. No hay electricidad SOLUCIÓN 1. Limpie o reemplace el filtro. 2. Extraiga la manguera y despeje los residuos. 3. Asegúrese de que el cabezal de potencia esté firmemente conectado al tanque de polvo. 1. Asegúrese de que el tomacorriente tenga tensión. (Es posible que tenga que ponerse en contacto con un electricista calificado). E22 Blowing Feature Your vac contains a blowing feature. It has the capability to blow away dirt and other debris. It is excellent to use to blow dirt and debris out of garages or off patios and driveways. Follow the steps below to use your vac as a blower. 1. Locate blower port of your vac. 2. Insert one end of the 4 foot x 1-1/4 inch hose into the blower port. 4. Turn vac "ON"and you are ready to use your vac as a blower. WARNING: Always wear safety when using it in a noisy area. eyewear complying with ANSI Z87.1 (or in Canada CSA Z94.3) when using as a blower. WARNING: To avoid injury to bystanders, keep them clear of blowing debris. WARNING: To reduce the risk of hearing damage, wear ear protectors when using the vac/blower for extended hours or when using it in a noisy area. WARNING: Wear a dust mask if blowing creates dust which might be inhaled. GENERAL MAINTENANCE Filter Your filter should be cleaned often to maintain peak vac performance. NOTE: The filter is made of high quality material designed to stop small particles such as sawdust. Handle the filter carefully when removing to clean or installing a new filter. Do not tear the filter during removal or installation if your intent is to reuse the filter. Easy to Replace Filter 1. Extend the retainer band around the plastic posts on the lid. 2. Remove filter bag off the filter cage. 3. Place the replacement filter on the filter cage until open end touches bottom of lid. 4. Release the retainer band from the plastic post on the lid, holding the filter bag secure to the lid. 5. Make sure the retainer band is positioned on the filter bag covering the black printed line. Retainer Band Lid Filter Bag Plastic Post Motor Housing (upside-down) 23
-
 1
1 -
2
-
3
-
4
-
5
-
6
-
7
-
8
-
9
-
10
-
11
-
12
-
13
-
14
-
15
-
16
-
17
-
 18
18 -
 19
19 -
 20
20 -
 21
21 -
 22
22 -
 23
23 -
 24
24 -
 25
25 -
 26
26 -
 27
27 -
 28
28 -
29
-
30
-
31
-
32
-
33
-
34
 |
 |
