Epson 1815p User's Guide - Page 76
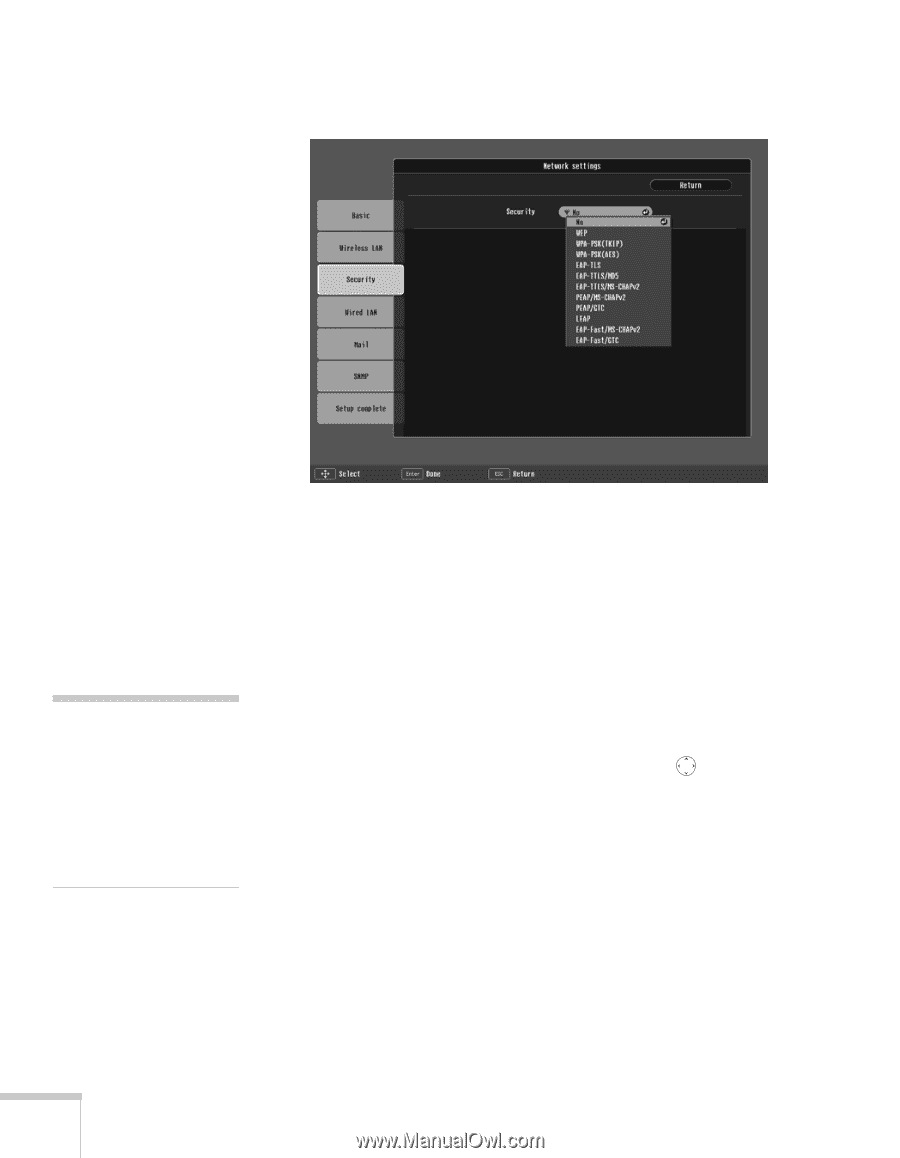
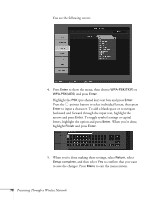
For Format, highlight, choose Key ID
 |
UPC - 010343858190
View all Epson 1815p manuals
Add to My Manuals
Save this manual to your list of manuals |
Page 76 highlights
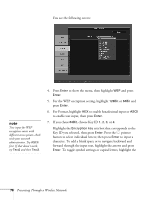
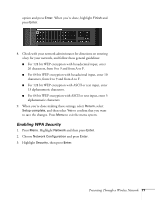
You see the following screen: note Text input for WEP encryption varies with different access points; check with your network administrator. Try ASCII first. If that doesn't work, try Text2 and then Text3. 4. Press Enter to show the menu, then highlight WEP and press Enter. 5. For the WEP encryption setting, highlight 128Bit or 64Bit and press Enter. 6. For Format, highlight HEX to enable hexadecimal input or ASCII to enable text input, then press Enter. 7. If you chose 64Bit, choose Key ID 1, 2, 3, or 4. Highlight the Encryption key text box that corresponds to the Key ID you selected, then press Enter. Press the pointer button to select individual letters; then press Enter to input a character. To add a blank space or to navigate backward and forward through the input text, highlight the arrows and press Enter. To toggle symbol settings or capital letters, highlight the 76 Presenting Through a Wireless Network
-
 1
1 -
2
-
3
-
4
-
5
-
6
-
7
-
8
-
9
-
10
-
11
-
12
-
13
-
14
-
15
-
16
-
17
-
18
-
19
-
20
-
21
-
22
-
23
-
24
-
25
-
26
-
27
-
28
-
29
-
30
-
31
-
32
-
33
-
34
-
35
-
36
-
37
-
38
-
39
-
40
-
41
-
42
-
43
-
44
-
45
-
46
-
47
-
48
-
49
-
50
-
51
-
52
-
53
-
54
-
55
-
56
-
57
-
58
-
59
-
60
-
61
-
62
-
63
-
64
-
65
-
66
-
67
-
68
-
69
-
70
-
 71
71 -
 72
72 -
 73
73 -
 74
74 -
 75
75 -
 76
76 -
 77
77 -
 78
78 -
 79
79 -
 80
80 -
 81
81 -
82
-
83
-
84
-
85
-
86
-
87
-
88
-
89
-
90
-
91
-
92
-
93
-
94
-
95
-
96
-
97
-
98
-
99
-
100
-
101
-
102
-
103
-
104
-
105
-
106
-
107
-
108
-
109
-
110
-
111
-
112
-
113
-
114
-
115
-
116
-
117
-
118
-
119
-
120
-
121
-
122
-
123
-
124
-
125
-
126
-
127
-
128
-
129
-
130
-
131
-
132
-
133
-
134
-
135
-
136
-
137
-
138
-
139
-
140
-
141
-
142
-
143
-
144
-
145
-
146
-
147
-
148
-
149
-
150
-
151
-
152
-
153
-
154
-
155
-
156
-
157
-
158
-
159
-
160
-
161
-
162
-
163
-
164
-
165
-
166
-
167
-
168
-
169
-
170
-
171
-
172
-
173
-
174
-
175
-
176
-
177
-
178
-
179
-
180
-
181
-
182
-
183
-
184
-
185
-
186
-
187
-
188
-
189
-
190
-
191
-
192
-
193
-
194
-
195
-
196
-
197
-
198
-
199
-
200
-
201
-
202
-
203
-
204
 |
 |