Epson ActionPrinter 3250 User Manual - Page 24
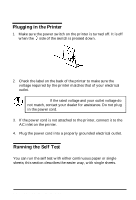
Running the Test, Connecting the Printer to Your Computer
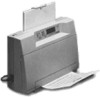 |
View all Epson ActionPrinter 3250 manuals
Add to My Manuals
Save this manual to your list of manuals |
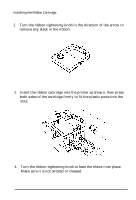
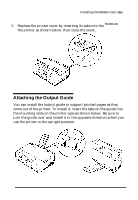
Page 24 highlights
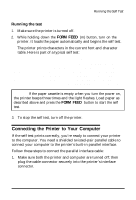
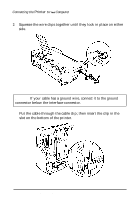
Running the Self Test Running the test 1. Make sure the printer is turned off. 2. While holding down the FORM FEED (m) button, turn on the printer. It loads the paper automatically and begins the self test. The printer prints characters in the current font and character table. Here is part of a typical self test: !"#$%&I()*+,-./0123456789:;?@ABCDEFGHIJKL !'I 0123456789:;?@ABCDEFGHIJKLM "#$%&I()*+,-./0123456789:;?@ABCDEFGHIJKLMN #$%&I()*+,-./0123456789:;?@ABCDEFGHIJKLMNCJ $%&I ()*+,-. /0123456789:;?@ABCDEl?GHIJKLMNOP %a'()*+,-. /0123456789:; ?@ABCDEFGHIJKLMNOPQ %I()*+,-. 10123456789:; ?@ABCDEFGHIJKLMNOPQR Note: If the paper cassette is empty when you turn the power on, the printer beeps three times and the light flashes. Load paper as described above and press the FORM FEED button to start the self test. 3. To stop the self test, turn off the printer. Connecting the Printer to Your Computer If the self test prints correctly, you're ready to connect your printer to the computer. You need a shielded twisted-pair parallel cable to connect your computer to the printer's built-in parallel interface. Follow these steps to connect the parallel interface cable: 1. Make sure both the printer and computer are turned off; then plug the cable connector securely into the printer's interface connector. Setting Up the Printer l-11
-
 1
1 -
2
-
3
-
4
-
5
-
6
-
7
-
8
-
9
-
10
-
11
-
12
-
13
-
14
-
15
-
16
-
17
-
18
-
 19
19 -
 20
20 -
 21
21 -
 22
22 -
 23
23 -
 24
24 -
 25
25 -
 26
26 -
 27
27 -
 28
28 -
 29
29 -
30
-
31
-
32
-
33
-
34
-
35
-
36
-
37
-
38
-
39
-
40
-
41
-
42
-
43
-
44
-
45
-
46
-
47
-
48
-
49
-
50
-
51
-
52
-
53
-
54
-
55
-
56
-
57
-
58
-
59
-
60
-
61
-
62
-
63
-
64
-
65
-
66
-
67
-
68
-
69
-
70
-
71
-
72
-
73
-
74
-
75
-
76
-
77
-
78
-
79
-
80
-
81
-
82
-
83
-
84
-
85
-
86
-
87
-
88
-
89
-
90
-
91
-
92
-
93
-
94
-
95
-
96
-
97
-
98
-
99
-
100
-
101
-
102
-
103
 |
 |
