Epson ActionTower 8200 User Manual - Page 84
Installing a Card in the Tower Computer, the computer, as shown below. Keep the screw to secure
 |
View all Epson ActionTower 8200 manuals
Add to My Manuals
Save this manual to your list of manuals |
Page 84 highlights
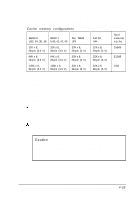
4. Replace the slot cover bracket by inserting it into the small metal holder below the option slots; then replace its retaining screw. 5. Replace the computer's cover; see "Replacing the Cover." Then see "Post-installation Procedures" for instructions on configuring your computer with your new option card. Installing a Card in the Tower Computer Follow the steps below to install an option card in the tower computer. Although the illustration shows a PCI card, you can use the same instructions for an ISA card. 1. Remove the retaining screw securing the option slot cover to the computer, as shown below. (Keep the screw to secure the option card in step 4.) 2. Slide out the slot cover and set it aside. (Store it in a safe place in case you remove the option card later.) 4-20 Installing and Removing Options
-
 1
1 -
2
-
3
-
4
-
5
-
6
-
7
-
8
-
9
-
10
-
11
-
12
-
13
-
14
-
15
-
16
-
17
-
18
-
19
-
20
-
21
-
22
-
23
-
24
-
25
-
26
-
27
-
28
-
29
-
30
-
31
-
32
-
33
-
34
-
35
-
36
-
37
-
38
-
39
-
40
-
41
-
42
-
43
-
44
-
45
-
46
-
47
-
48
-
49
-
50
-
51
-
52
-
53
-
54
-
55
-
56
-
57
-
58
-
59
-
60
-
61
-
62
-
63
-
64
-
65
-
66
-
67
-
68
-
69
-
70
-
71
-
72
-
73
-
74
-
75
-
76
-
77
-
78
-
 79
79 -
 80
80 -
 81
81 -
 82
82 -
 83
83 -
 84
84 -
 85
85 -
 86
86 -
 87
87 -
 88
88 -
 89
89 -
90
-
91
-
92
-
93
-
94
-
95
-
96
-
97
-
98
-
99
-
100
-
101
-
102
-
103
-
104
-
105
-
106
-
107
-
108
-
109
-
110
-
111
-
112
-
113
-
114
-
115
-
116
-
117
-
118
-
119
-
120
-
121
-
122
-
123
-
124
-
125
-
126
-
127
-
128
-
129
-
130
-
131
-
132
-
133
-
134
-
135
-
136
-
137
-
138
-
139
-
140
-
141
-
142
-
143
-
144
-
145
-
146
-
147
-
148
-
149
-
150
-
151
-
152
-
153
-
154
-
155
-
156
-
157
-
158
-
159
-
160
-
161
-
162
-
163
-
164
-
165
-
166
-
167
-
168
-
169
-
170
-
171
-
172
-
173
-
174
-
175
-
176
-
177
-
178
-
179
-
180
-
181
-
182
-
183
-
184
-
185
-
186
-
187
 |
 |
