Epson BrightLink 436Wi Installation Guide - Page 10
Connecting Computers, Connecting Through a Network, Computer1, Epson Projector Software, epson.com
 |
View all Epson BrightLink 436Wi manuals
Add to My Manuals
Save this manual to your list of manuals |
Page 10 highlights
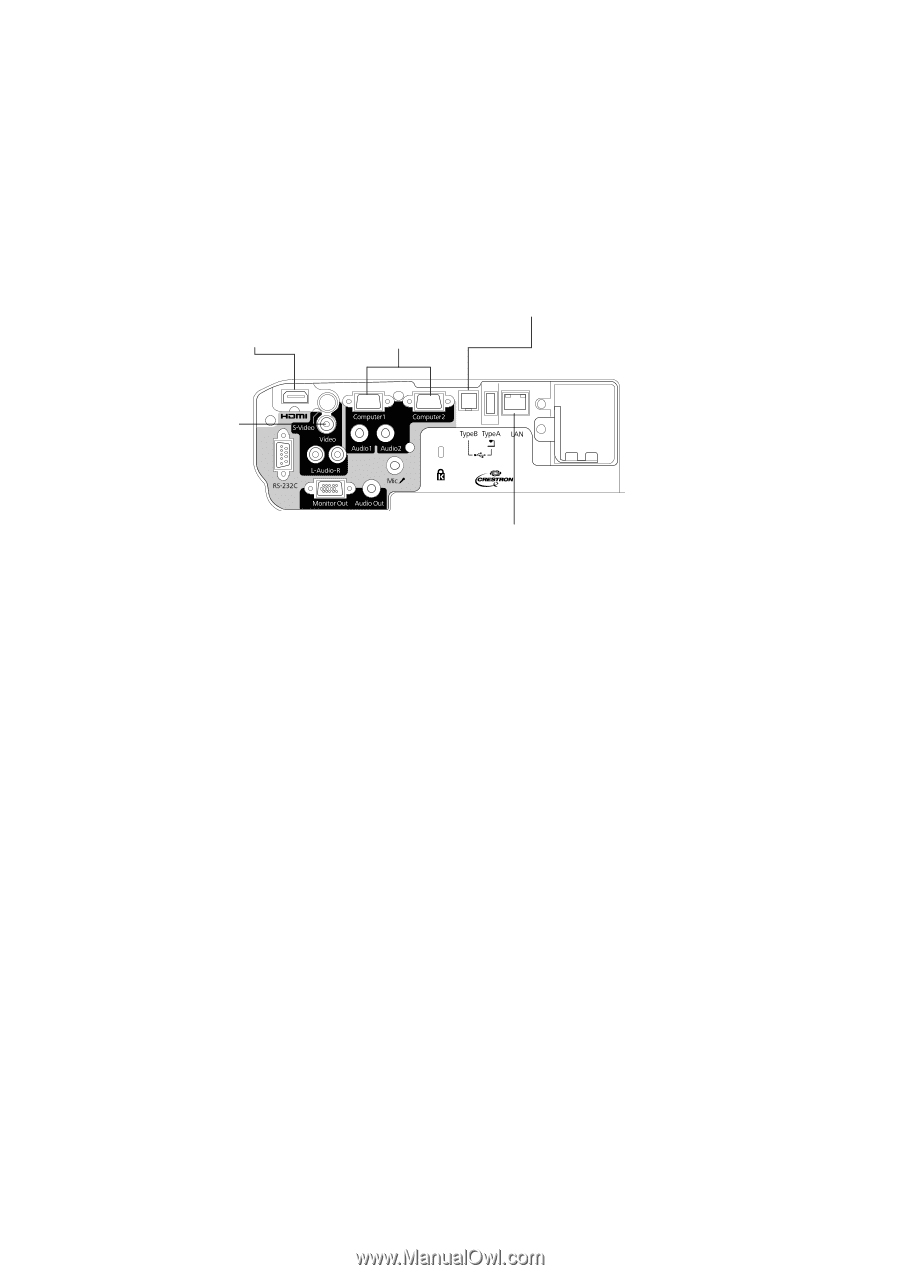
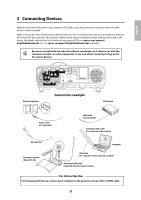
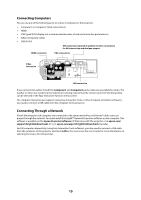
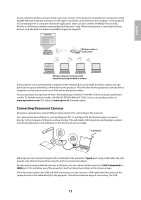
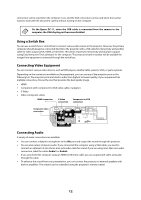
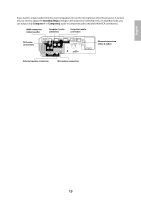
Connecting Computers You can use any of the following ports to connect computers to the projector: • Computer1 or Computer2 (VGA connections) • HDMI • USB TypeB (USB display, not recommended because of reduced interactive performance) • Video (composite video) • LAN (RJ-45) USB connection required (in addition to other connections) for full interactivity and dual pen support HDMI connection VGA connections Video connection LAN connection If you connect VGA cables to both the Computer1 and Computer2 ports, make sure you label the cables. The teacher or other user needs to know which port is being used so that the correct source for full interactivity can be selected in the Easy Interactive Function menu screen. For computer interactive pen support (using Easy Interactive Tools or other 3rd party annotation software), you need to connect a USB cable from the computer to the projector. Connecting Through a Network If both the projector and computer are connected to the same network by an Ethernet® cable, users can project through the network. You must install the EasyMP® Network Projection software on the computer. This software is available on the Epson Projector Software CD that came with the projector or at epson.com/ support/brightlinkdownloads (U.S.) or epson.ca/support/brightlinkdownloads (Canada). For full computer interactivity (using Easy Interactive Tools software), you also need to connect a USB cable from the computer to the projector and select LAN as the source (see the User's Guide for more information on selecting the source for interactivity). 10
-
 1
1 -
2
-
3
-
4
-
 5
5 -
 6
6 -
 7
7 -
 8
8 -
 9
9 -
 10
10 -
 11
11 -
 12
12 -
 13
13 -
 14
14 -
 15
15 -
16
-
17
-
18
-
19
-
20
-
21
-
22
-
23
-
24
-
25
-
26
-
27
-
28
-
29
-
30
-
31
-
32
-
33
-
34
-
35
-
36
-
37
-
38
-
39
-
40
-
41
-
42
-
43
-
44
-
45
-
46
-
47
-
48
-
49
-
50
-
51
-
52
-
53
-
54
-
55
-
56
-
57
-
58
-
59
-
60
-
61
-
62
-
63
-
64
-
65
-
66
-
67
-
68
-
69
-
70
-
71
-
72
 |
 |