Epson BrightLink 436Wi Installation Guide - Page 6
Package Contents
 |
View all Epson BrightLink 436Wi manuals
Add to My Manuals
Save this manual to your list of manuals |
Page 6 highlights
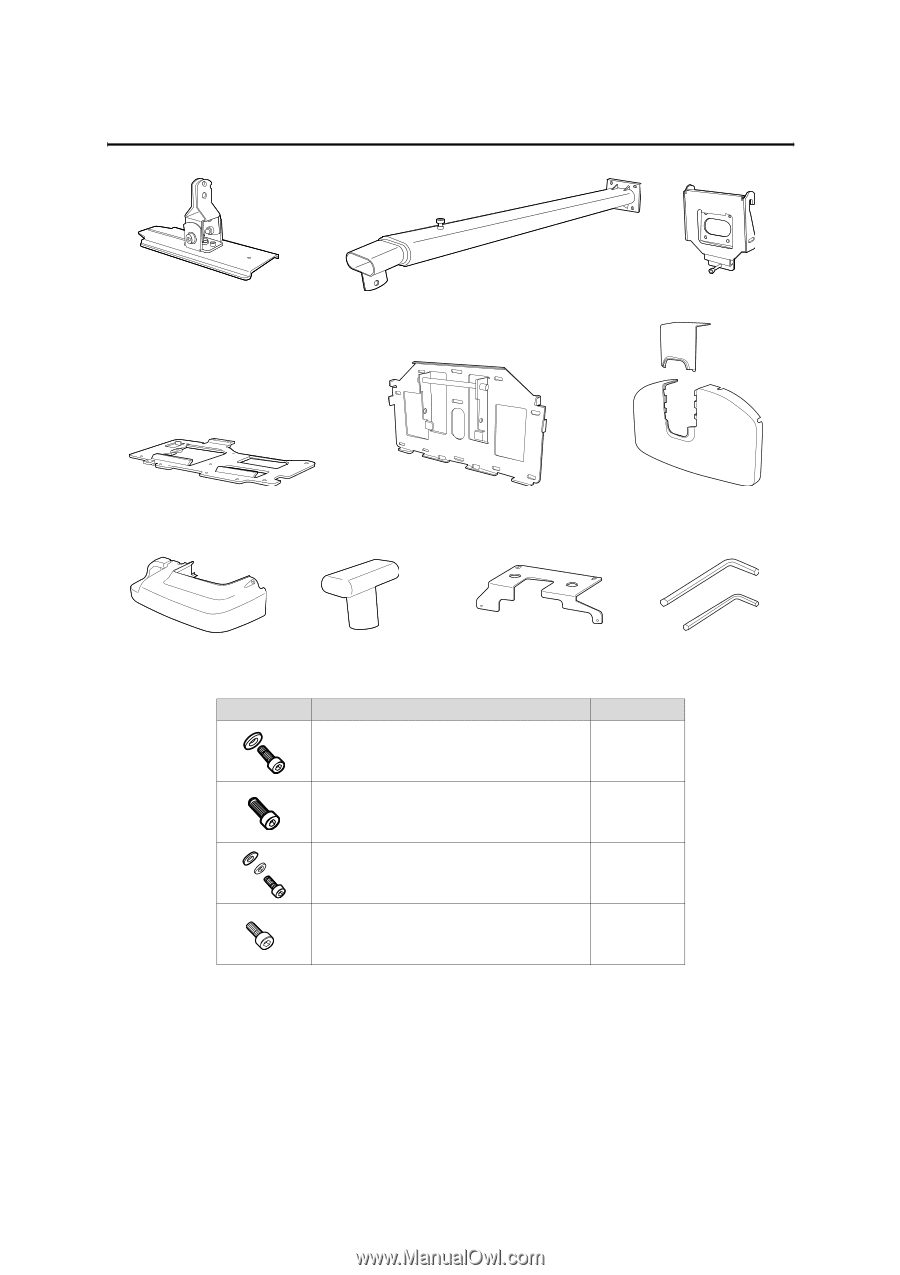
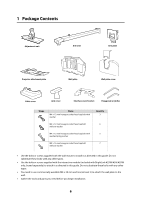
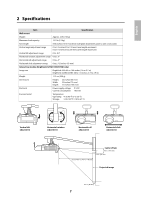
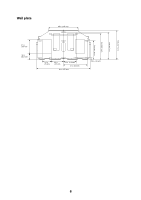
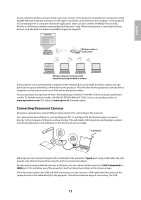
1 Package Contents Adjustment unit Arm unit Arm plate Projector attachment plate Wall plate Wall plate cover Cable cover Arm cover Interface cover bracket Hexagonal wrenches Shape Name M4 × 12 mm hexagon socket head cap bolt with washer M4 × 12 mm hexagon socket head cap bolt without washer M4 × 12 mm hexagon socket head cap bolt with washer/spring washer M8 × 16 mm hexagon socket head cap bolt without washer Quantity 3 6 5 7 • Use the bolts or screws supplied with the wall mount to install it as directed in this guide. Do not substitute these bolts with any other types. • Use the bolts or screws supplied with the interactive module (included with BrightLink 425Wi/430i/435Wi only; boxed separately) to attach it as directed in this guide. Do not substitute these bolts with any other types. • You need to use commercially available M8 × 50 mm anchors (at least 3) to attach the wall plate to the wall. • Gather the tools and parts you need before you begin installation. 6
-
 1
1 -
 2
2 -
 3
3 -
 4
4 -
 5
5 -
 6
6 -
 7
7 -
 8
8 -
 9
9 -
 10
10 -
 11
11 -
 12
12 -
13
-
14
-
15
-
16
-
17
-
18
-
19
-
20
-
21
-
22
-
23
-
24
-
25
-
26
-
27
-
28
-
29
-
30
-
31
-
32
-
33
-
34
-
35
-
36
-
37
-
38
-
39
-
40
-
41
-
42
-
43
-
44
-
45
-
46
-
47
-
48
-
49
-
50
-
51
-
52
-
53
-
54
-
55
-
56
-
57
-
58
-
59
-
60
-
61
-
62
-
63
-
64
-
65
-
66
-
67
-
68
-
69
-
70
-
71
-
72
 |
 |