Epson BrightLink 436Wi Installation Guide - Page 29
Attach the attachment plate to the projector, Attach the projector to the adjustment unit
 |
View all Epson BrightLink 436Wi manuals
Add to My Manuals
Save this manual to your list of manuals |
Page 29 highlights
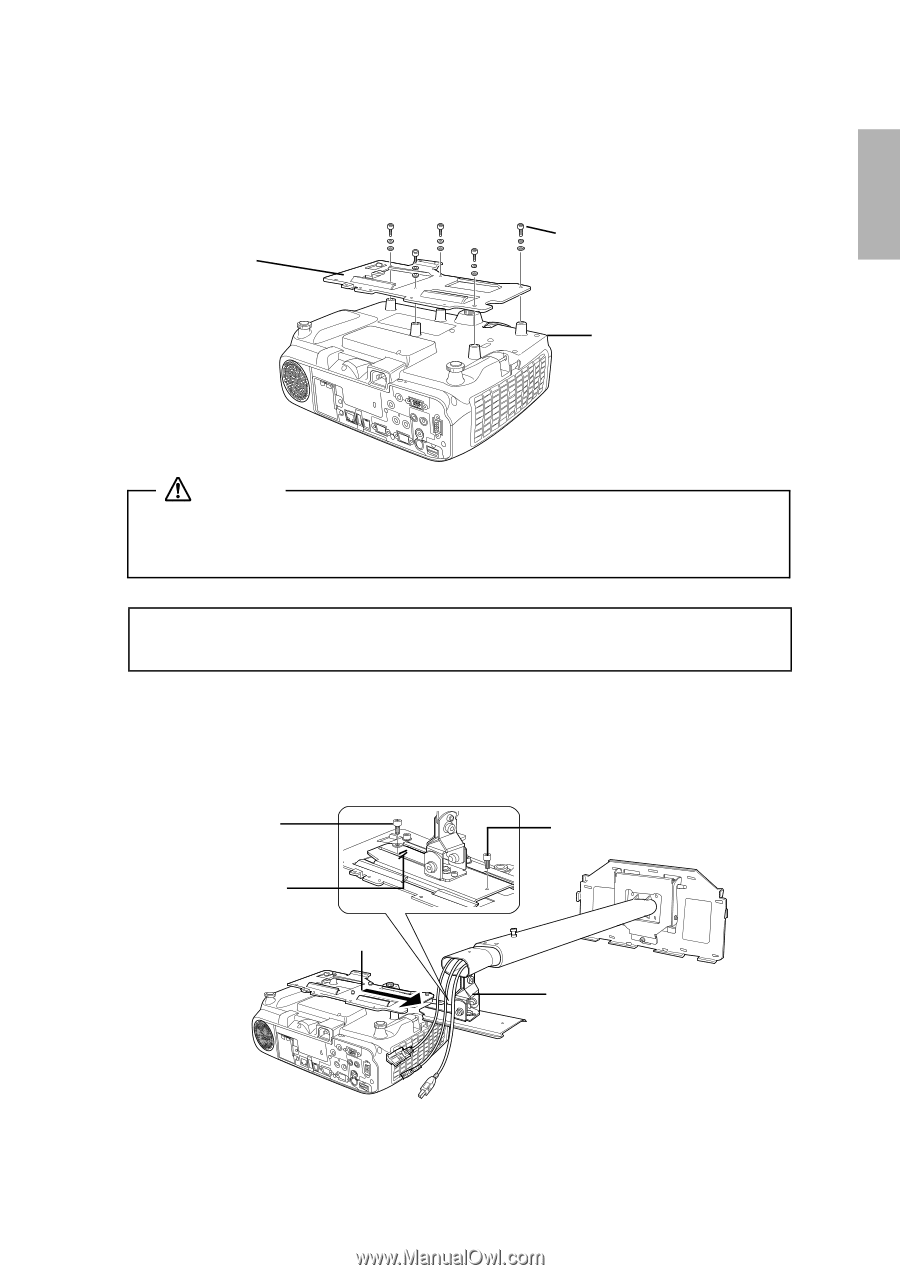
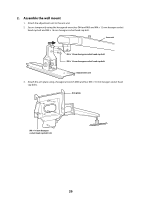
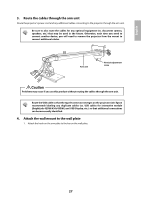
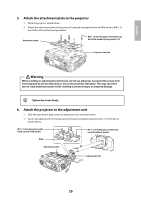
English 5. Attach the attachment plate to the projector 1. Place the projector upside down. 2. Attach the attachment plate to the projector using the hexagonal wrench (M4) and five M4 × 12 mm bolts with washers/spring washers. Attachment plate M4 × 12 mm hexagon socket head cap bolt with washer/spring washer (×5) Projector lens side Warning When installing or adjusting the wall mount, do not use adhesives to prevent the screws from loosening and do not use lubricants or oils on the projector slide plate. This may cause the case to crack and the projector to fall, resulting in personal injury or property damage. q Tighten the screws firmly. 6. Attach the projector to the adjustment unit 1. Slide the attachment plate onto the adjustment unit as shown below. 2. Secure the adjustment unit temporarily at the points marked using two M4 × 12 mm bolts as shown below. M4 × 12 mm hexagon socket head cap bolt with washer M4 × 12 mm hexagon socket head cap bolt without washer Mark Attachment plate Adjustment unit 29
-
 1
1 -
2
-
3
-
4
-
5
-
6
-
7
-
8
-
9
-
10
-
11
-
12
-
13
-
14
-
15
-
16
-
17
-
18
-
19
-
20
-
21
-
22
-
23
-
 24
24 -
 25
25 -
 26
26 -
 27
27 -
 28
28 -
 29
29 -
 30
30 -
 31
31 -
 32
32 -
 33
33 -
 34
34 -
35
-
36
-
37
-
38
-
39
-
40
-
41
-
42
-
43
-
44
-
45
-
46
-
47
-
48
-
49
-
50
-
51
-
52
-
53
-
54
-
55
-
56
-
57
-
58
-
59
-
60
-
61
-
62
-
63
-
64
-
65
-
66
-
67
-
68
-
69
-
70
-
71
-
72
 |
 |