Epson BrightLink 436Wi Installation Guide - Page 4
Location, About This Installation Guide
 |
View all Epson BrightLink 436Wi manuals
Add to My Manuals
Save this manual to your list of manuals |
Page 4 highlights
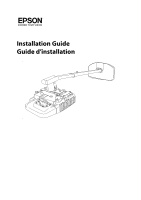
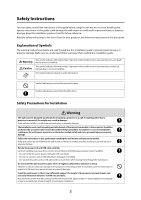
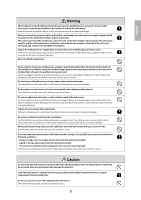
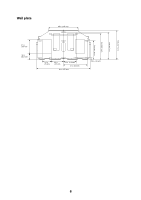
Caution Because the interactive module uses infrared communication, it could interfere with infrared communication from other products. If this happens, move the other product(s) out of the detection area. Location • Determine where you will install the wall mount and prepare the location in advance. Also, make sure there is a gap of 16 to 26 inches (410 to 660 mm) from the top of the image projected onto the white board to the ceiling. See "Positioning the Projector" on page 14 for more details. • Do not install the projector in a location where it might be subjected to vibration or shock. Vibration or shock could cause damage to the projector or mounting surface. It could also cause the wall mount or projector to fall, resulting in serious injury or death. • Before installing the projector, verify the power supply wiring for the installation location. • Install the projector away from other electric devices such as fluorescent lights or air conditioners. Some kinds of fluorescent lights could interfere with the remote control of the projector. • Install the projector away from direct sunlight and other bright light sources. • It is recommended to keep VGA computer cable length less than 66 ft (20 meters) to reduce external noise. About This Installation Guide This guide describes how to mount the short-throw projectors BrightLink® 421i/425Wi/430i/435Wi/436Wi and PowerLite® 420/425W/430/435W to a wall using the Epson® wall mount. Also included are instructions for attaching the interactive module, which is included with BrightLink 425Wi/ 430i/435Wi only. Not all models are available in all markets. 4
-
 1
1 -
 2
2 -
 3
3 -
 4
4 -
 5
5 -
 6
6 -
 7
7 -
 8
8 -
 9
9 -
 10
10 -
11
-
12
-
13
-
14
-
15
-
16
-
17
-
18
-
19
-
20
-
21
-
22
-
23
-
24
-
25
-
26
-
27
-
28
-
29
-
30
-
31
-
32
-
33
-
34
-
35
-
36
-
37
-
38
-
39
-
40
-
41
-
42
-
43
-
44
-
45
-
46
-
47
-
48
-
49
-
50
-
51
-
52
-
53
-
54
-
55
-
56
-
57
-
58
-
59
-
60
-
61
-
62
-
63
-
64
-
65
-
66
-
67
-
68
-
69
-
70
-
71
-
72
 |
 |
