Epson BrightLink 436Wi Installation Guide - Page 24
Installing the Projector, Install the wall plate
 |
View all Epson BrightLink 436Wi manuals
Add to My Manuals
Save this manual to your list of manuals |
Page 24 highlights
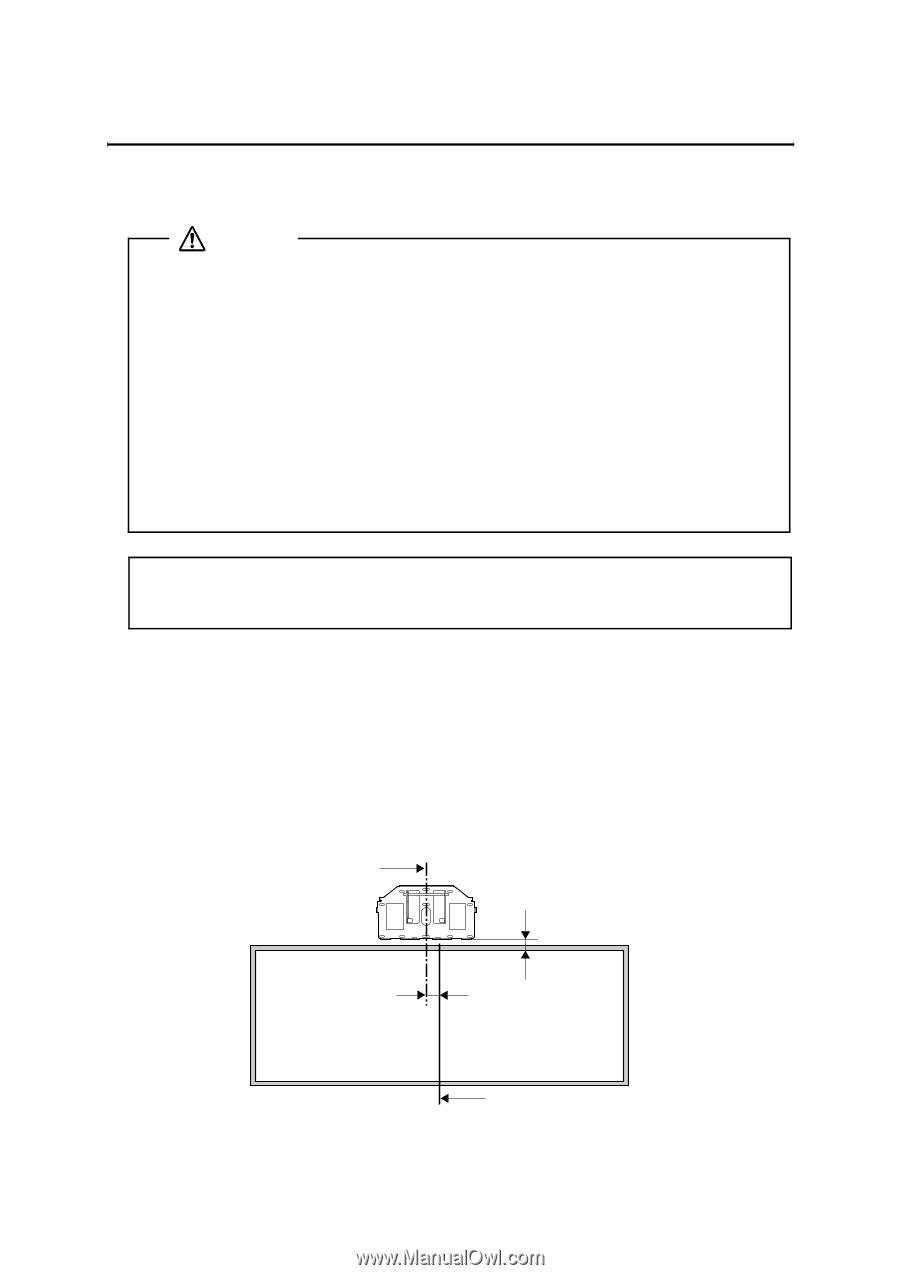
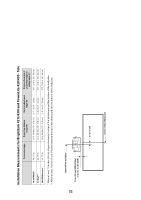
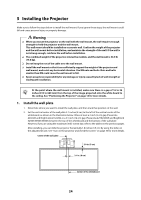
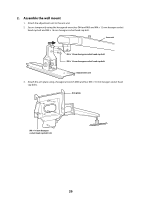
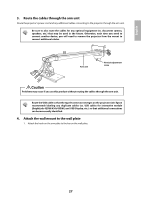
5 Installing the Projector Make sure to follow the steps below to install the wall mount. If you ignore these steps, the wall mount could fall and cause personal injury or property damage. Warning ❏ When you mount the projector on the wall with the wall mount, the wall requires enough strength to hold the projector and the wall mount. This wall mount should be installed on a concrete wall. Confirm the weight of the projector and the wall mount before installation, and maintain the strength of the wall. If the wall is not strong enough, reinforce the wall before installation. ❏ The combined weight of the projector, interactive module, and the wall mount is 34.9 lb (15.8 kg). ❏ Do not hang the rest of the cable over the wall mount. ❏ Install the wall mount so that it can sufficiently support the weight of the projector and wall mount, and resist any horizontal vibration. Use M8 nuts and bolts. Nuts and bolts smaller than M8 could cause the wall mount to fall. ❏ Epson accepts no responsibility for any damage or injury caused by lack of wall strength or inadequate installation. q At the point where the wall mount is installed, make sure there is a gap of 16 to 26 inches (410 to 660 mm) from the top of the image projected onto the white board to the ceiling. See "Positioning the Projector" on page 14 for more details. 1. Install the wall plate 1. Determine where you want to install the wall plate, and then mark that position on the wall. 2. Set the vertical center of the wall plate 3.1 inches (8 cm) to the left of the vertical center of the whiteboard, as shown in the illustration below. Allow at least a 2 inch (5 cm) gap (PowerLite 420/430 and BrightLink 421i/430i) or a 5.5 inch (14 cm) gap (PowerLite 425W/435W and BrightLink 425Wi/435Wi/436Wi) between the top of the whiteboard and the bottom of the wall plate. However, if you are using the maximum (tele) screen size, refer to the tables on the previous pages. After installing, you can slide the projector horizontally 1.8 inches (4.5 cm) by using the slider on the adjustment unit. See "Turn on the projector and check the screen" on page 33 for more details. Center of the wall plate 2.0 in. (5 cm) 3.1 in. (8 cm) Center of the whiteboard 24
-
 1
1 -
2
-
3
-
4
-
5
-
6
-
7
-
8
-
9
-
10
-
11
-
12
-
13
-
14
-
15
-
16
-
17
-
18
-
 19
19 -
 20
20 -
 21
21 -
 22
22 -
 23
23 -
 24
24 -
 25
25 -
 26
26 -
 27
27 -
 28
28 -
 29
29 -
30
-
31
-
32
-
33
-
34
-
35
-
36
-
37
-
38
-
39
-
40
-
41
-
42
-
43
-
44
-
45
-
46
-
47
-
48
-
49
-
50
-
51
-
52
-
53
-
54
-
55
-
56
-
57
-
58
-
59
-
60
-
61
-
62
-
63
-
64
-
65
-
66
-
67
-
68
-
69
-
70
-
71
-
72
 |
 |