Epson BrightLink 436Wi Installation Guide - Page 35
Attach the wall plate cover, User's Guide
 |
View all Epson BrightLink 436Wi manuals
Add to My Manuals
Save this manual to your list of manuals |
Page 35 highlights
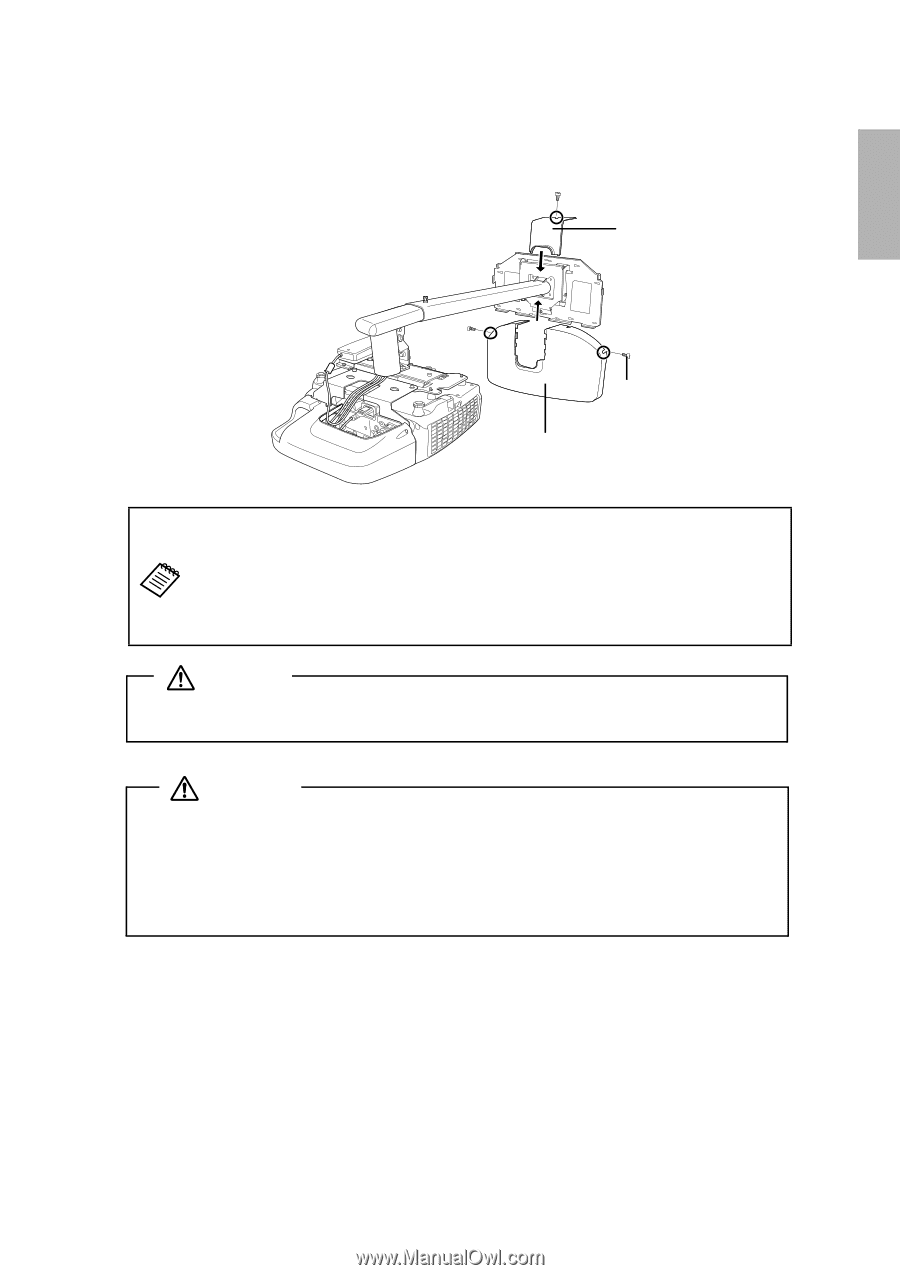
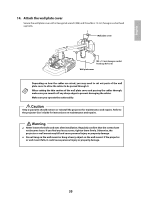
English 14. Attach the wall plate cover Secure the wall plate cover with a hexagonal wrench (M4) and three M4 × 12 mm hexagon socket head cap bolts. Wall plate cover M4 × 12 mm hexagon socket head cap bolt (×3) Wall plate cover Depending on how the cables are wired, you may need to cut out parts of the wall plate cover to allow the cables to be passed through it. When cutting the thin section of the wall plate cover and passing the cables through, make sure you smooth off any sharp edges to prevent damaging the cables. Make sure you operate the cutter safely. Caution Only a specialist should remove or reinstall the projector for maintenance and repairs. Refer to the projector User's Guide for instructions on maintenance and repairs. Warning ❏ Never loosen the bolts and nuts after installation. Regularly confirm that the screws have not become loose. If you find any loose screws, tighten them firmly. Otherwise, the projector or wall mount may fall and cause personal injury or property damage. ❏ Do not hang on the wall mount or hang a heavy object on the wall mount. If the projector or wall mount falls, it could cause personal injury or property damage. 35
-
 1
1 -
2
-
3
-
4
-
5
-
6
-
7
-
8
-
9
-
10
-
11
-
12
-
13
-
14
-
15
-
16
-
17
-
18
-
19
-
20
-
21
-
22
-
23
-
24
-
25
-
26
-
27
-
28
-
29
-
 30
30 -
 31
31 -
 32
32 -
 33
33 -
 34
34 -
 35
35 -
 36
36 -
 37
37 -
 38
38 -
 39
39 -
 40
40 -
41
-
42
-
43
-
44
-
45
-
46
-
47
-
48
-
49
-
50
-
51
-
52
-
53
-
54
-
55
-
56
-
57
-
58
-
59
-
60
-
61
-
62
-
63
-
64
-
65
-
66
-
67
-
68
-
69
-
70
-
71
-
72
 |
 |