Epson CX6400 Quick Reference Guide - Page 27
Selecting Photos from the Control Panel, screen to select
 |
UPC - 013438468694
View all Epson CX6400 manuals
Add to My Manuals
Save this manual to your list of manuals |
Page 27 highlights
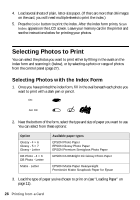
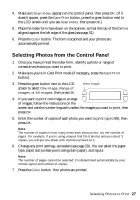
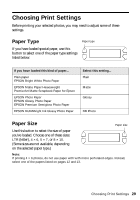
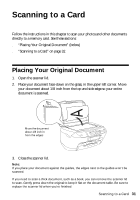
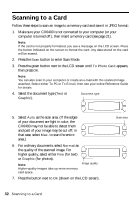
4. Make sure Scan Index appears on the control panel, then press OK. (If it doesn't appear, press the Card Print button, press the green button next to the LCD screen until you see Scan Index, then press OK.) 5. Place the index form face-down on the scanner, so that the top of the form is aligned against the left edge of the glass (see page 31). 6. Press the Color button. The form is scanned and your photos are automatically printed. Selecting Photos from the Control Panel 1. Once you have printed the index form, identify a photo or range of consecutive photos you want to print. 2. Make sure you're in Card Print mode (if necessary, press the Card Print button). 3. Press the green button next to the LCD screen to select One image, Range of images, or All images, then press OK. Select images 4. If you want to print one image or a range of images, follow the instructions on the screen and use the number keypad to select the images you want to print, then press OK. 5. Enter the number of copies of each photo you want to print (up to 99), then press OK. Note: The number of copies is how many times each photo prints, not the number of pages. For example, if you're using a layout that fits 8 photos and you select 3 copies, you will get one sheet with 3 photos printed on it. 6. Change any print settings, as needed (see page 29). You can select the paper type, paper size (unless you're using plain paper), and layout. Note: The number of pages cannot be selected; it is determined automatically by your chosen layout and number of copies. 7. Press the Color button. Your photos are printed. Selecting Photos to Print 27
-
 1
1 -
2
-
3
-
4
-
5
-
6
-
7
-
8
-
9
-
10
-
11
-
12
-
13
-
14
-
15
-
16
-
17
-
18
-
19
-
20
-
21
-
 22
22 -
 23
23 -
 24
24 -
 25
25 -
 26
26 -
 27
27 -
 28
28 -
 29
29 -
 30
30 -
 31
31 -
 32
32 -
33
-
34
-
35
-
36
-
37
-
38
-
39
-
40
-
41
-
42
-
43
-
44
-
45
-
46
-
47
-
48
-
49
-
50
-
51
-
52
 |
 |