Epson PictureMate Pal - PM 200 Basics - Page 23
Borderless, Auto Correction, Sepia, Black & White, Digital Camera Correction, Enhance Fine Details
 |
View all Epson PictureMate Pal - PM 200 manuals
Add to My Manuals
Save this manual to your list of manuals |
Page 23 highlights
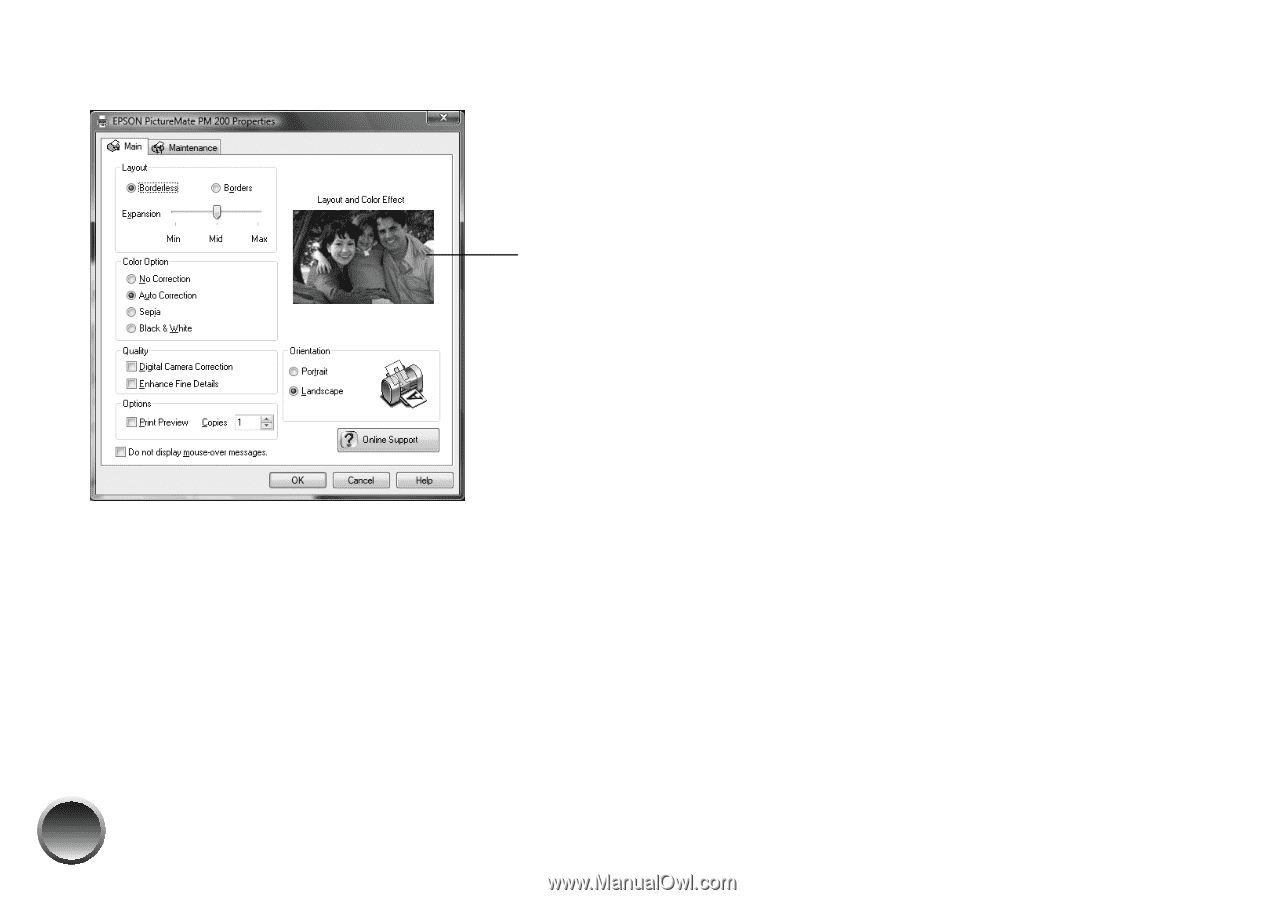
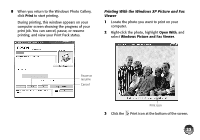
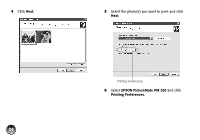
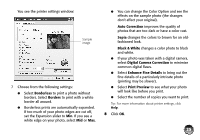
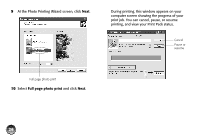
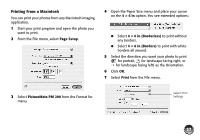
You see the printer settings window: Sample photo 6 Choose from the following settings: ● Select Borderless to print a photo without borders. Select Borders to print with a white border all around. ● Borderless prints are automatically expanded. If too much of your photo edges are cut off, set the Expansion slider to Min. If you see a white edge on your photo, select Mid or Max. 22 ● You can change the Color Option and see the effects on the sample photo (the changes don't affect your original). Auto Correction improves the quality of photos that are too dark or have a color cast. Sepia changes the colors to brown for an oldfashioned look. Black & White changes color photos to black and white. ● If your photo was taken with a digital camera, select Digital Camera Correction to minimize common digital flaws. ● Select Enhance Fine Details to bring out the fine details of a particularly intricate photo (printing may be slower). ● Select Print Preview to see what your photo will look like before you print. ● Select the number of copies you want to print. Tip: For more information about printer settings, click Help. 7 Click OK.
-
 1
1 -
2
-
3
-
4
-
5
-
6
-
7
-
8
-
9
-
10
-
11
-
12
-
13
-
14
-
15
-
16
-
17
-
 18
18 -
 19
19 -
 20
20 -
 21
21 -
 22
22 -
 23
23 -
 24
24 -
 25
25 -
 26
26 -
 27
27 -
 28
28 -
29
-
30
-
31
-
32
-
33
-
34
-
35
-
36
-
37
-
38
-
39
-
40
-
41
-
42
-
43
-
44
-
45
-
46
-
47
-
48
-
49
-
50
-
51
-
52
-
53
-
54
-
55
-
56
-
57
-
58
-
59
-
60
-
61
-
62
-
63
-
64
-
65
-
66
-
67
-
68
-
69
-
70
 |
 |